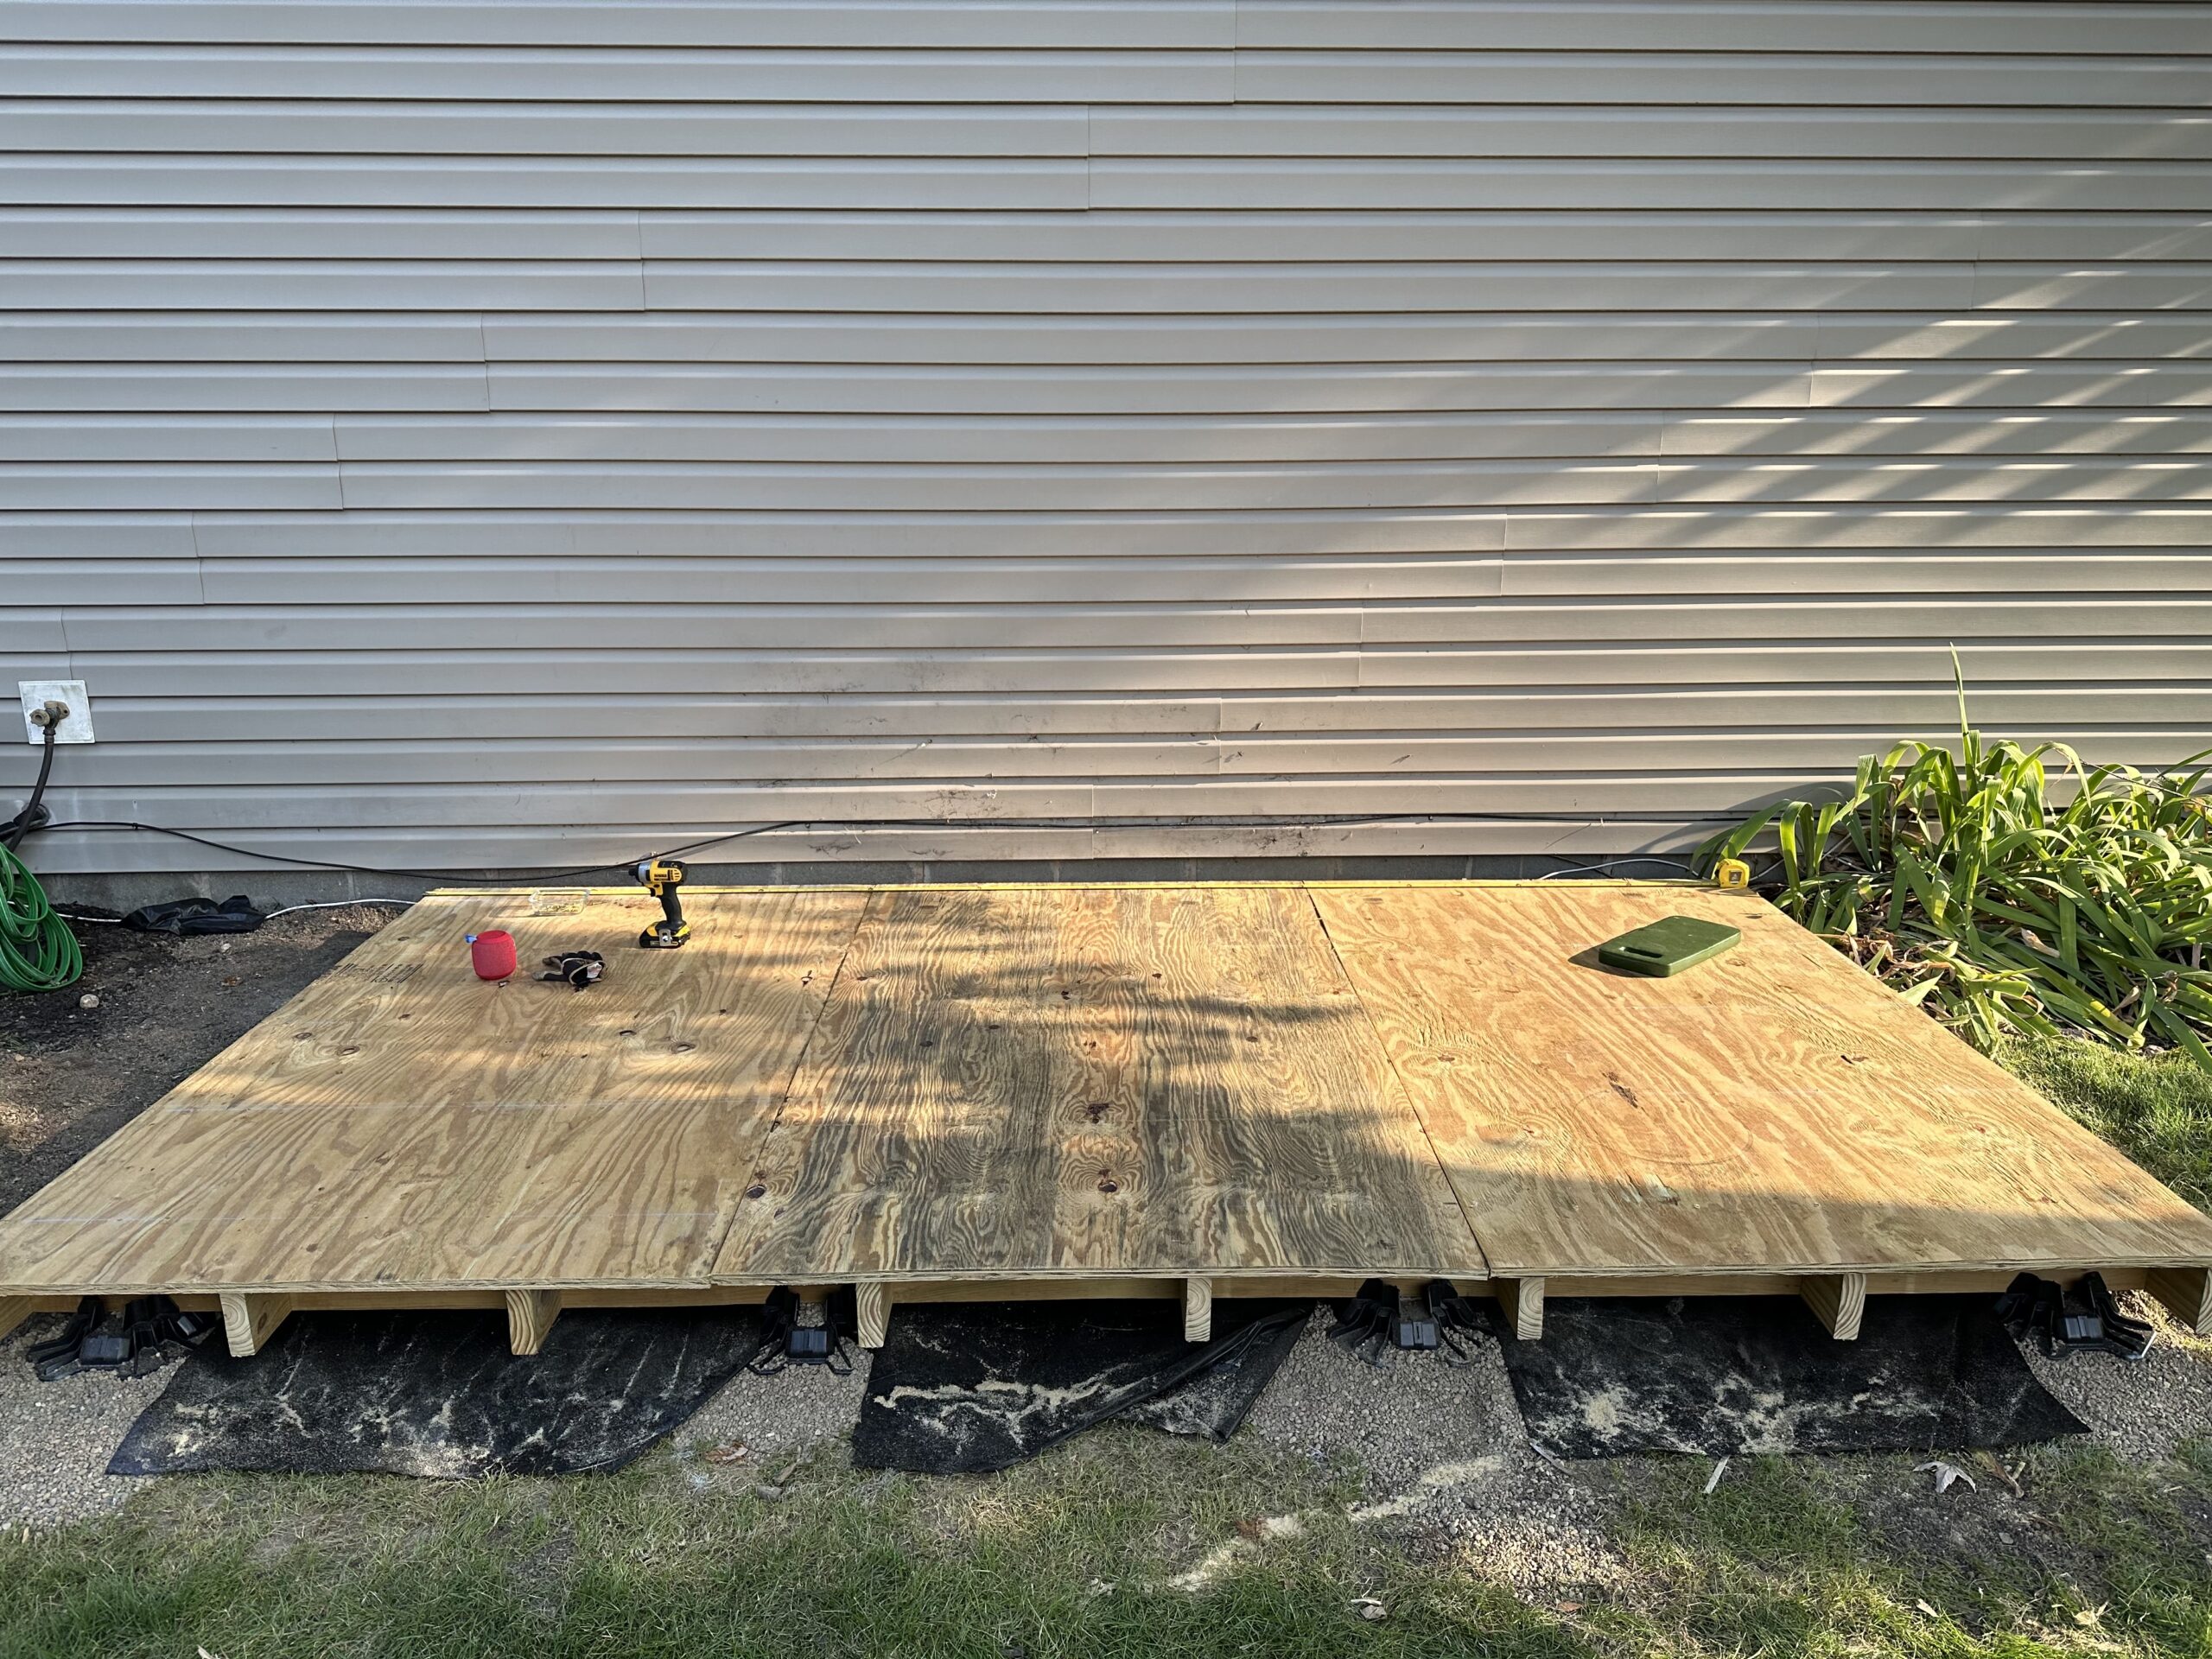
The Foundation at the end of Day 2
Building a Shed Foundation Using TuffBlocks
In our last post, Designing the Build, I talked about the process of designing the build for the shed and about landing on the idea of building the shed foundation using TuffBlocks. Looking back, I now realize that by choosing TuffBlocks, I had selected a foundation system that would be easy for me to accomplish with very little help. I’m a fan!
In this post, I’ll take you through the two days I spent building the shed foundation, starting with preparing the site, leveling and squaring the foundation, installing the inner rows of TuffBlocks and joists, and finally decking it with pressure treated plywood.
Here is the plan on paper:
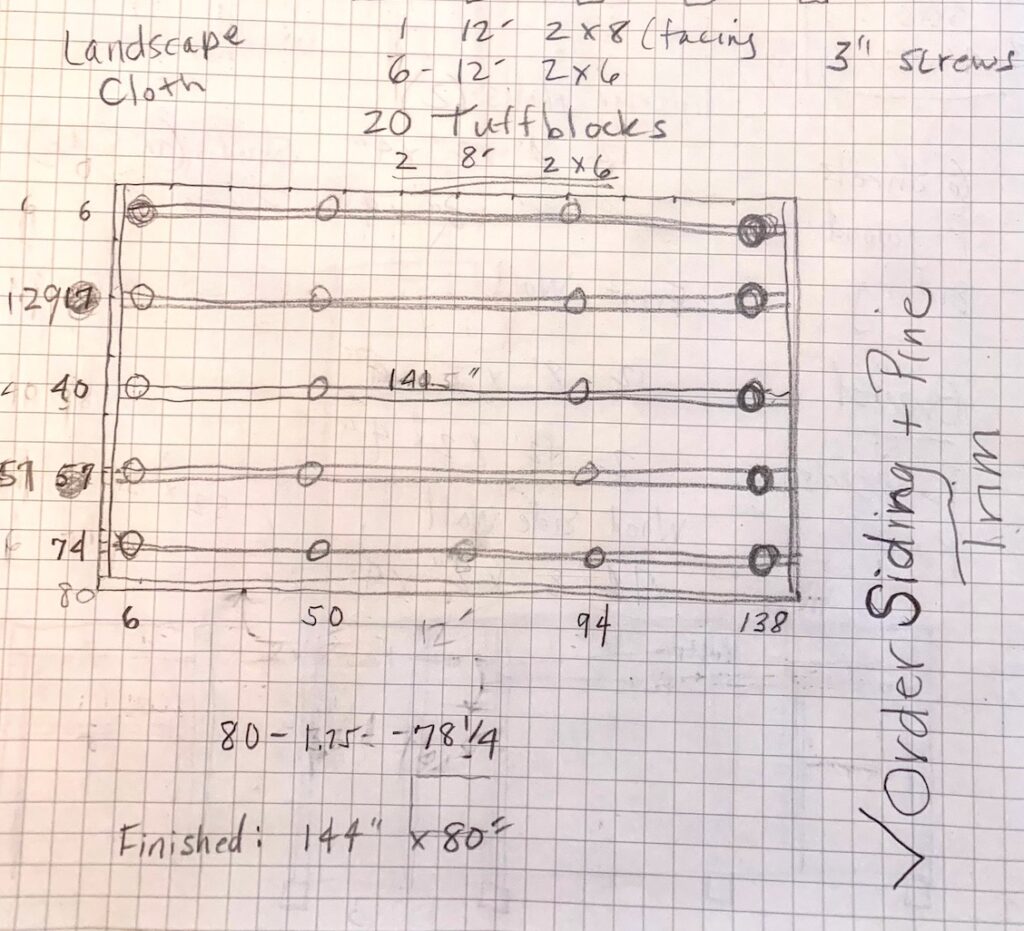
Building the Foundation & Floor System
Table of Contents
Rich Learns how to use His New Miter Saw
Squaring & Leveling the Perimeter
Building out the Front Edge & Installing the Floor Deck
The Tools we Used
When building a collection of cordless tools, I am a big fan of sticking with a brand that uses the same battery across tools so you can interchange batteries as needed and charge them using the same chargers. DeWalt makes an excellent line of products, and that is what I encouraged Rich to buy. This is a list of the tools we bought and used. Full transparency: if you buy anything through these links, I will receive compensation.
Site Prep for a Shed using TuffBlocks
The elevation at the back of the foundation was 5-6″ higher than the front, and there was a slight hump between the back and the middle before the ground sloped down to the front. I needed to remove the hump first, and then get a handle on how to even things out from there.
I started with a shovel and a garden rake and made very little progress. It was hot and I was tiring fast.
After a bit of rather unproductive work, Rich’s neighbor, Bob, came out to water the amazing container-vegetable jungle on his back deck. Of course I stopped to talk because Bob is a generally interesting person and it was hot and I needed a break.
We talked about his plants and my progress (which was negligible at this point) and I asked him if by any chance he had a grub hoe. He didn’t know what that was, so I described it. “I have a pick axe,” he said, “and you’re welcome to borrow it.”
Excellent. It was a grub hoe. Or maybe a mattock. At any rate, it was exactly what I needed. Thanks, Bob!
I used the mattock to move all the dirt that needed to be moved and then got busy leveling the back joist side to side. then I figured out the elevation situation for the rest of the foundation.
Leveling back to front was a process of laying a joist from back to front, putting a level on it, then continuing to take soil off the back and middle until it was even with the front. There was a fair amount of dirt that needed to be scraped off the back two rows and distributed toward the front, and the mattock/grub hoe made easy work of it. Keep in mind that I didn’t have level the whole site, just the places where the TuffBlocks would sit. Finally, I needed to remove enough dirt under each joist so that nowhere was a floor joist in contact with the ground.
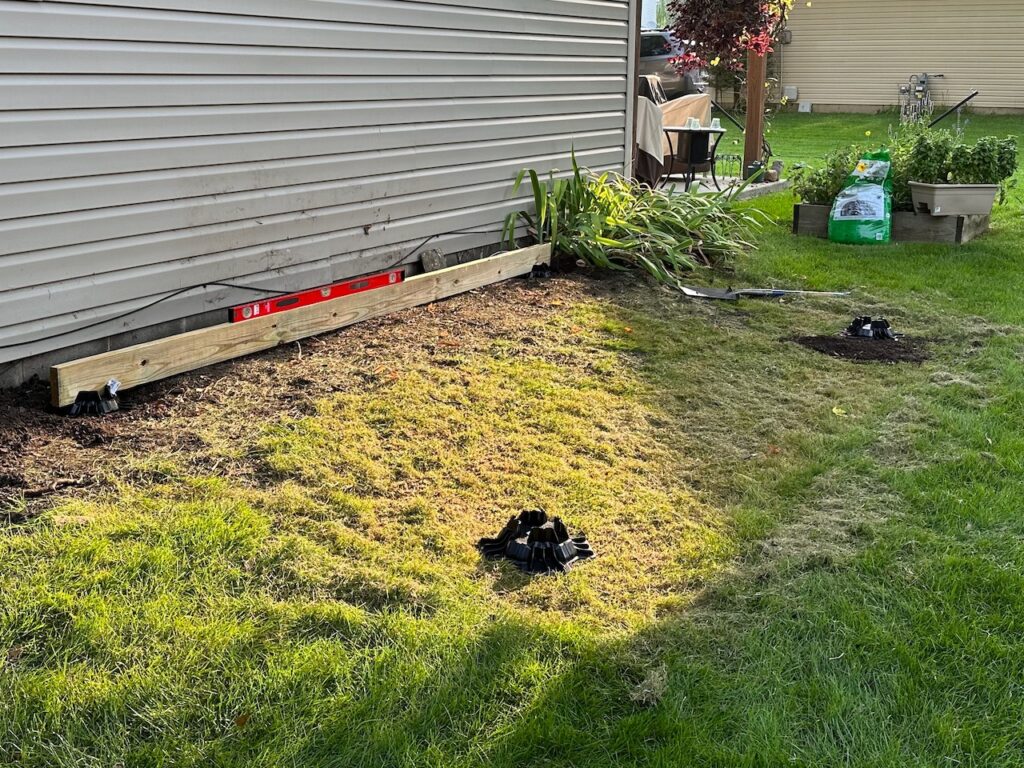
Site preparation for TuffBlocks foundation
Video: Foundation Site Prep at the Beginning of Day 1
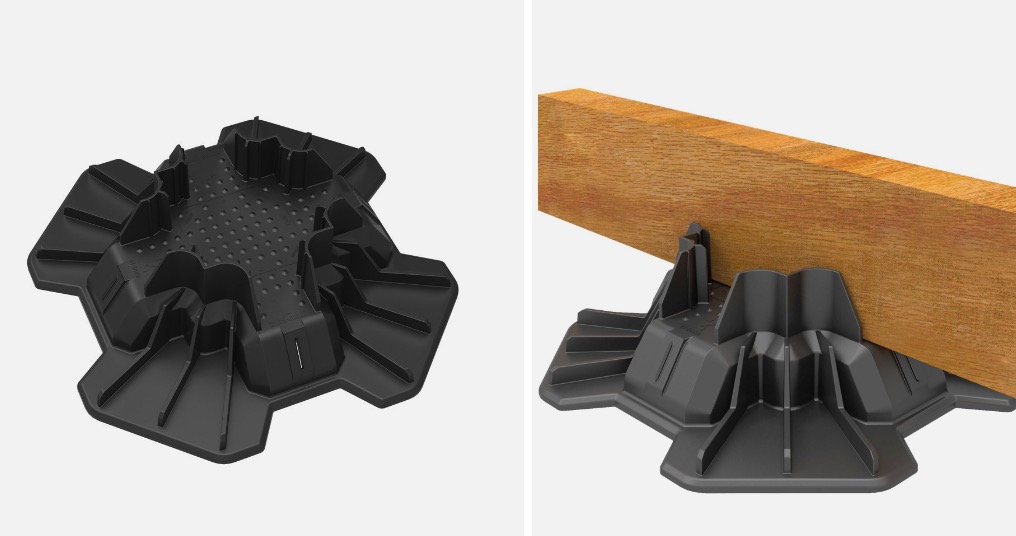
TuffBlocks by BuildTuff
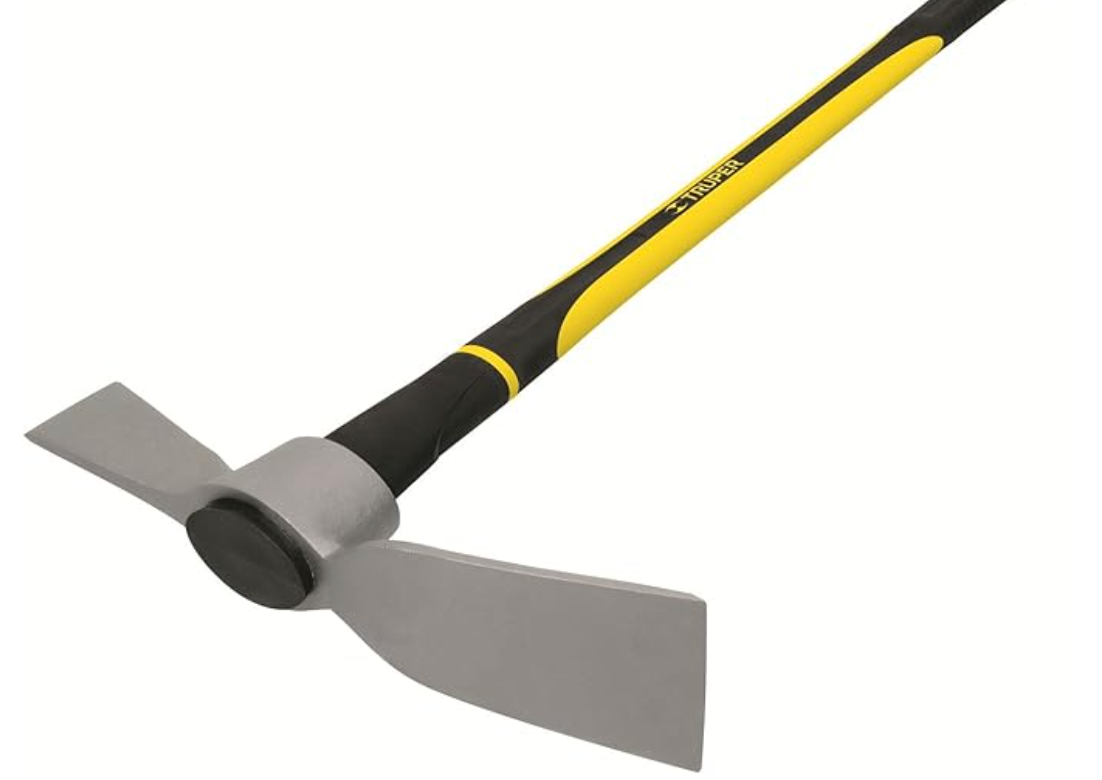
A mattock similar to the one I borrowed from Bob
Rich Learns how to Use his New Miter Saw
My brother, Rich badly wanted to do this project, but he was nervous about all of it as we got started. He had never built anything to speak of, and didn’t own many power tools.
If you asked him now, he’d tell you he has the coolest tool collection in Indiana. If you asked him that first day when we were loading a compound miter saw onto his cart at Lowes, he would tell you he was nervous.
All that was about to change.
I was tickled when he got finished with work for the day and came down to help. As an educator, I love watching people learn, and this was to be the beginning of his learning how to be a power-tool-using-kinda-guy.
“Here,” I said, “I’ll show you how I’m measuring the floor joists and marking them to cut with the saw. Easy. I had him hold the end of the board while I clamped it and cut it, showing him how to release the lock with my thumb, start the saw with the rest of my fingers, then push the whole thing down through the 2 x 6.
Because I believe the best way to learn how to do anything is to do it, I suggested he measure and mark the next board, and he did. Easy. I showed him how to position the board and clamp it in place. As he got ready to assume his position at the other end of the board, I said, “Why don’t you cut this one?”
His eyes widened ever so slightly. “Really?” He looked at me a little sheepishly. I knew he wasn’t sure he was ready. “Sure,” I said. And again, I walked him through how to pull the trigger, where to keep his left hand so he didn’t cut it off, and how to move the saw. “OK…”
And he did it. I’ve never seen anyone cut a board so carefully or so slowly, but hey, first cuts are a big deal! Pretty soon he was measuring and cutting on his own, and proud to own a compound miter saw having made his first chop cuts.
We were on our way!

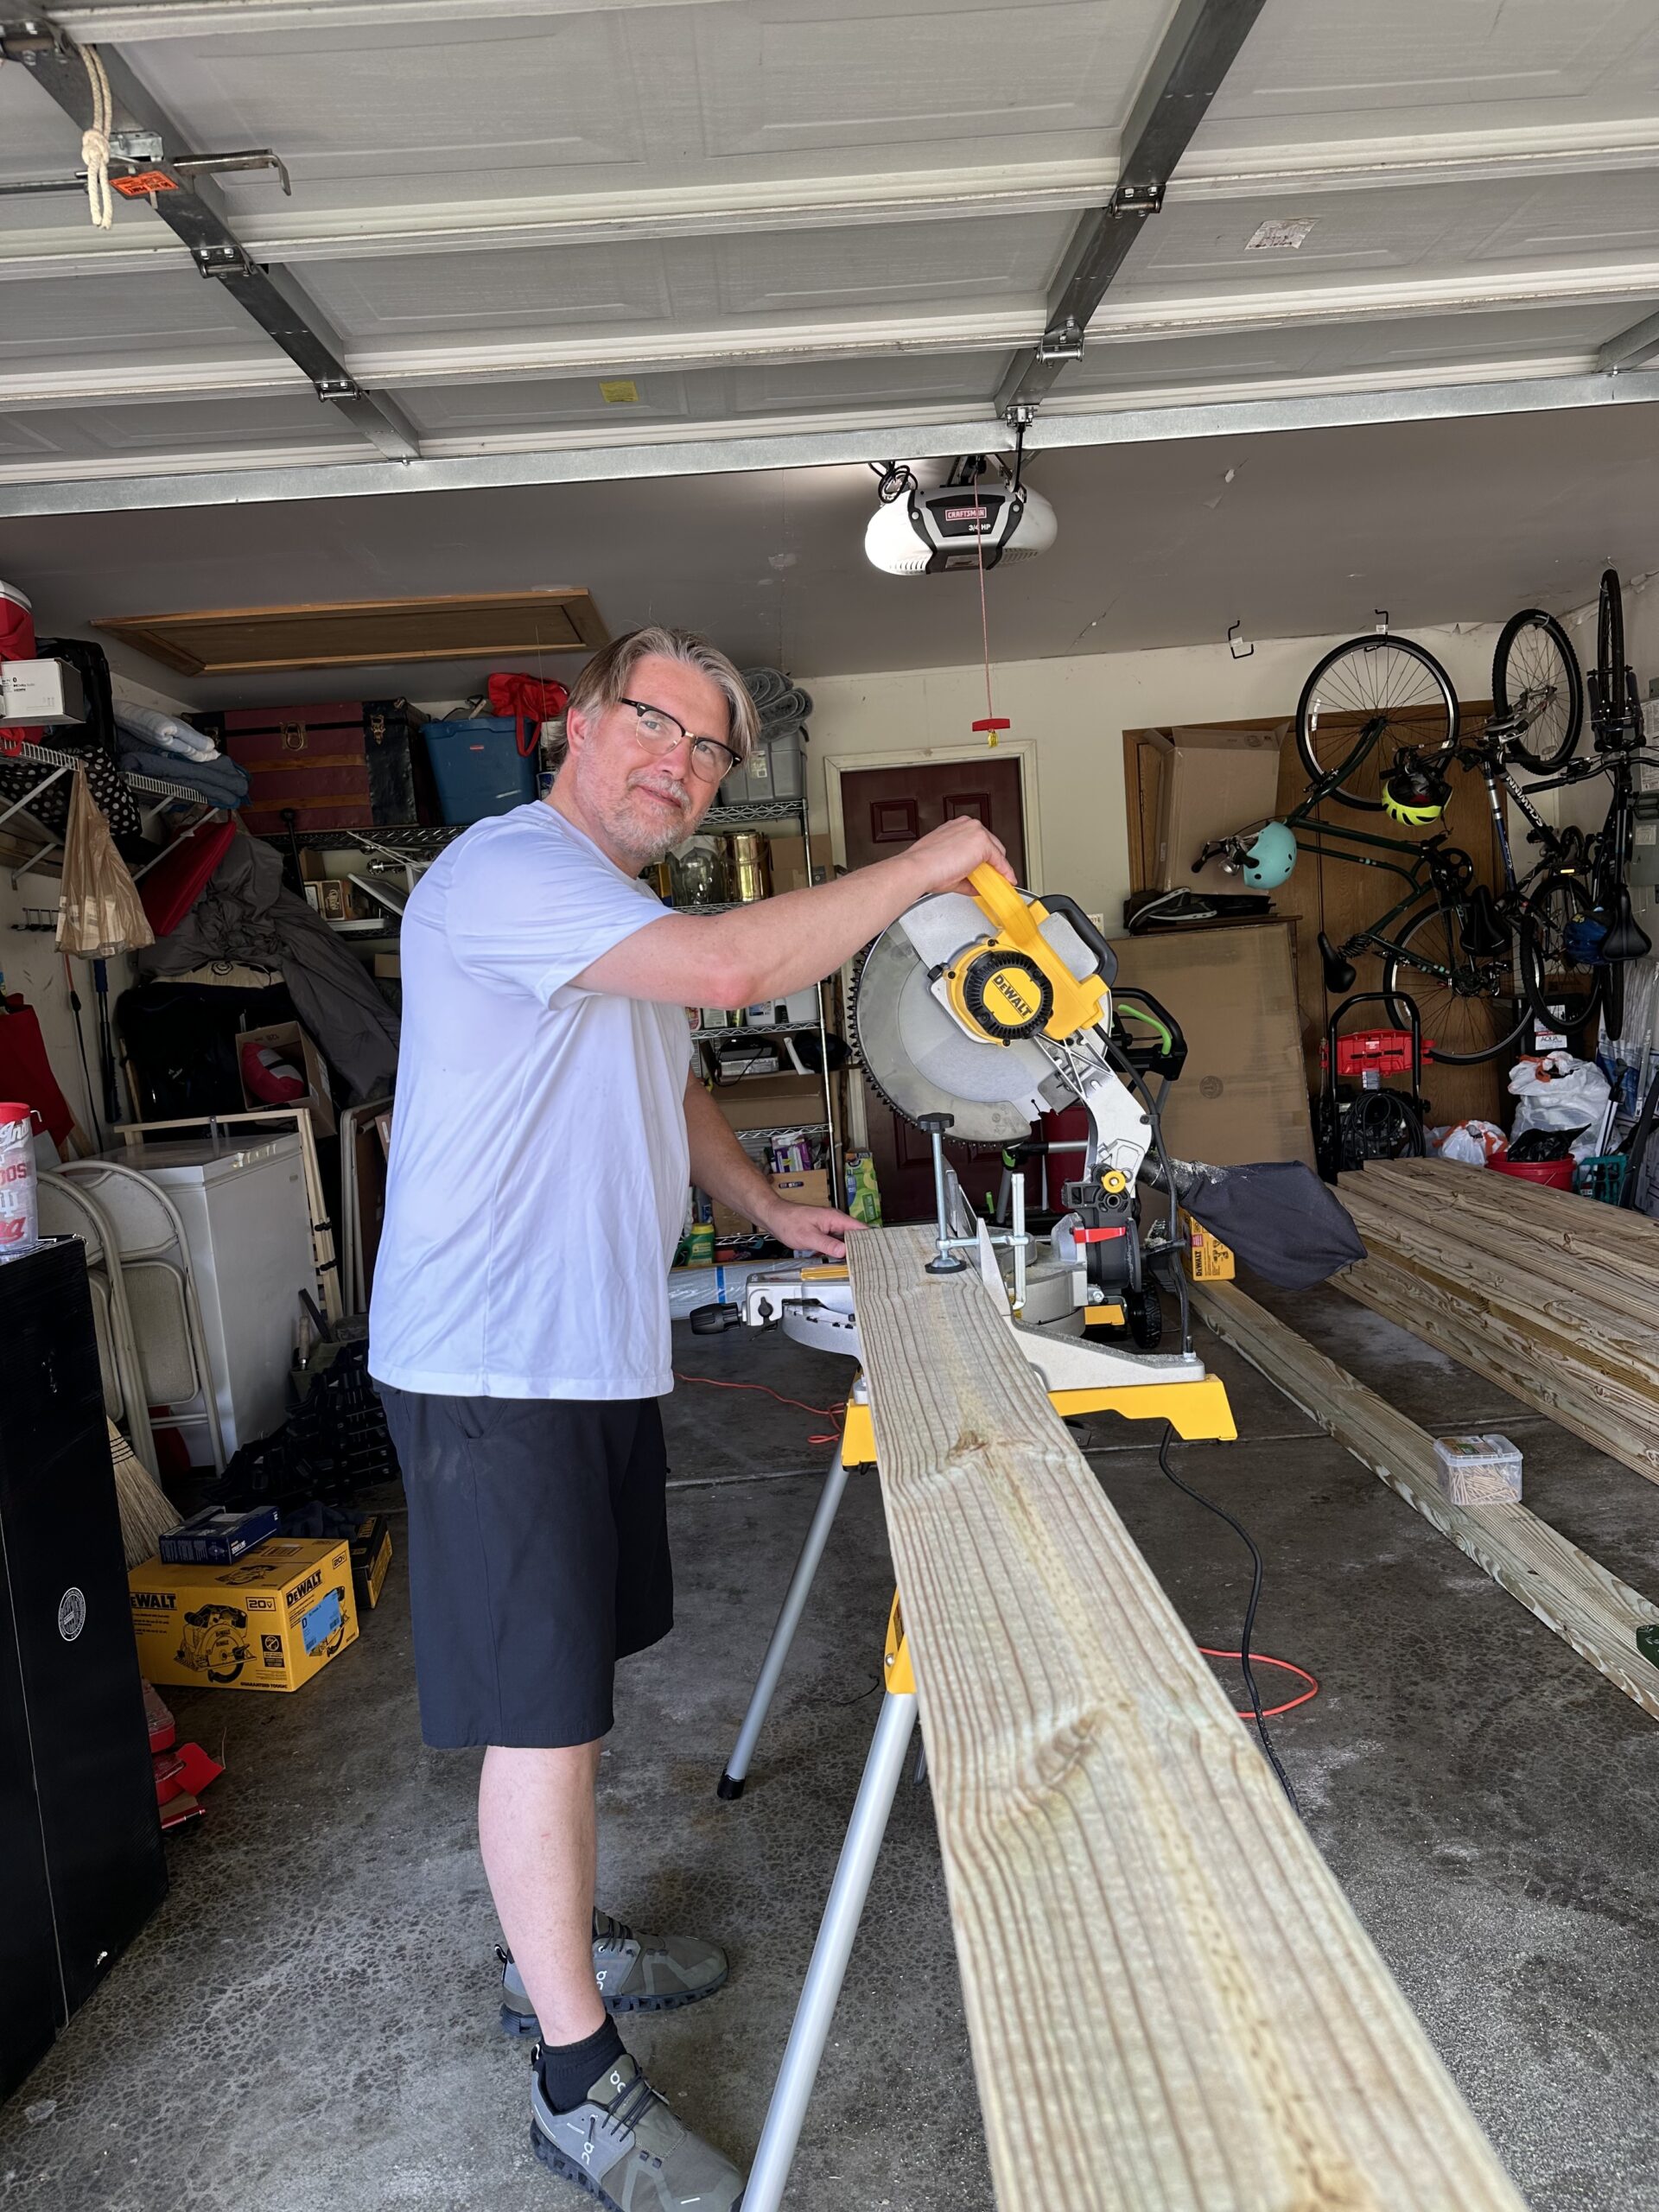
Rich making his first cut
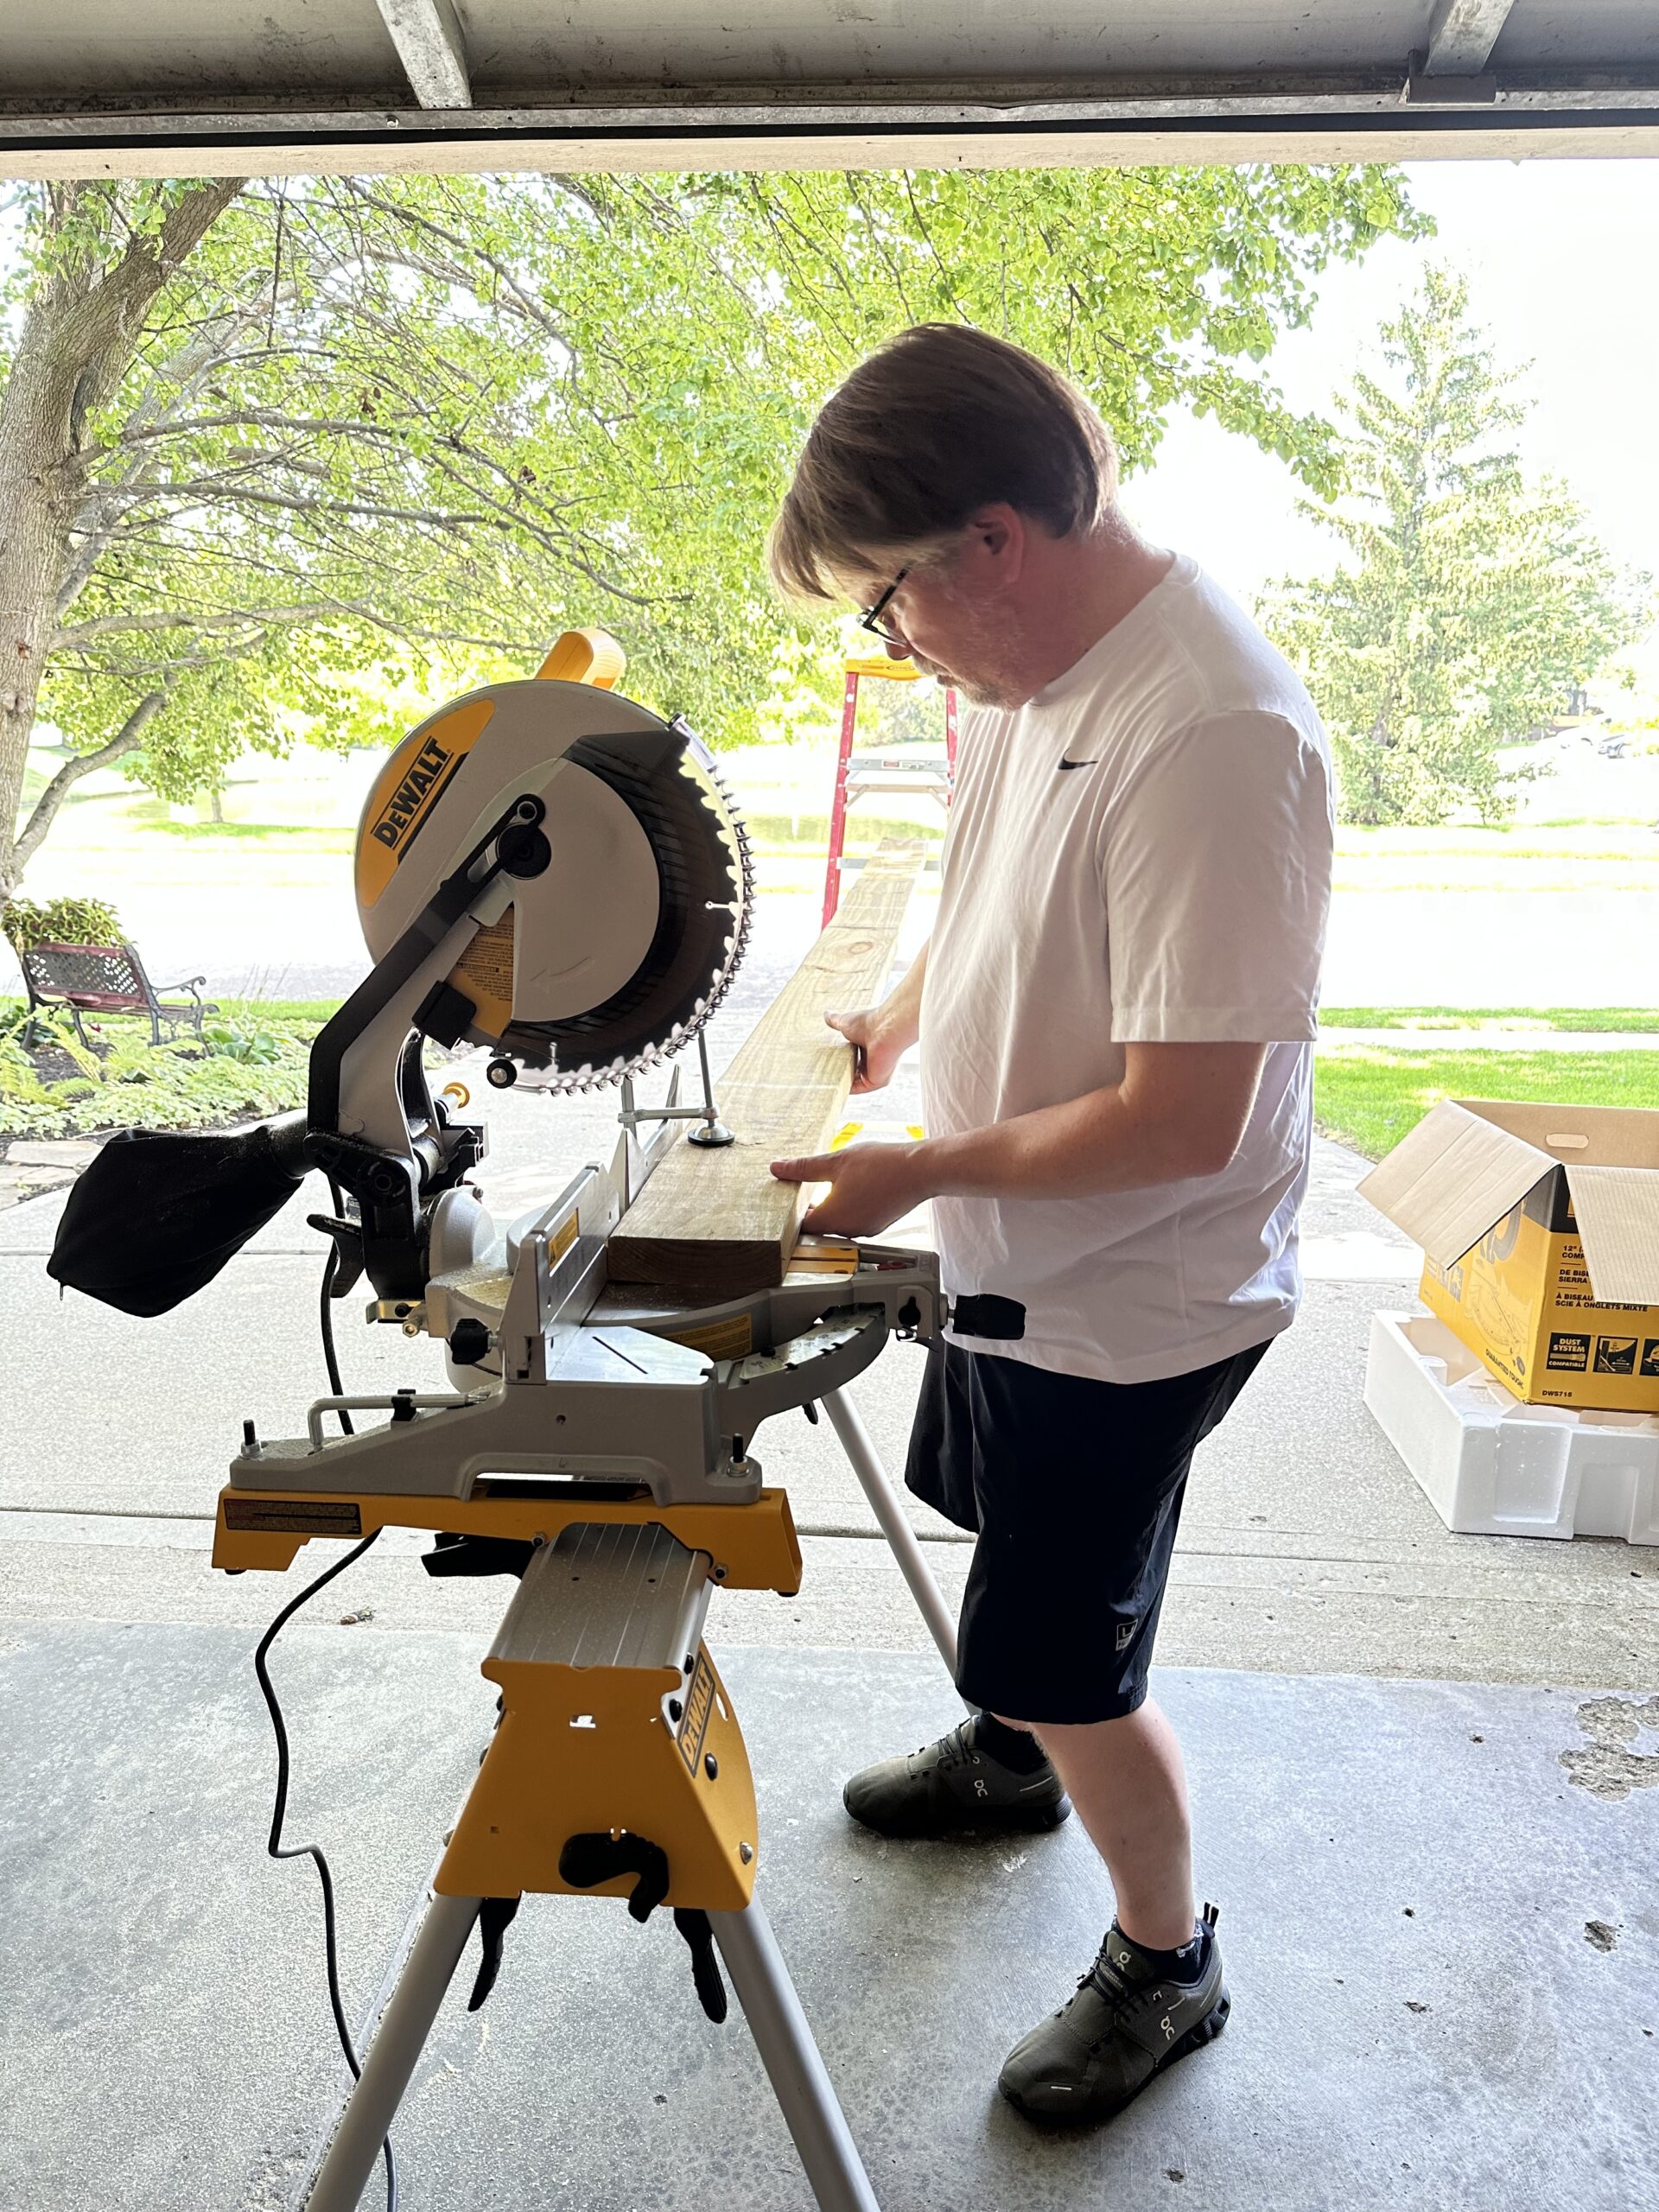
Fast Learner!
Building the Shed Foundation:
Squaring the Frame
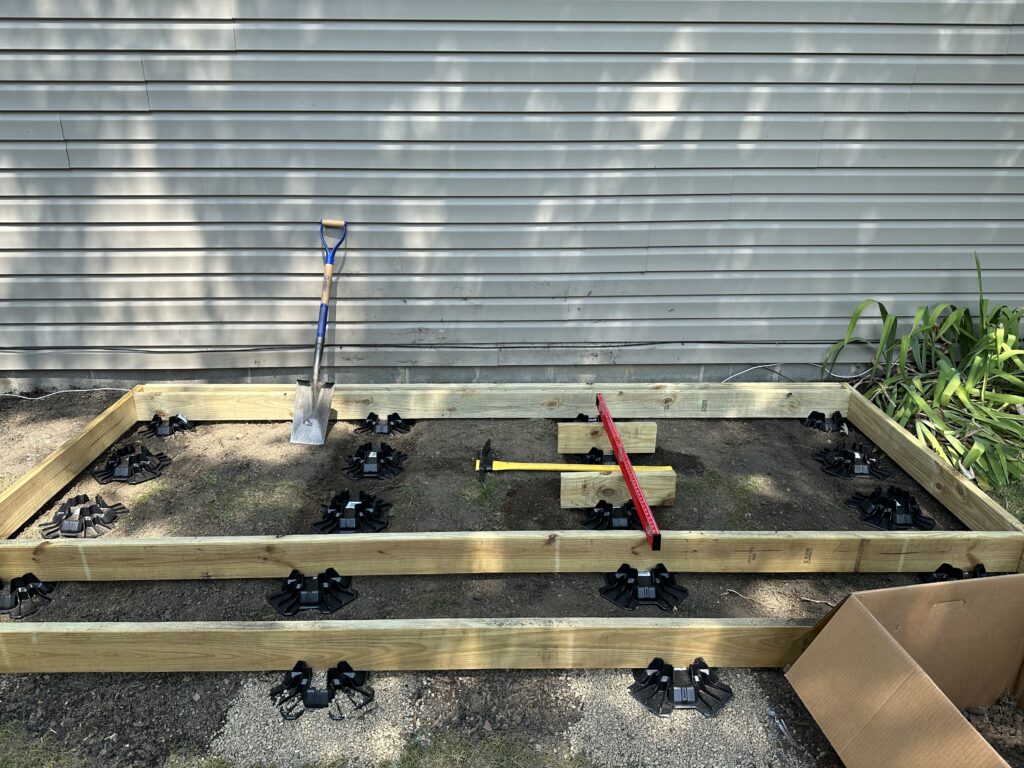
Once we had the front level, the back level, and the sides level front to back, it was time to screw the front and back joists to the side pieces.
First, though, we marked on both side boards where the three inner joists would be attached. Then we screwed the whole thing together using just two 3″ screws at each corner so we could begin squaring it up.
Squaring it was accomplished by measuring diagonally from corner to corner until the measurements exactly matched. (And we put a framing square on each corner just to check our work, which was damn near perfect!)
We went back then and finished screwing it all together.
That was as far as we got on Day 1. A good day’s work for beginners, yes?
Video: Foundation at the End of Day 1
About TuffBlocks
TuffBlocks™ are an instant foundation system by BuildTuff.com. Each TuffBlock is engineered to hold 1,700 lbs., weighs only 1 ½ lbs., and has been break-tested to 11,000 lbs.
My foundation plan called for using 20 TuffBlocks, enough to hold 34,000 lbs. That’s 17 tons. 3 African elephants. 20 Ford Expeditions.
Anyway, these things turned out to be incredibly easy to work with. They are lightweight and easy to move around as I was preparing the site. I can only imagine the state of my back had I done this with concrete deck blocks! So glad I chose TuffBlocks for the foundation!
Shed Foundation Day 2
3 More Rows of TuffBlocks & a Vapor Barrier
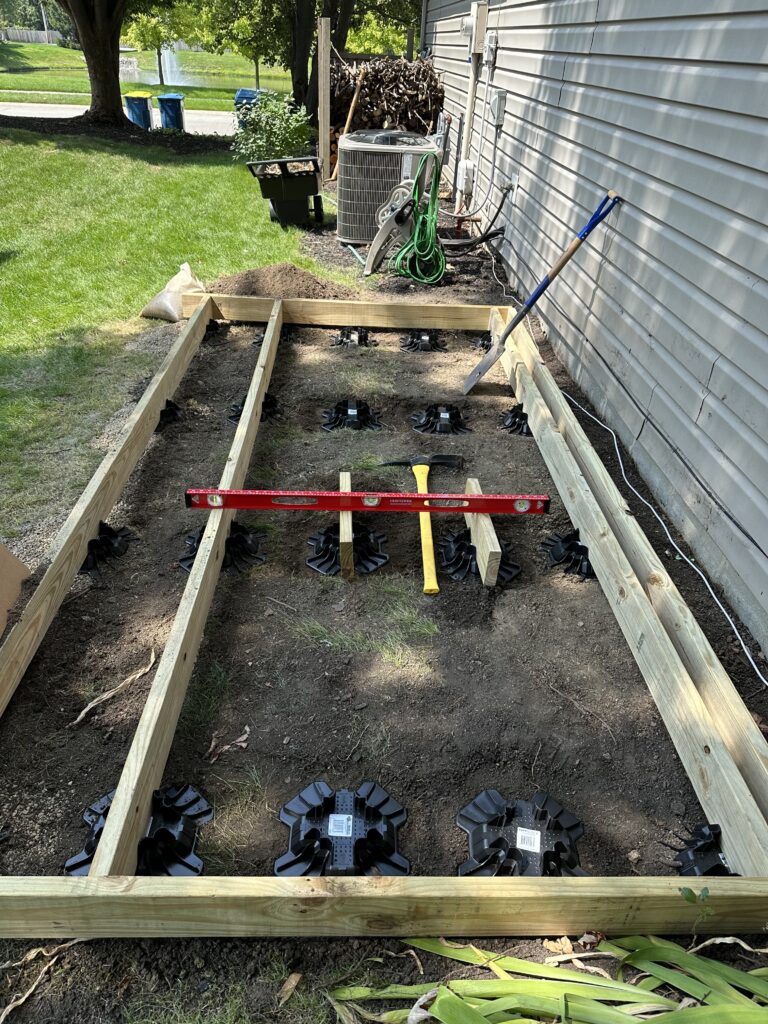
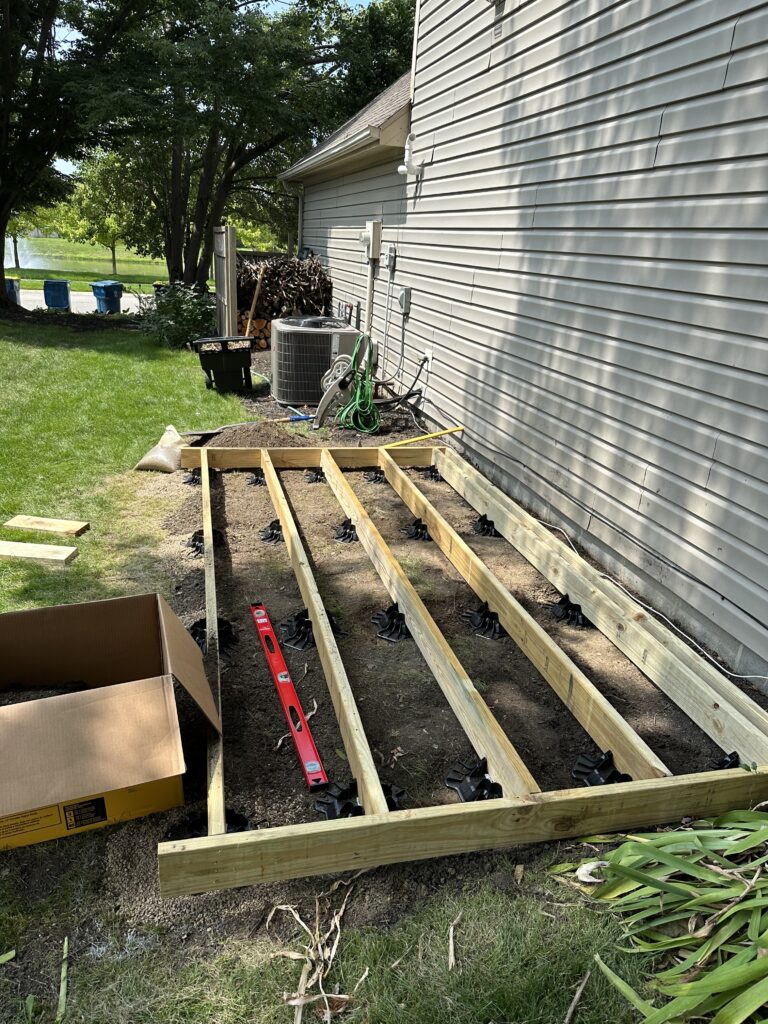
Day 2 involved installing 3 more rows of TuffBlocks inside the frame we built the day before. This required a little more grub-hoeing to get the elevations right.
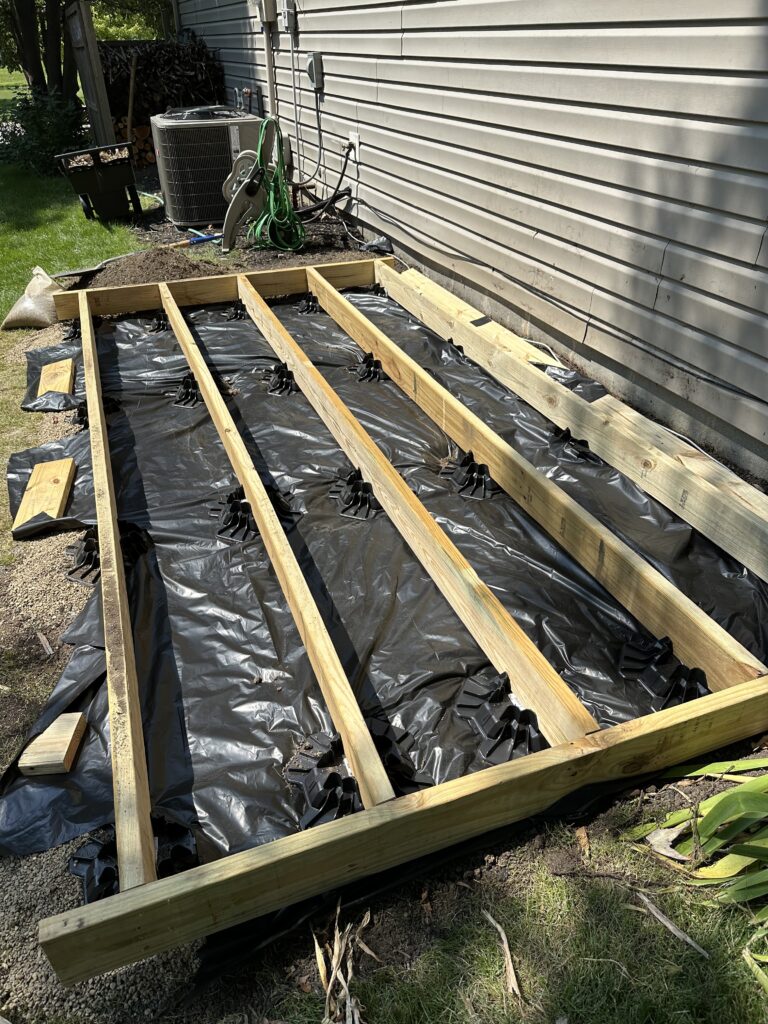
Once all of the TuffBlocks were properly seated so everything was level, I removed all the joists and TuffBlocks from the interior of the foundation and laid down a vapor barrier, cutting it to fit around the front and back rows of the TuffBlocks. Now, think about moving 12 concrete deck blocks and three 12′ 2 x 6s by yourself and appreciate how comparatively easy that was for me!
After the vapor barrier was in place, I replaced the inner 3 rows of TuffBlocks, put the floor joists back in place against the guidelines we drew the day before, and screwed them into place with four 3″ screws at each end.
Building out the Front Edge & Installing the Floor Deck
My plan called for a slight cantilever on the front where I would attach a 2 x 8 skirt to hide the underside of the shed and keep the front row of TuffBlocks from sticking out in front of the front wall. So next, I attached the braces across the front that I would use to screw in the 2 x 8.
I’ll tell you that while I thought this was a great plan at the time, I woke up at 3 in the morning the day I was to build the front wall, worried that this edge might (no, probably would) settle and wreak havoc on the shed’s structural integrity. Now, I’m an excellent sleeper, and very serious about my sleep. So when something wakes me up at night, I generally take it seriously.
As you will see in coming posts, I did what any good pioneer builder would do…I wedged a row of bricks under that 2 x 8 so as the structure settled, it would settle onto the bricks. Disaster averted.
Once the braces were in place, we positioned the 3/4″ pressure-treated plywood flooring and screwed it in place with four screws at the corners of each sheet. We snapped a line a few inches in front of the braces and removed the excess plywood using a circular saw. (I was too tired to trust myself making the final cut on the front edge of the flooring, so decided to save it for the morning.)

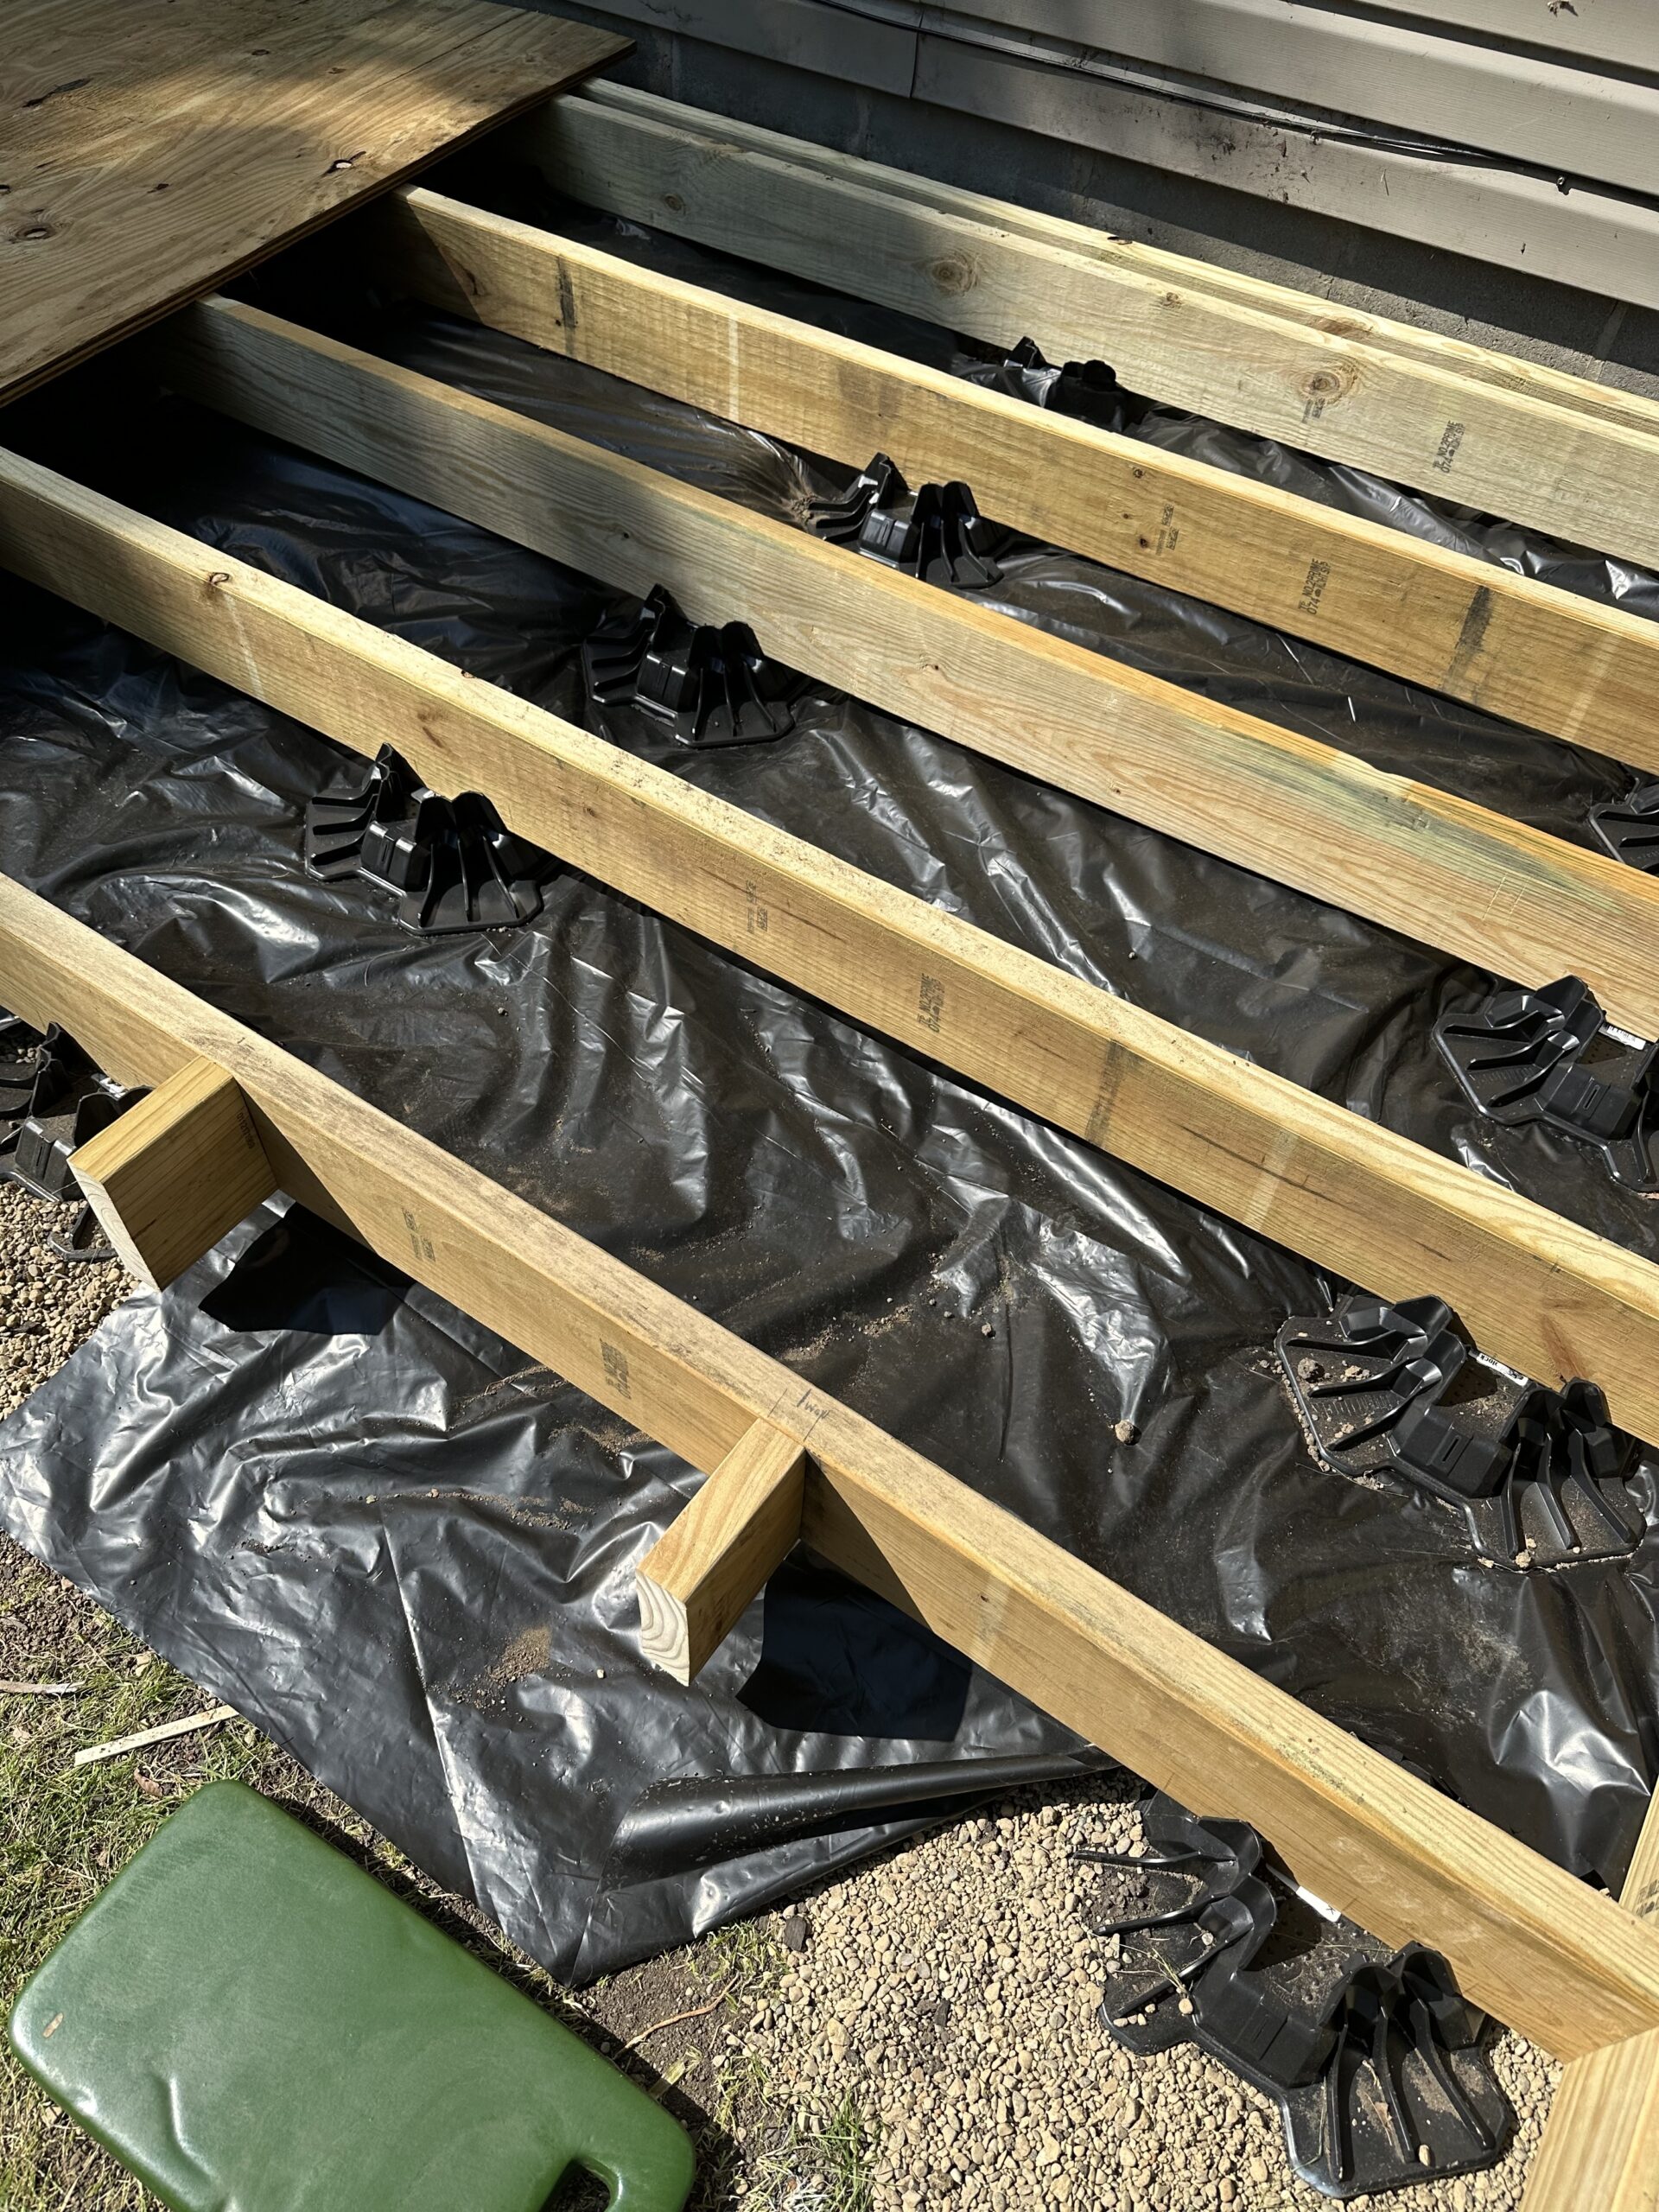
Bracing for 2 x 8 skirt
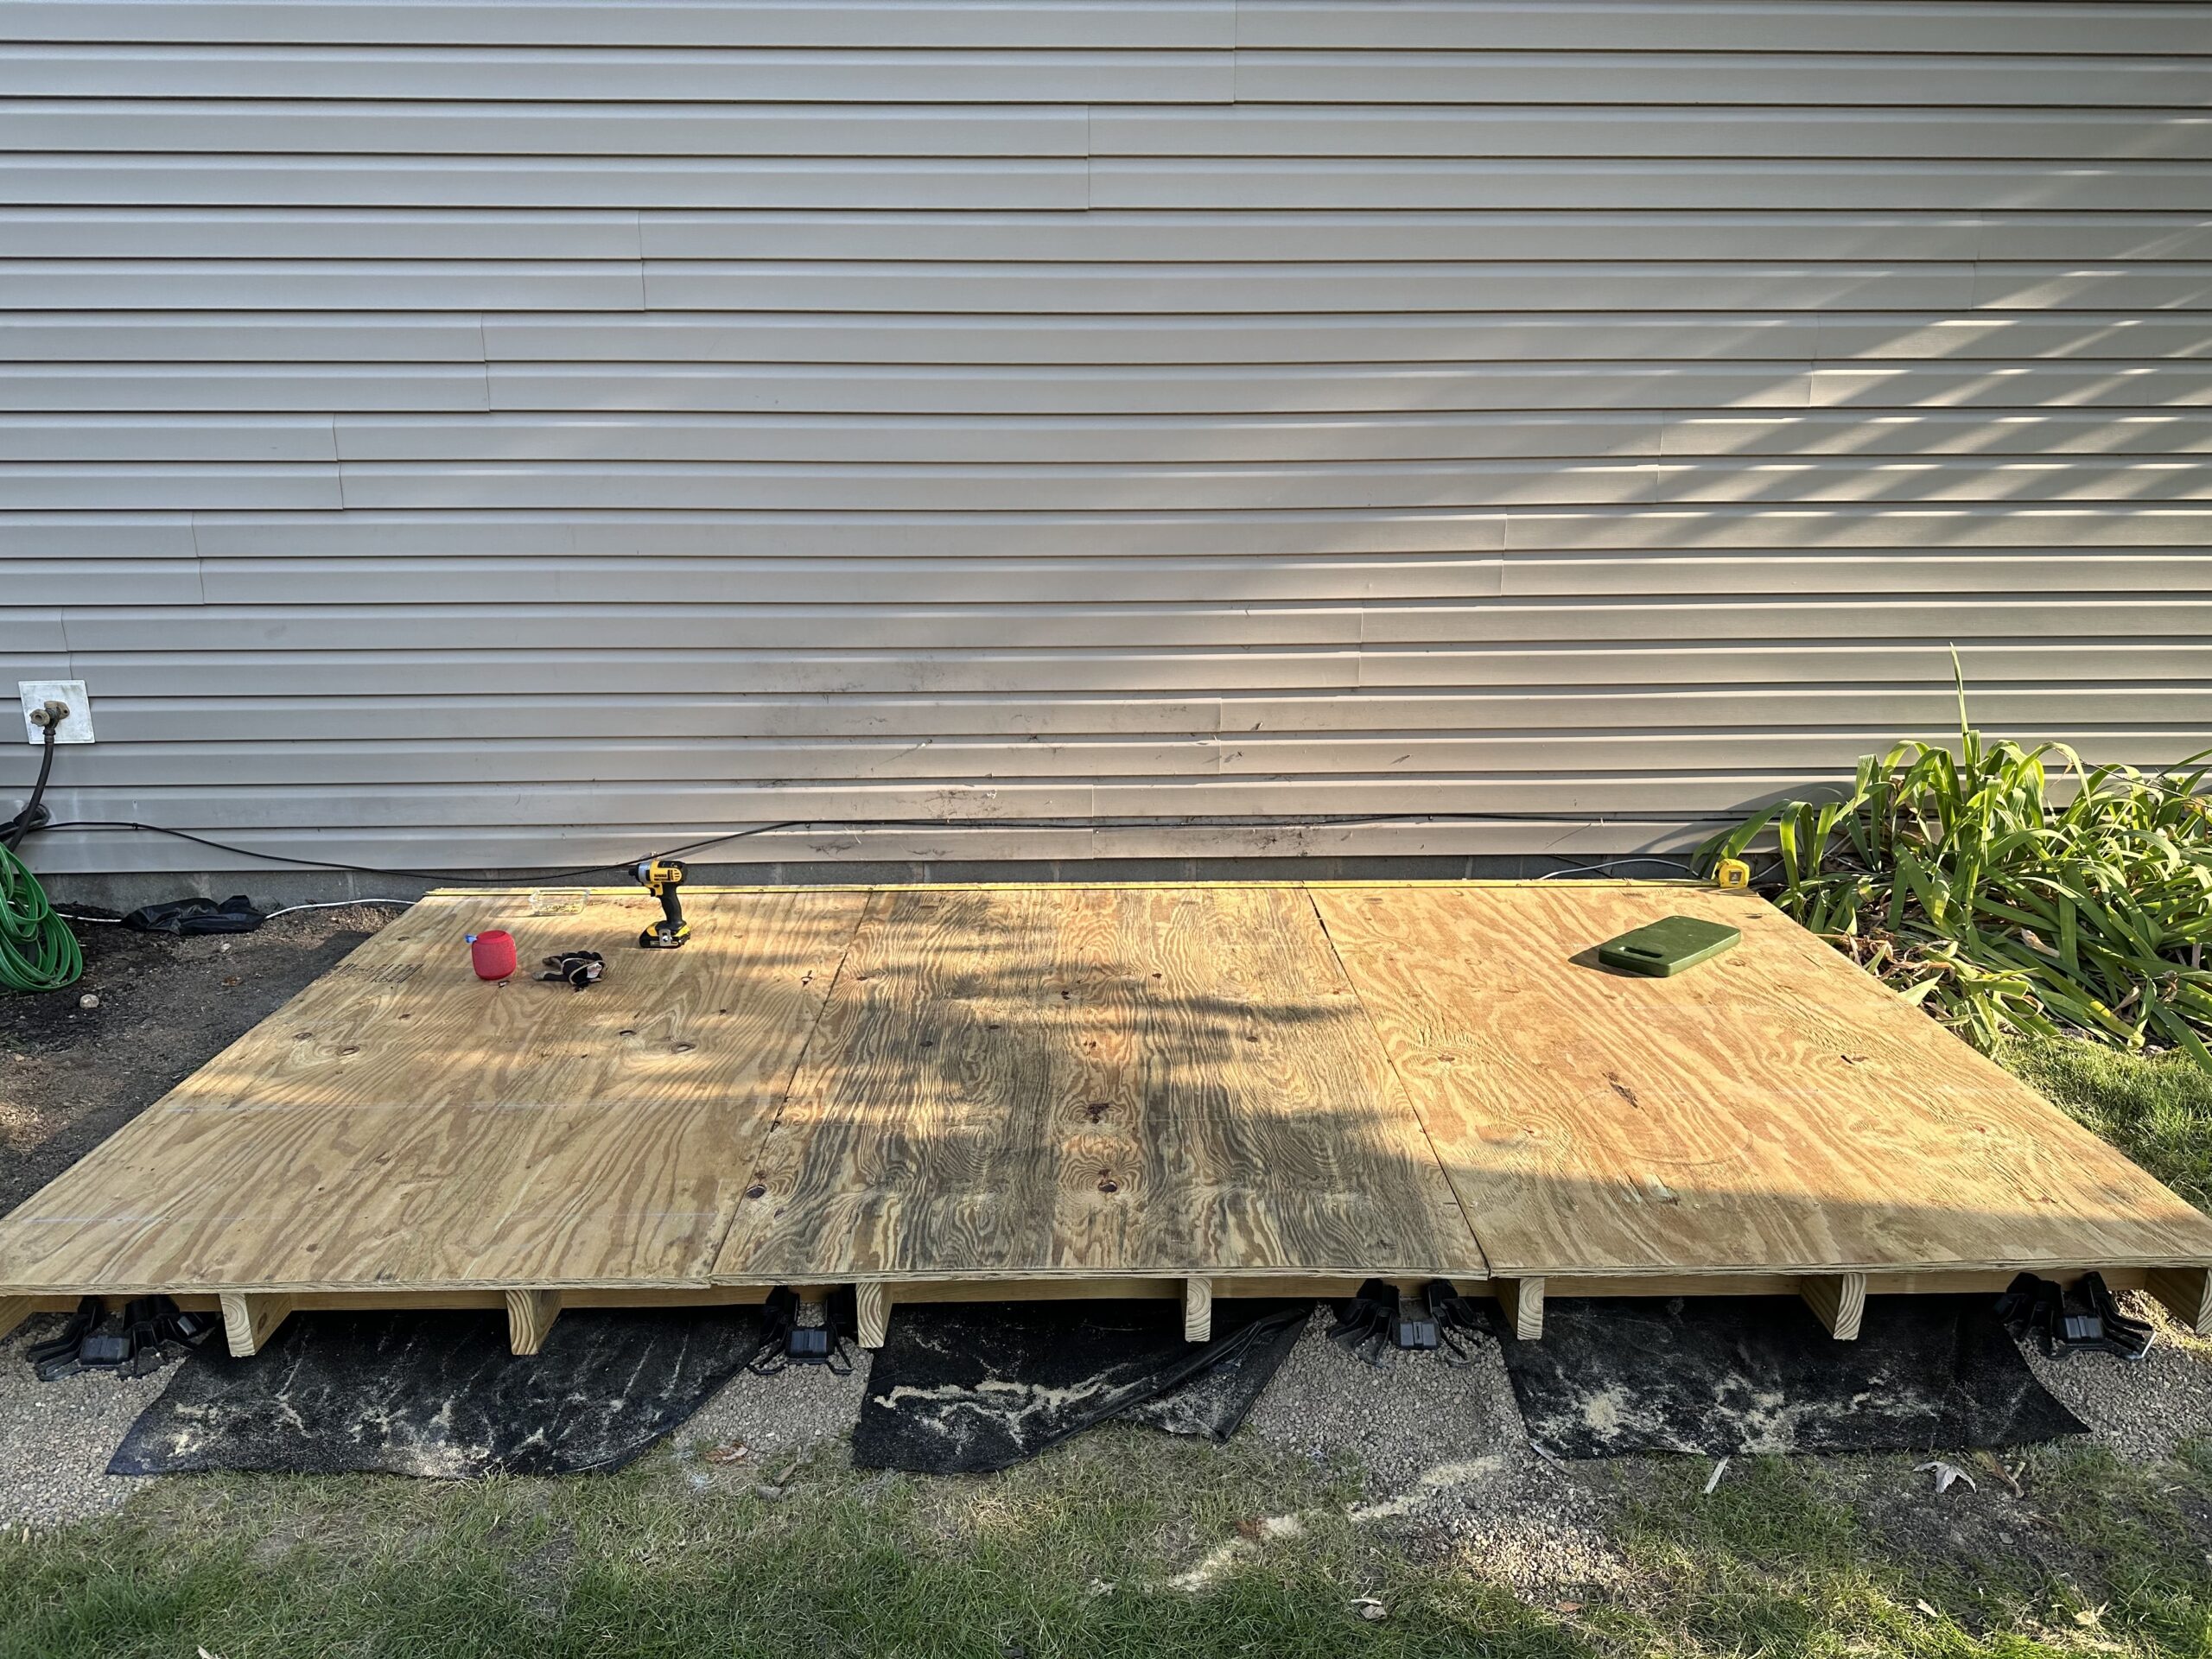
Completed foundation sans the skirt
The next morning, I snapped a chalk line over each joist and screwed the flooring down using 2 1/4″ screws at 8″ intervals. Once everything was secure, I snapped a line just above the end of the braces and trimmed the front edge of the plywood back so it was even witih the ends of the braces..
Voila!
I don’t have a picture of the 12 foot 2 x 8 skirt installed until after I had begun building the front wall. My memory is that it was so heavy and unwieldy that I had to wait until Rich was available after work to help me cut it and put it in place. And often during this project, after-work photography was preempted by gin and tonics. So, sorry!
What’s Next?
The Back Wall is up next. I’ll post the plan, how we built it, and show you the wonderful neighbors (including Bob) who helped us lift it into place.
