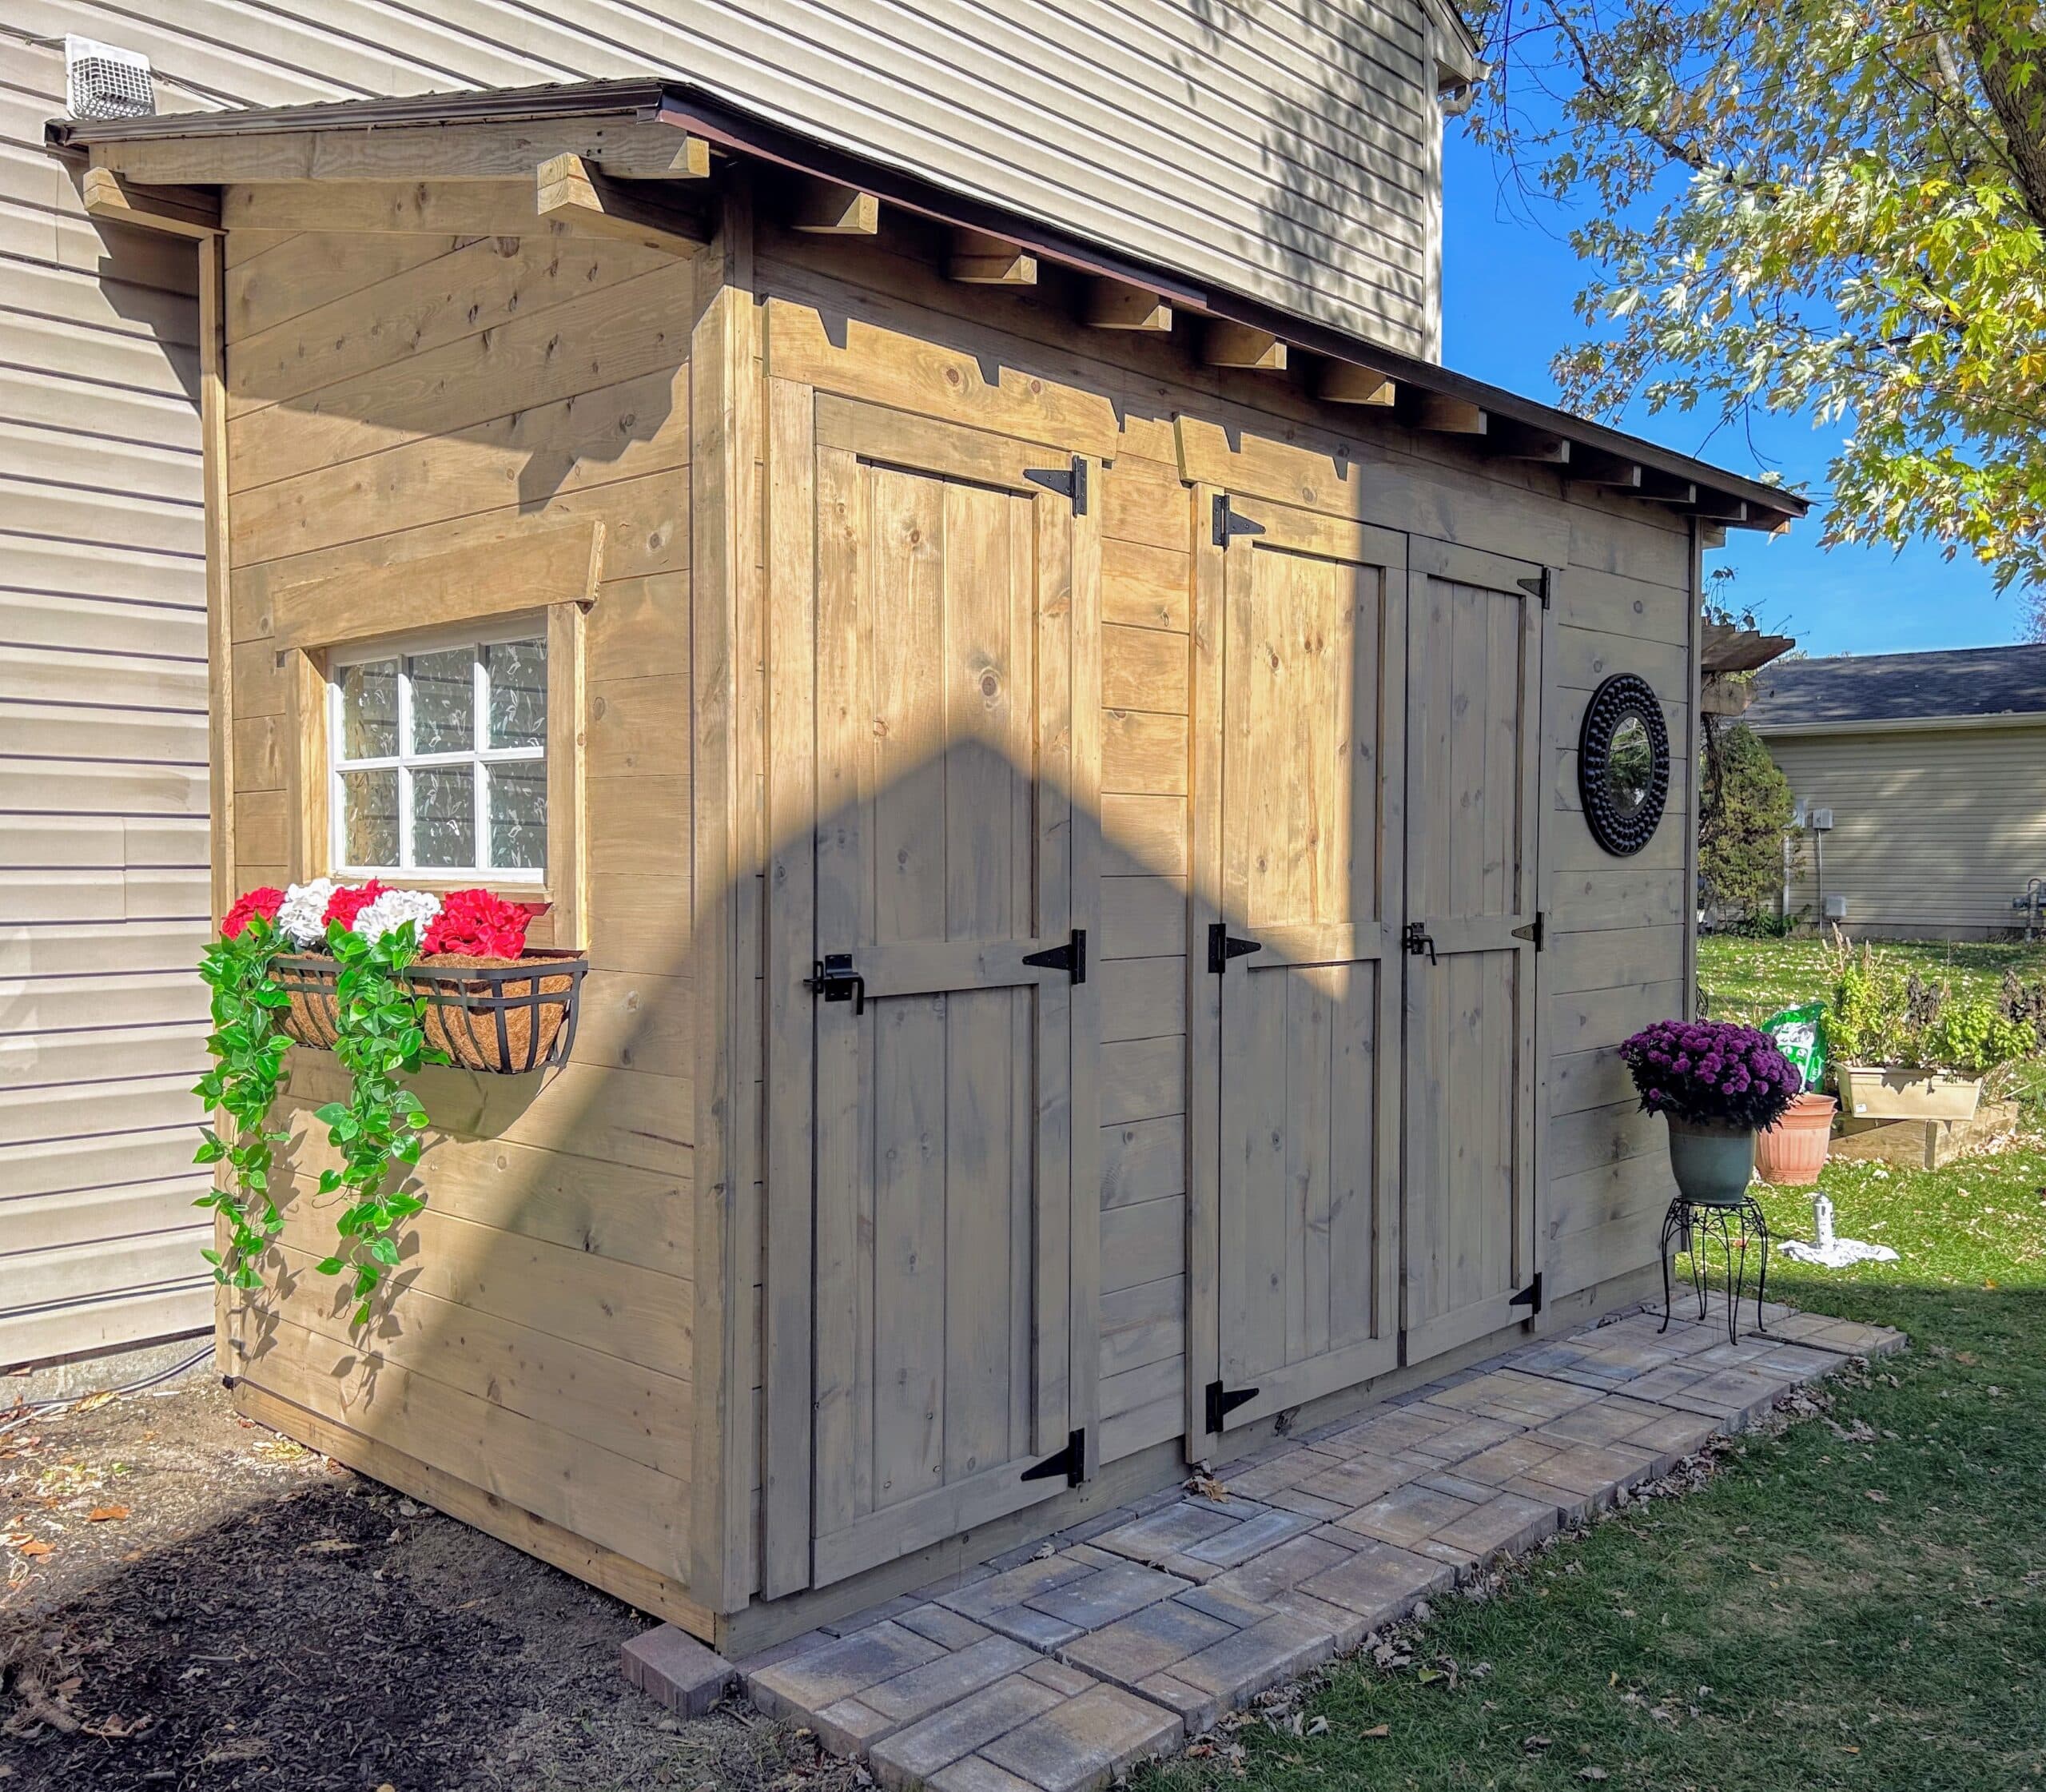
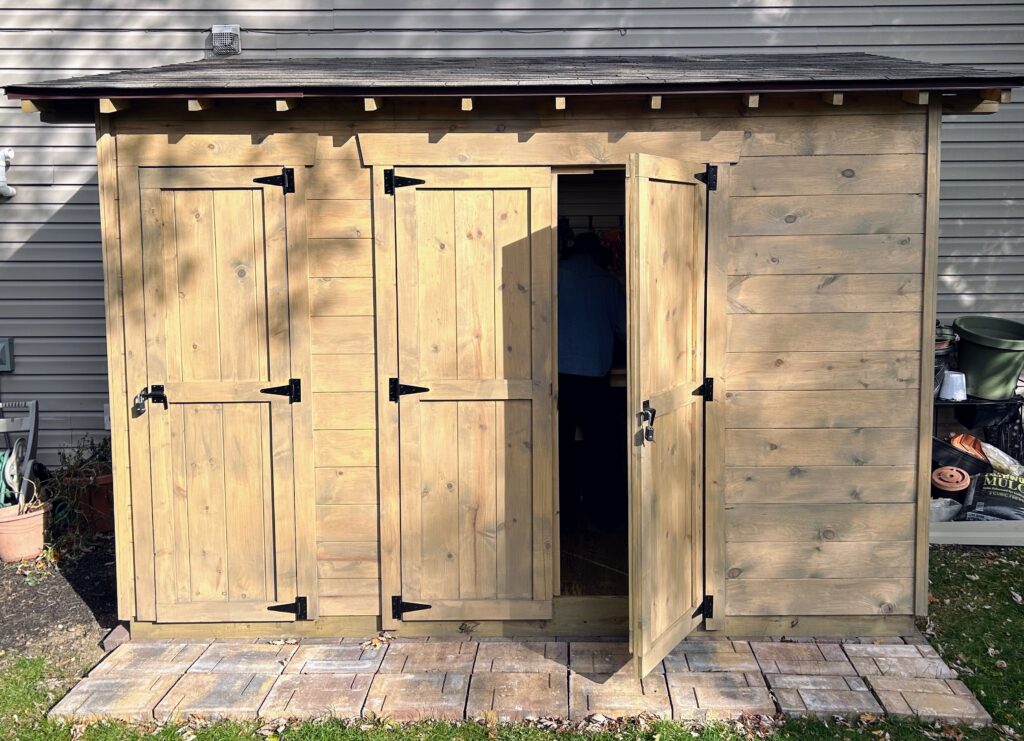
Rich & Katie’s shed in November of 2023
DIY Shed Designing the Build
In May, we birthed a design for Rich & Katie’s diy-wood-sided shed, which I wrote about in Rich & Katie’s Shed I. That design grew from trying to solve a major problem: there was no room in the garage for the cars and their people. Now it was summer, and it was time to engineer the build, schedule it, buy materials, and do the work. So here goes: DIY shed design 101!
Once we land on a design, our previous diagram (Problem → Solutions → Design) changes, because figuring out how to build what we have in mind means we will be dealing with all sorts of new problems related to making it so.
Let’s consider this instead:
Design
↓
(New) Problems
↓
Solutions
Designing the Build Table of Contents
Remembering my Whys
Before we dive in, though I must admit that I have been procrastinating on writing this post because we are going to get seriously into the weeds, and I’m never sure how detailed to get. I had to remind myself about my purpose at JHJ. I write to encourage folks to #LosetheFear and try new things.
I don’t claim to be an expert; I’m a learner, a tryer, and a stumbler-about in the wilderness of ideas. And as a learner, I am always eager to apprentice with those who actually know what they’re doing so I can learn how to do what I am learning to do.
So please think of me as a lead learner, a fearless tryer. I should be able to show you my tries without getting too carried away (I hope).
About 20 years ago, I decided that as a teacher, keeping track of my own learning was important—no, critical—if I was to help others learn how to learn. Because learning is about change. It’s about becoming. Always becoming.
That is what Jennifer’s Home Journal is about. Becoming.
So, into the weeds we go, friends!

But First, a Few Words about Wood
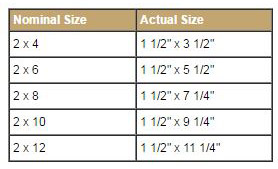
Dimensional Lumber. If you have ever built anything, you know how frustrating it can be to figure things out with dimensional lumber. 2 x 4s aren’t really 2” x 4” even though that’s what we say they are.
No, people, they are “about” 1 ½” x 3 ½”. Etc. So when you see all kinds of crazy calculations in my notes involving half inches, that’s why.
Second, always consult span tables and load tables to figure out how far apart to space things. For example, walls are typically built with 2 x 4s spaced 16” on center (meaning that the measurement is from the center of one stud to the next). To figure out the size lumber you need to support a roof or a deck, consult span tables which will tell you how far you can span between supports given different types of lumber.
Third, any time you take out a support in a wall (e.g., so you can put in a door or a window) you have to provide support elsewhere. This is typically done by building a header above door and window openings. If the wall is load-bearing (as is the case for the front wall and back wall of our shed), it is especially important to provide adequate support for whatever will be built above it (in our case, a roof).
Etc.
There is more, but I think you get the idea about it being weedy!

DIY Shed Designing the Build
Step 1: The Foundation and Floor System
I spent a lot of time at the beginning considering options for the foundation. I won’t go into all the options I considered, but I will tell you about my process that landed me where I did.
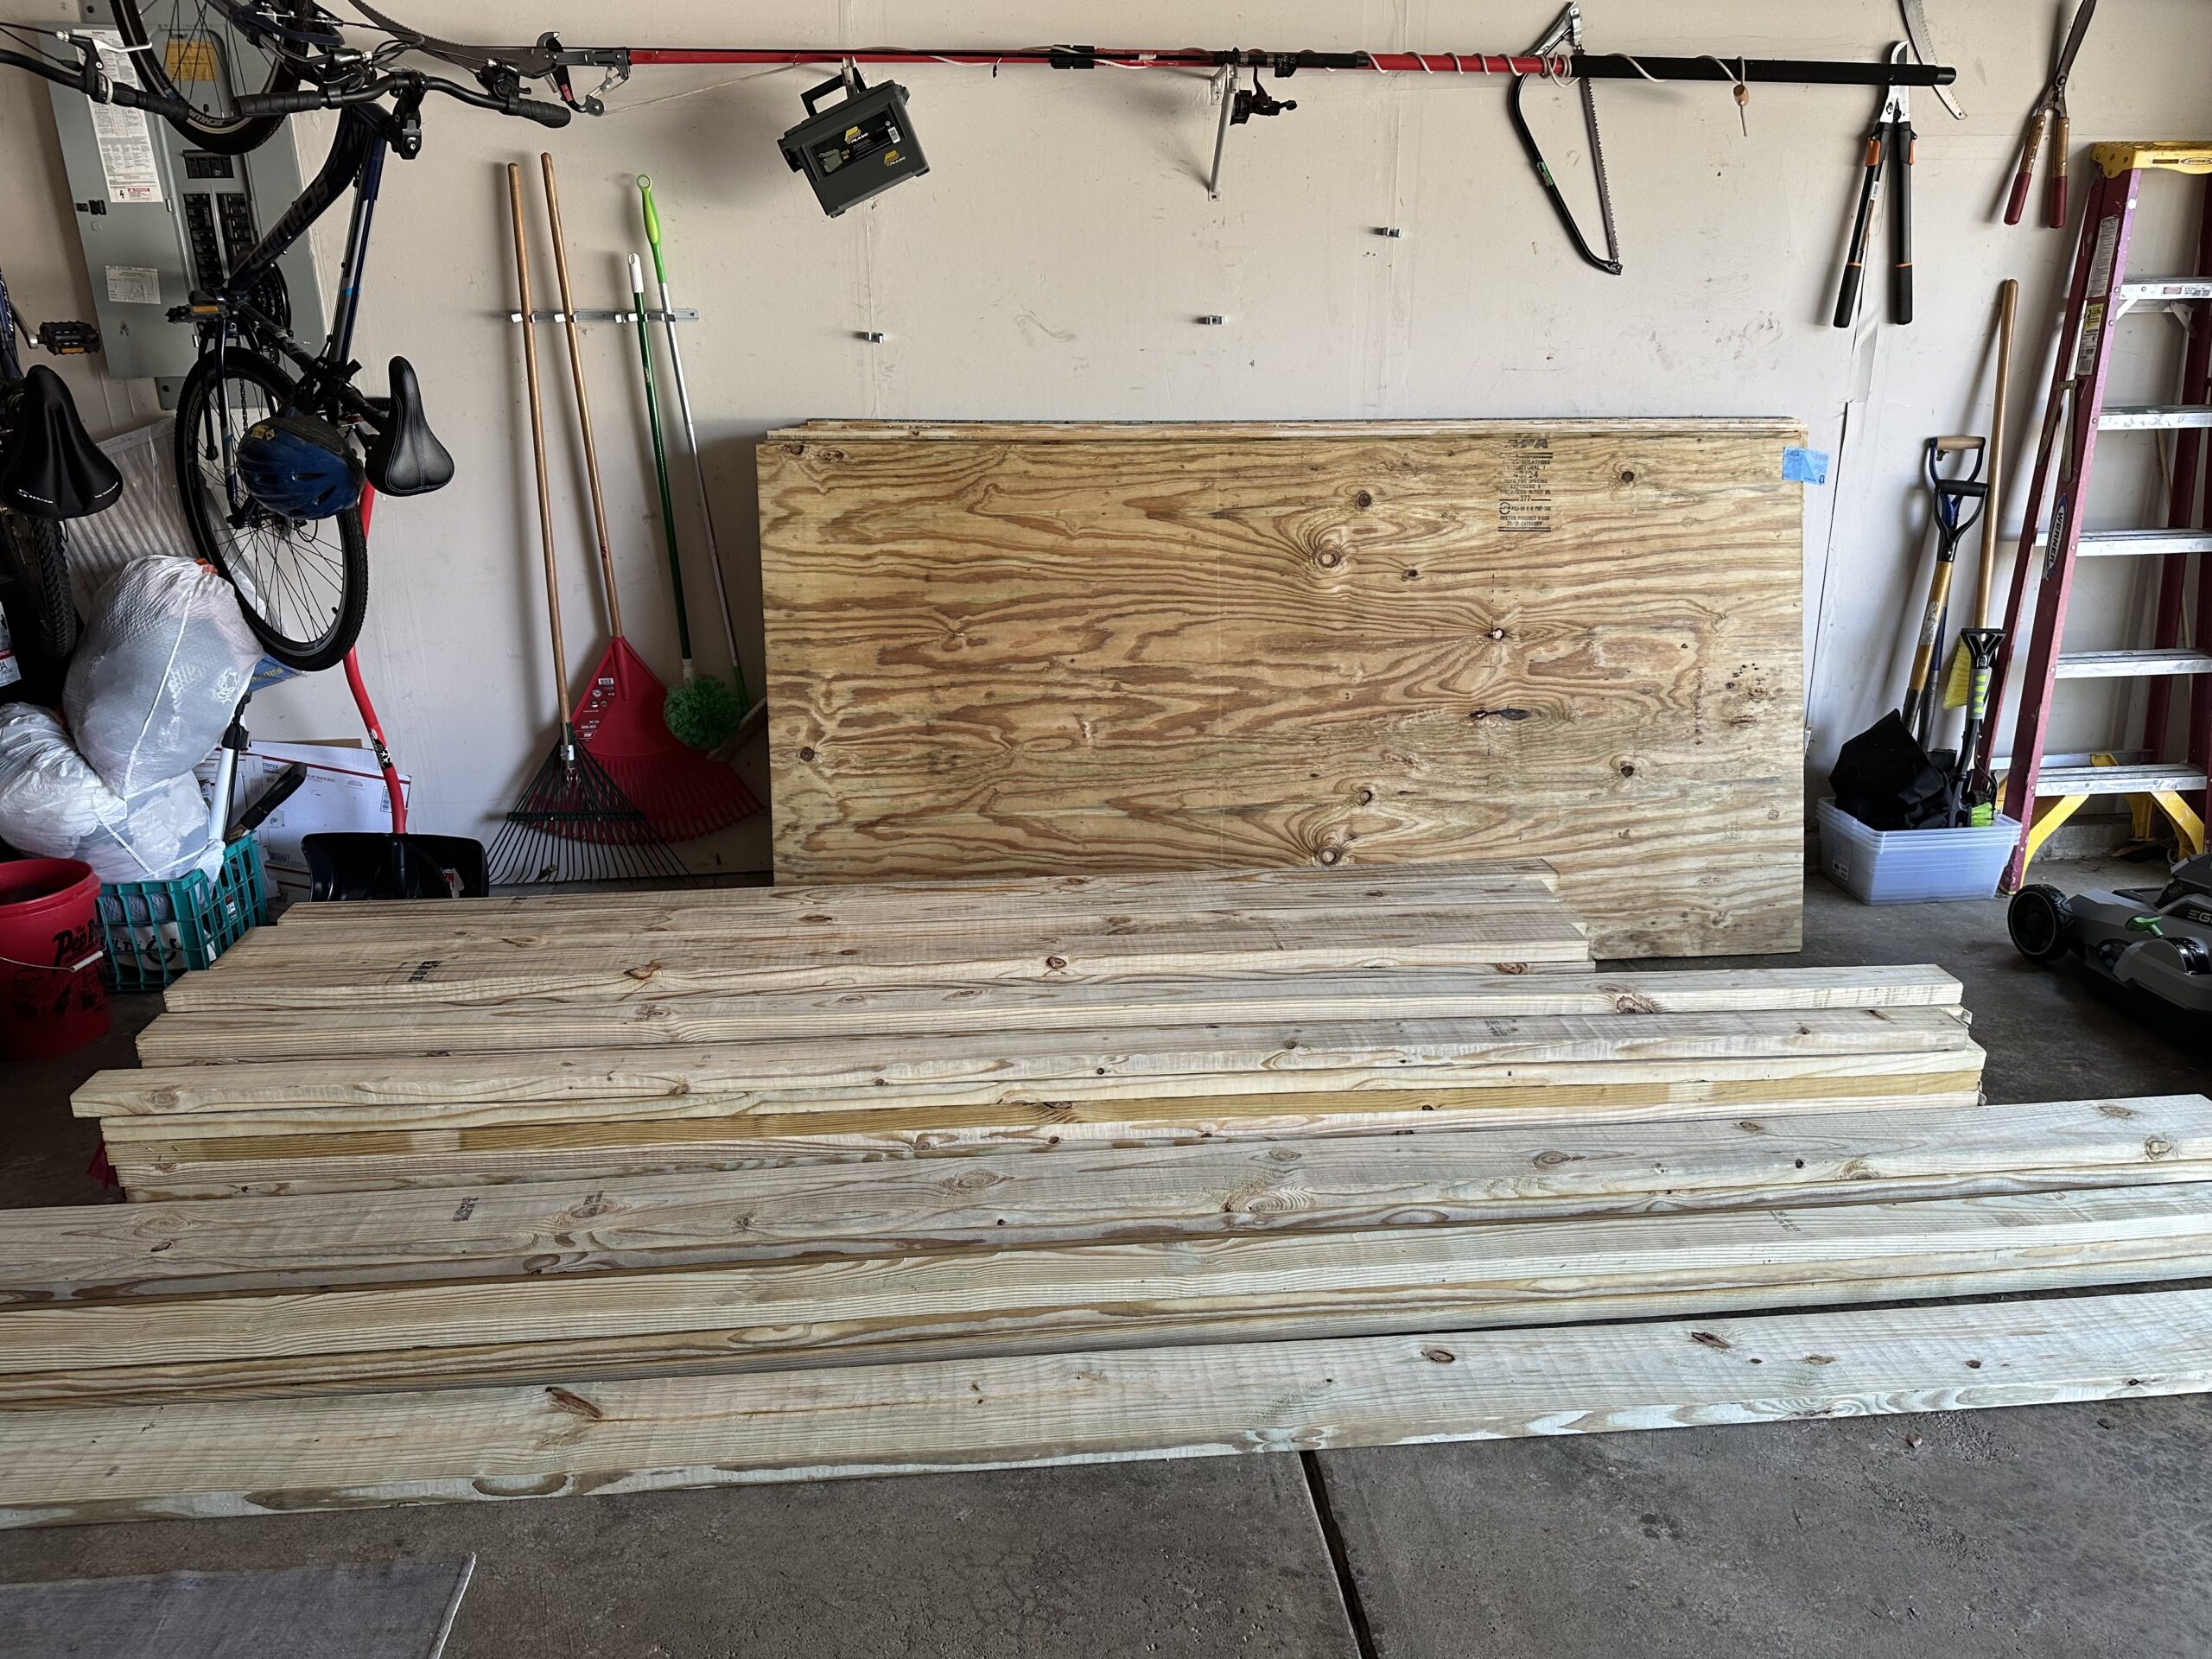
First, I didn’t want to take on anything we couldn’t accomplish ourselves. So that ruled out bringing in a grader and having a slab poured, or leveling the site and covering it with crushed stone as they often do with the buy-and-plop already-built sheds you can get at Lowes or Home Depot or Menards.
Second, Rich and Katie would both be working during the weeks I was there, and they’d only be available to help after work and on the weekends. I needed a solution that I could accomplish myself.
I considered digging holes and sinking posts into the ground and building the floor system on that as a foundation—I knew how to do that. Problem was, that is not a one-person job (especially for a 65-year-old woman).
After a fair amount of research on the web it occurred to me that I was overthinking this. After all, reasoned I, pioneers often built their homes on top of stones piled on the ground, and many of those houses lasted for 150 years (with subsequent rock piling as things settled). I mean, we were building a shed beside a 1990s contractor-stick-built-slab-on-grade house with vinyl siding. (No offense Katie and Rich; just calling it…) I didn’t need to build something that would outlast the house!
So, I thought, why not support it with those concrete deck supports spaced to support a much heavier load than a deck? I looked around and found plenty of examples of that approach to shed foundations, and had pretty much decided on doing that when I stumbled across…
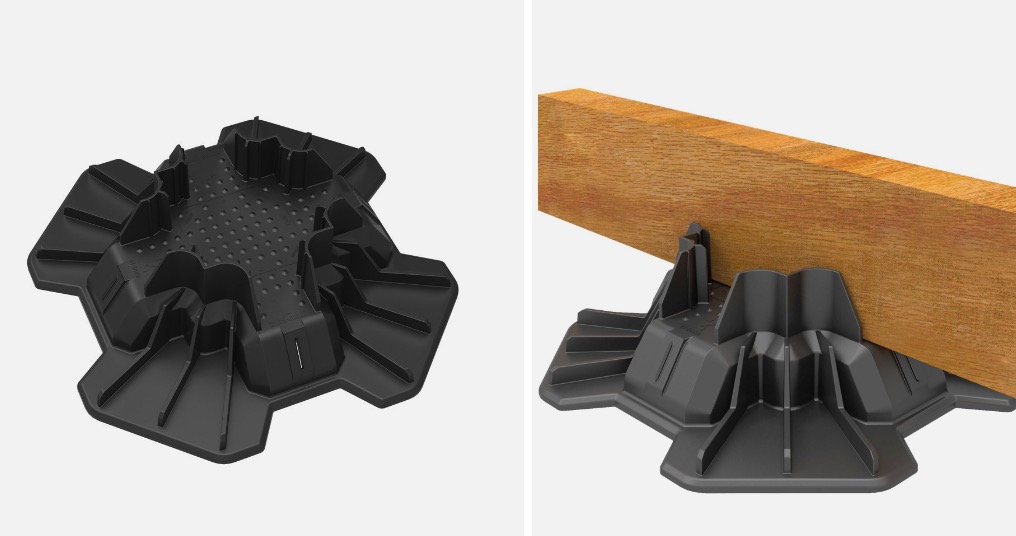
TuffBlocks
Provide a drumroll, because that’s what these things deserve.
TuffBlocks™ are an instant foundation system by BuildTuff.com. Each TuffBlock is engineered to hold 1,700 lbs., weighs only 1 ½ lbs., and has been break-tested to 11,000 lbs. I watched hours of videos of people building decks and steps and even a shed with these things.
I was completely in love with the idea. And certainly, if the video tutorials were any indication, I could quickly build a foundation myself. (As it turns out, they were spot on.)
Foundation and Floor System Plan
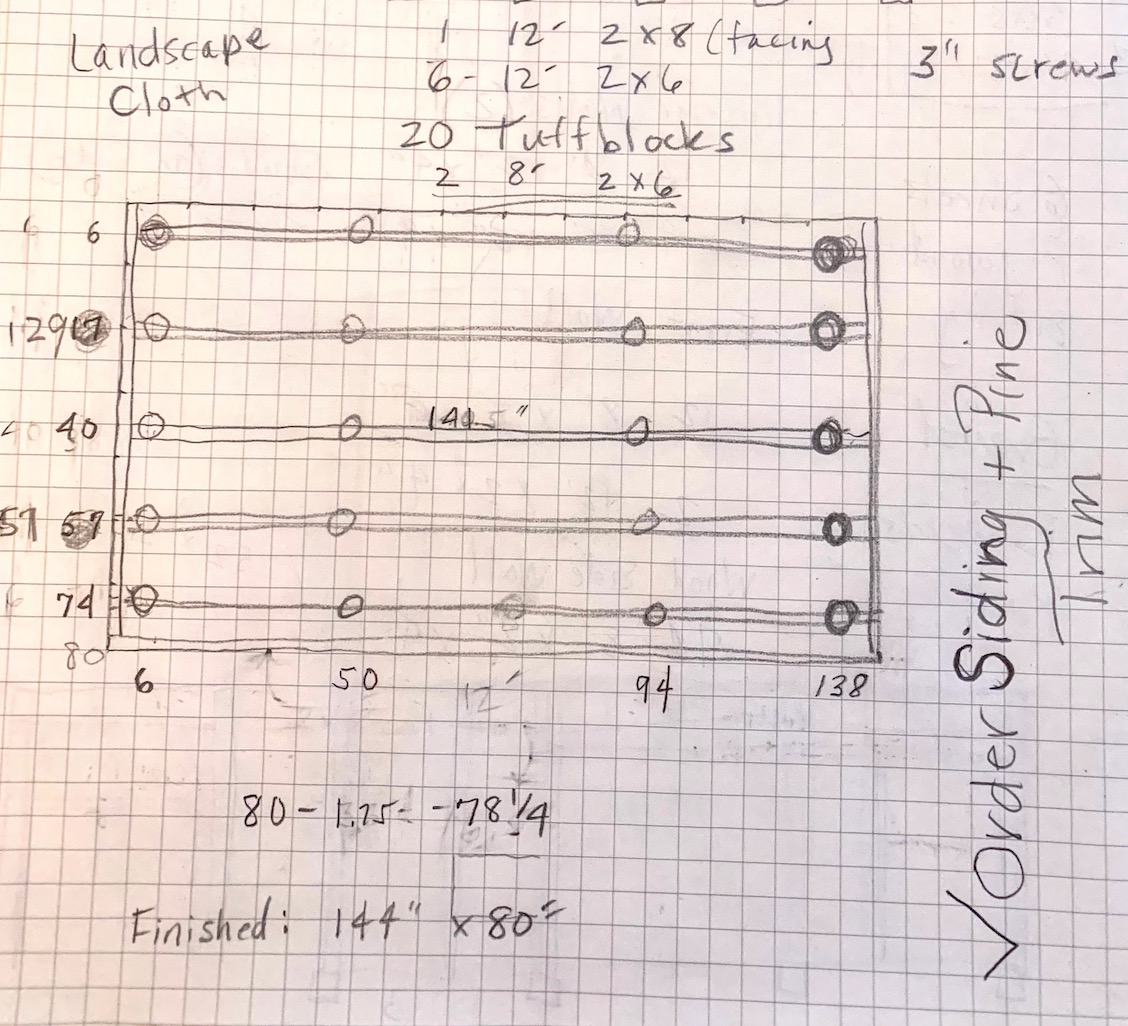
I planned to use 20 TuffBlocks™ across five rows with four blocks in each row. (20 blocks supports 34,000 lbs.)
Row spacing is indicated in inches along the left side and bottom. Of course, I consulted span tables and TuffBlock specs to arrive at this design.
I would use 2” x 6” x 12’ pressure-treated lumber set into the blocks, with a slight (6”) cantilever on the front and back. The front would have a 2” x 8” x 12’ piece attached to hide the space under the front edge and to create a sort of riser for the step up through each door. My original plan called for six 2” x 6” boards, but I actually needed seven. (I didn’t count the one I would need for the back in my original calculations.) The end of each row would be capped with two 2” x 6” x 8’ boards.
The whole thing would be decked with 4’ x 8’ x ¾” sheets of pressure-treated plywood. I would use 3” screws for framing and 2 ¼” screws for the decking.
I would put a vapor barrier beneath it all—my plan says landscape cloth, but I used heavy plastic.
DIY Shed Designing the Build
Step 2: The Back Wall
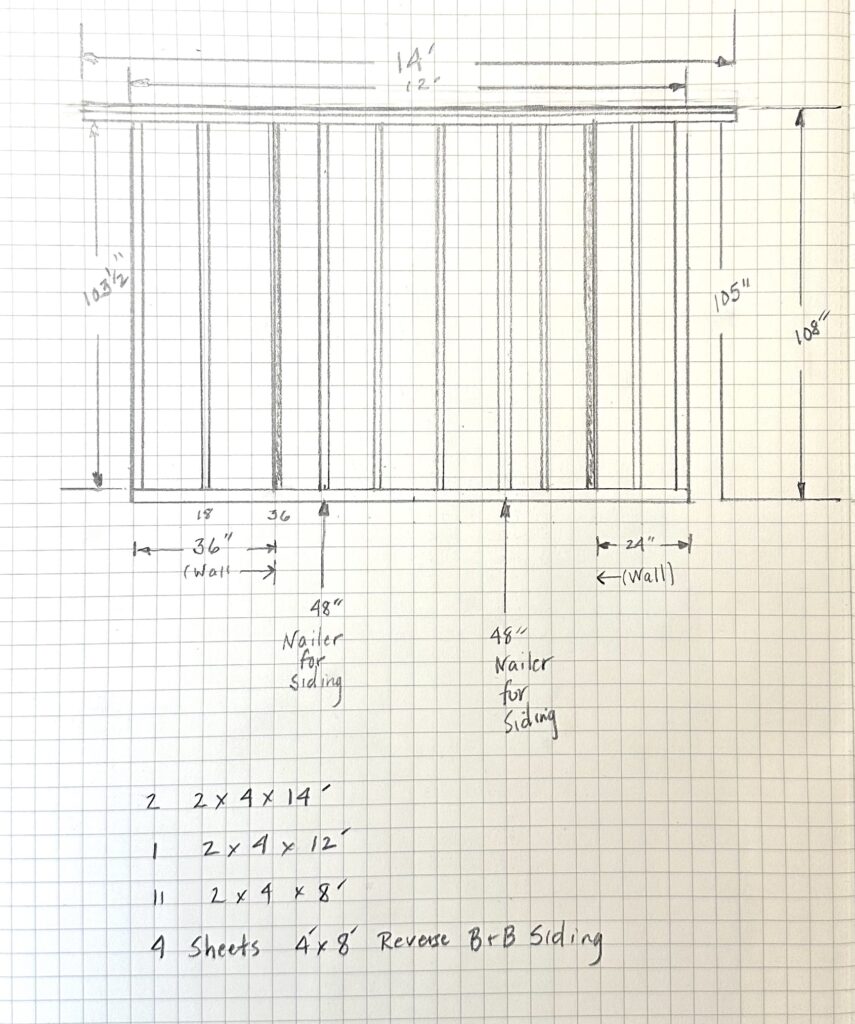
The finished height of back wall was to be 108”. This was a change from my original plan; I made the front wall taller to accommodate full-height (6’ 8”) doors. Changing the height of the front wall meant I needed to add at least 15” to the back wall to get the pitch required for the roof to meet Indiana code. So, all that happened during the design phase. (See what I mean about a design posing new problems to be solved?)
I determined that the entire wall—including exterior siding and painting—would have to be built as one unit and put in place first because once the wall was up, it would be just 6” from the house and there would be no way to get between the shed and the house to side it, much less paint it.
I planned to build the entire unit lying flat on top of the floor deck. Once built and painted, we would lift it into place and secure it with 2 x 4 braces.
To save a bit on cost, I planned to use reverse-board-and-batten plywood to side the back wall. Not only would this be a cheaper option for something that would never be seen, but it would also still provide the same structural integrity as the tongue and groove pine siding we planned to use on the rest of the shed.
Materials
4 Sheets 4’ x 8’ Plywood reverse board and batten siding
2 2 x 4 x 14’ boards (double top plate)
1 2 x 4 x 12’ board (bottom plate)
8 2 x 4 x 10’ boards cut to 103 ½”
Plan
DIY Shed Designing the Build
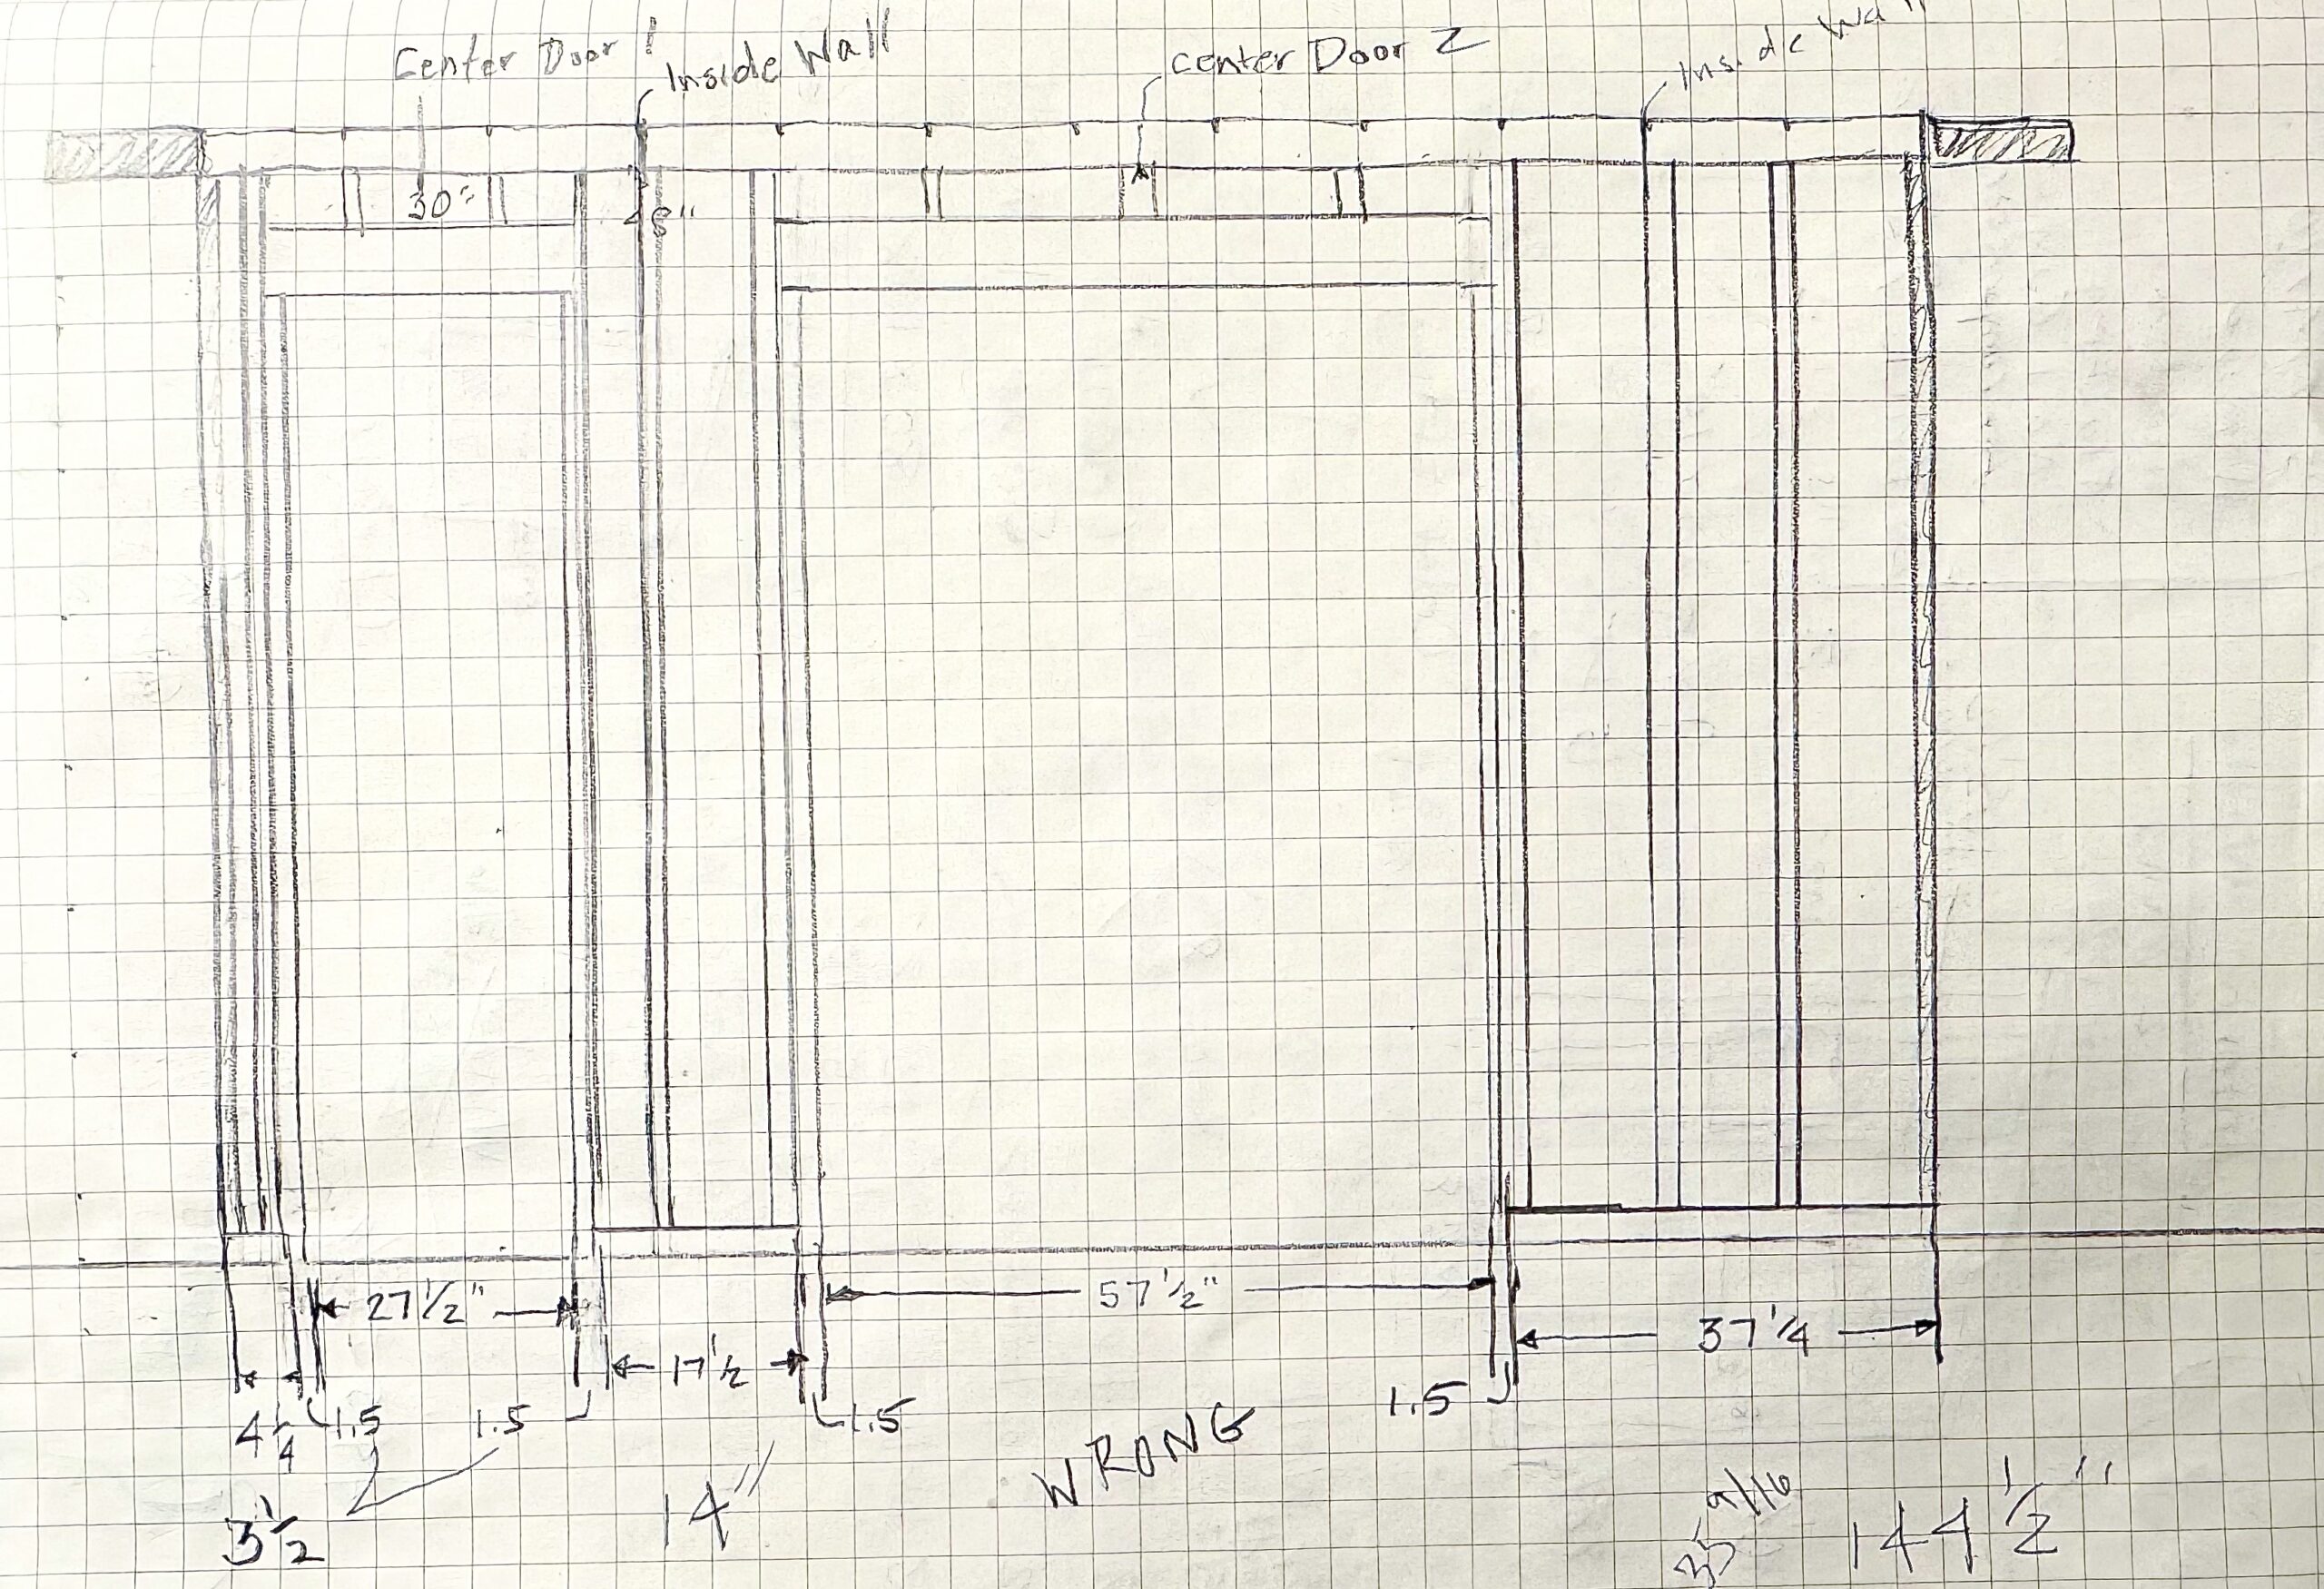
Step 3: The Front Wall
Finished height of front wall would be 93 ½”. Again, this was a change I made to the original design because I wanted the doors to be standard height (6’ 8”).
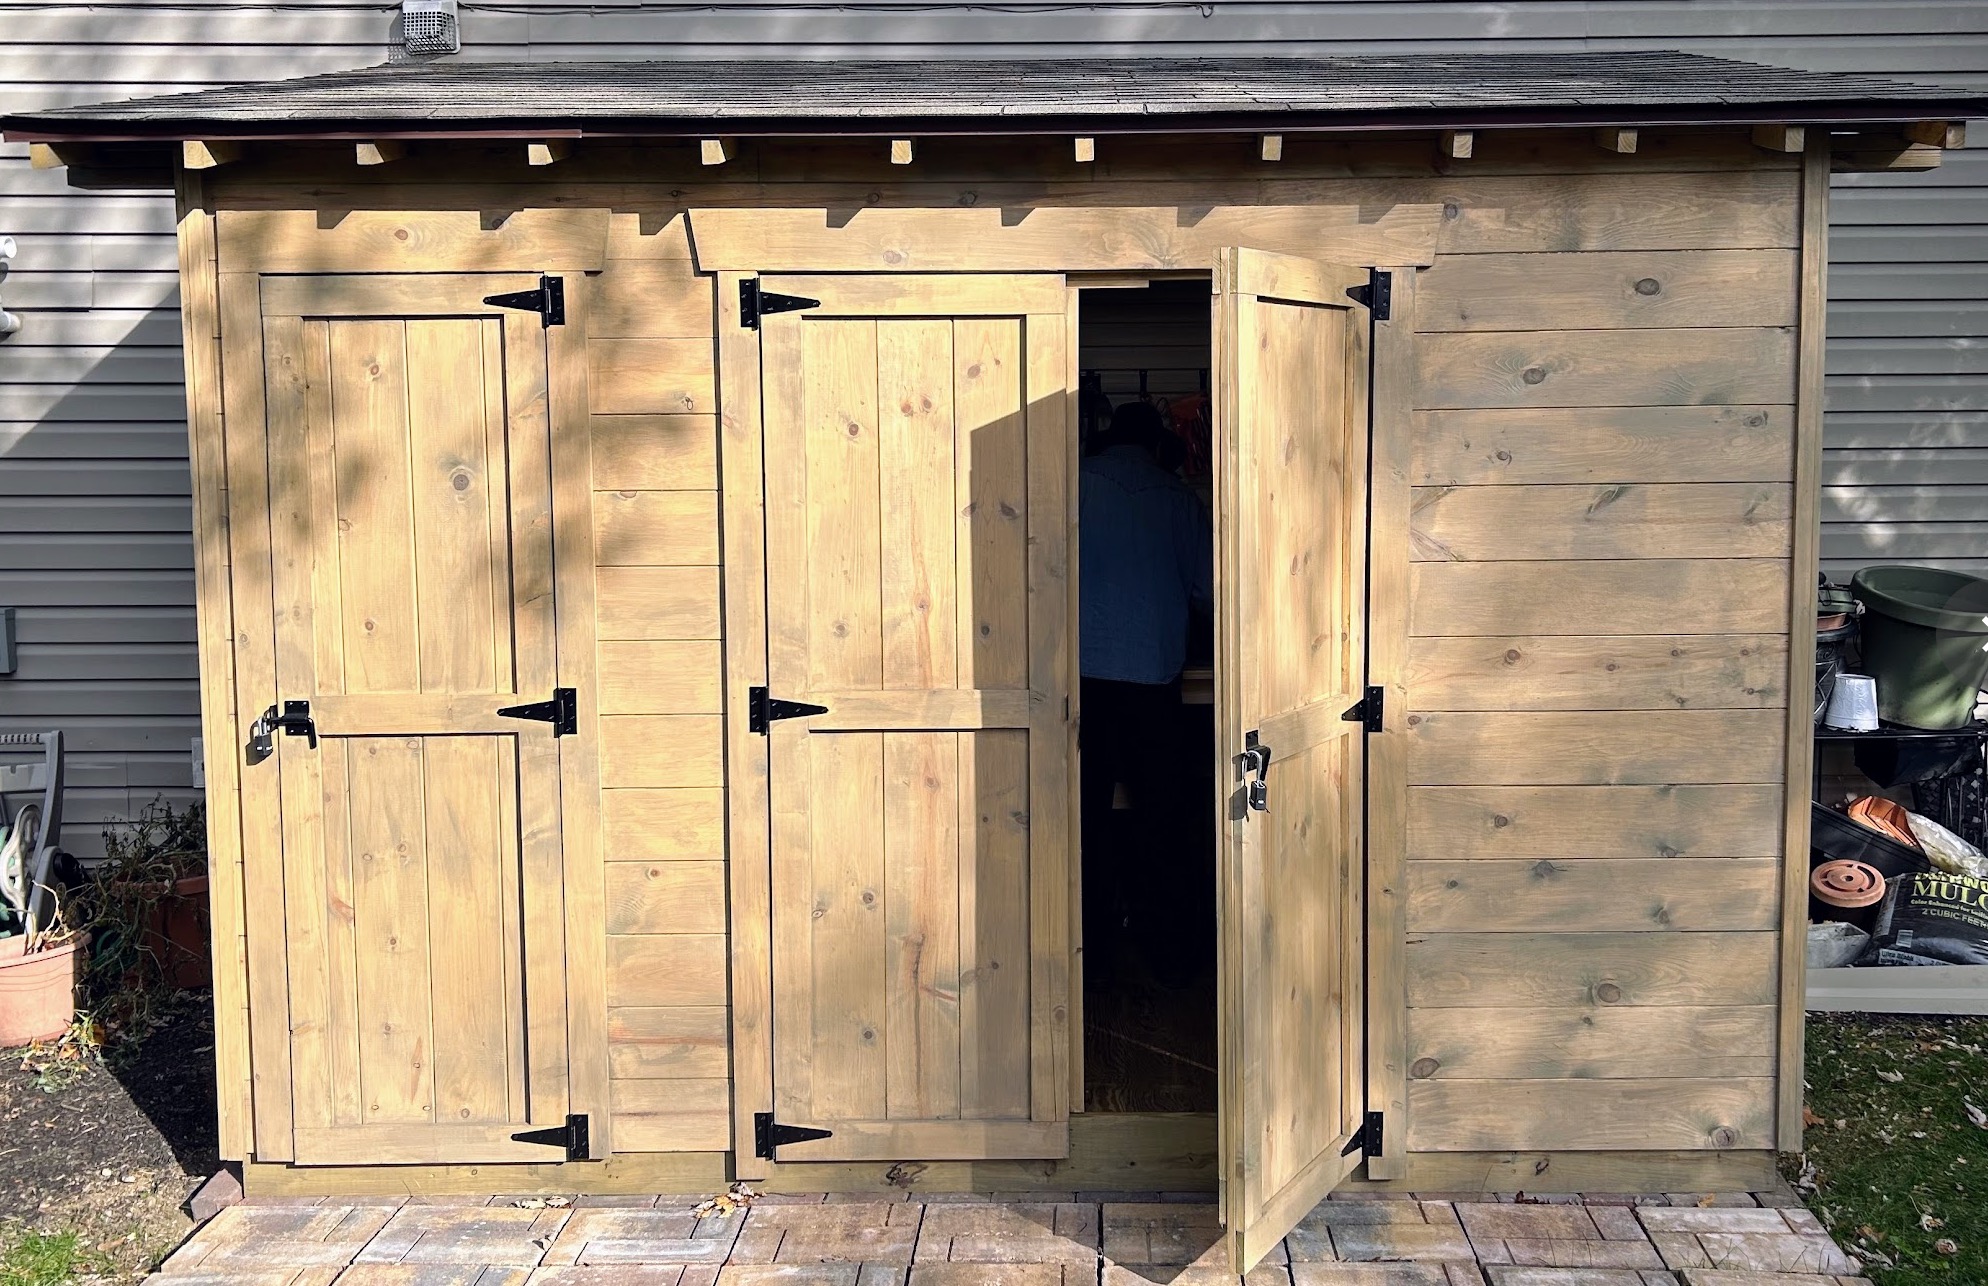
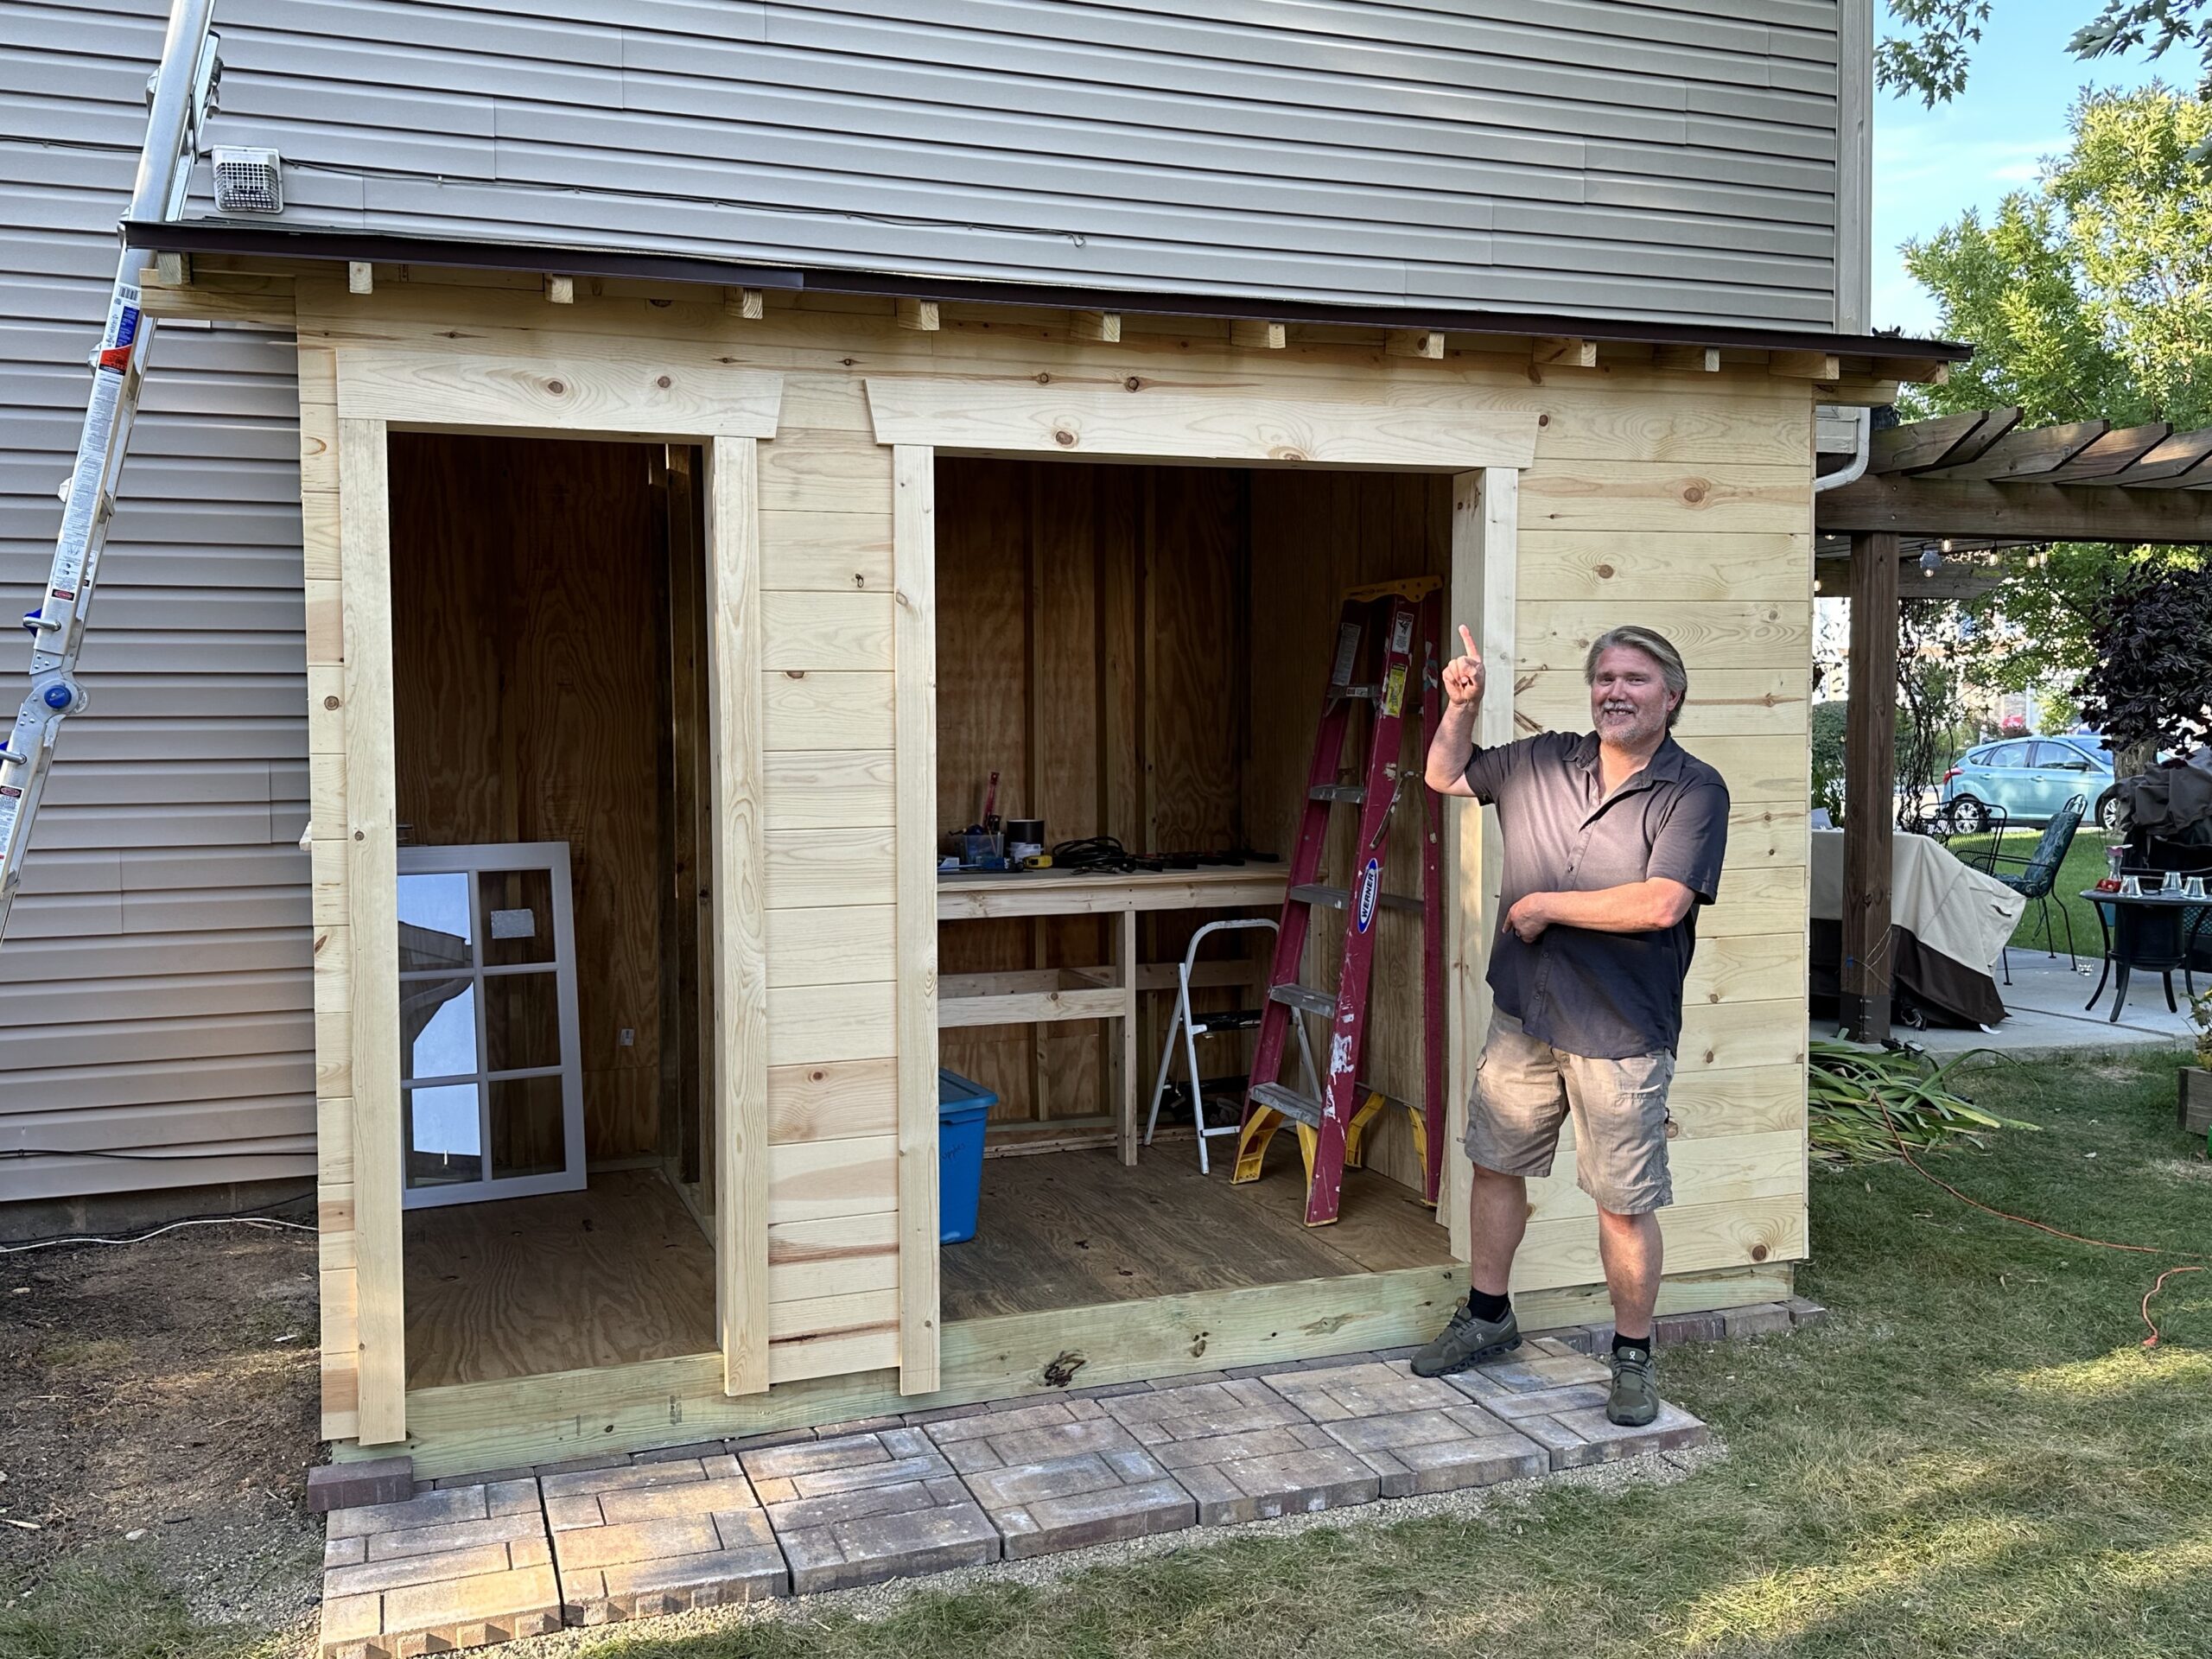
Before I show you the plan for this, take a look at the front wall of the finished shed, because it is always a good idea to begin with the end in mind! Notice the roof overhang on either end. Also notice the placement of the doors, which are centered on the spaces behind them.


Ok. How to build that?
Again, we will build this wall lying flat on the floor deck and lift it into place. Like the back wall, we will need a bottom plate, a double top plate, and a stud wall interrupted by two door openings that will have to be supported by headers to carry the weight of the roof.
Materials
2 2 x 4 x 14’ boards (top plate)
13 2 x 4 x 8’ boards
2 2 x 6 x 8’ boards (door headers)
Plan
DIY Shed Designing the Build
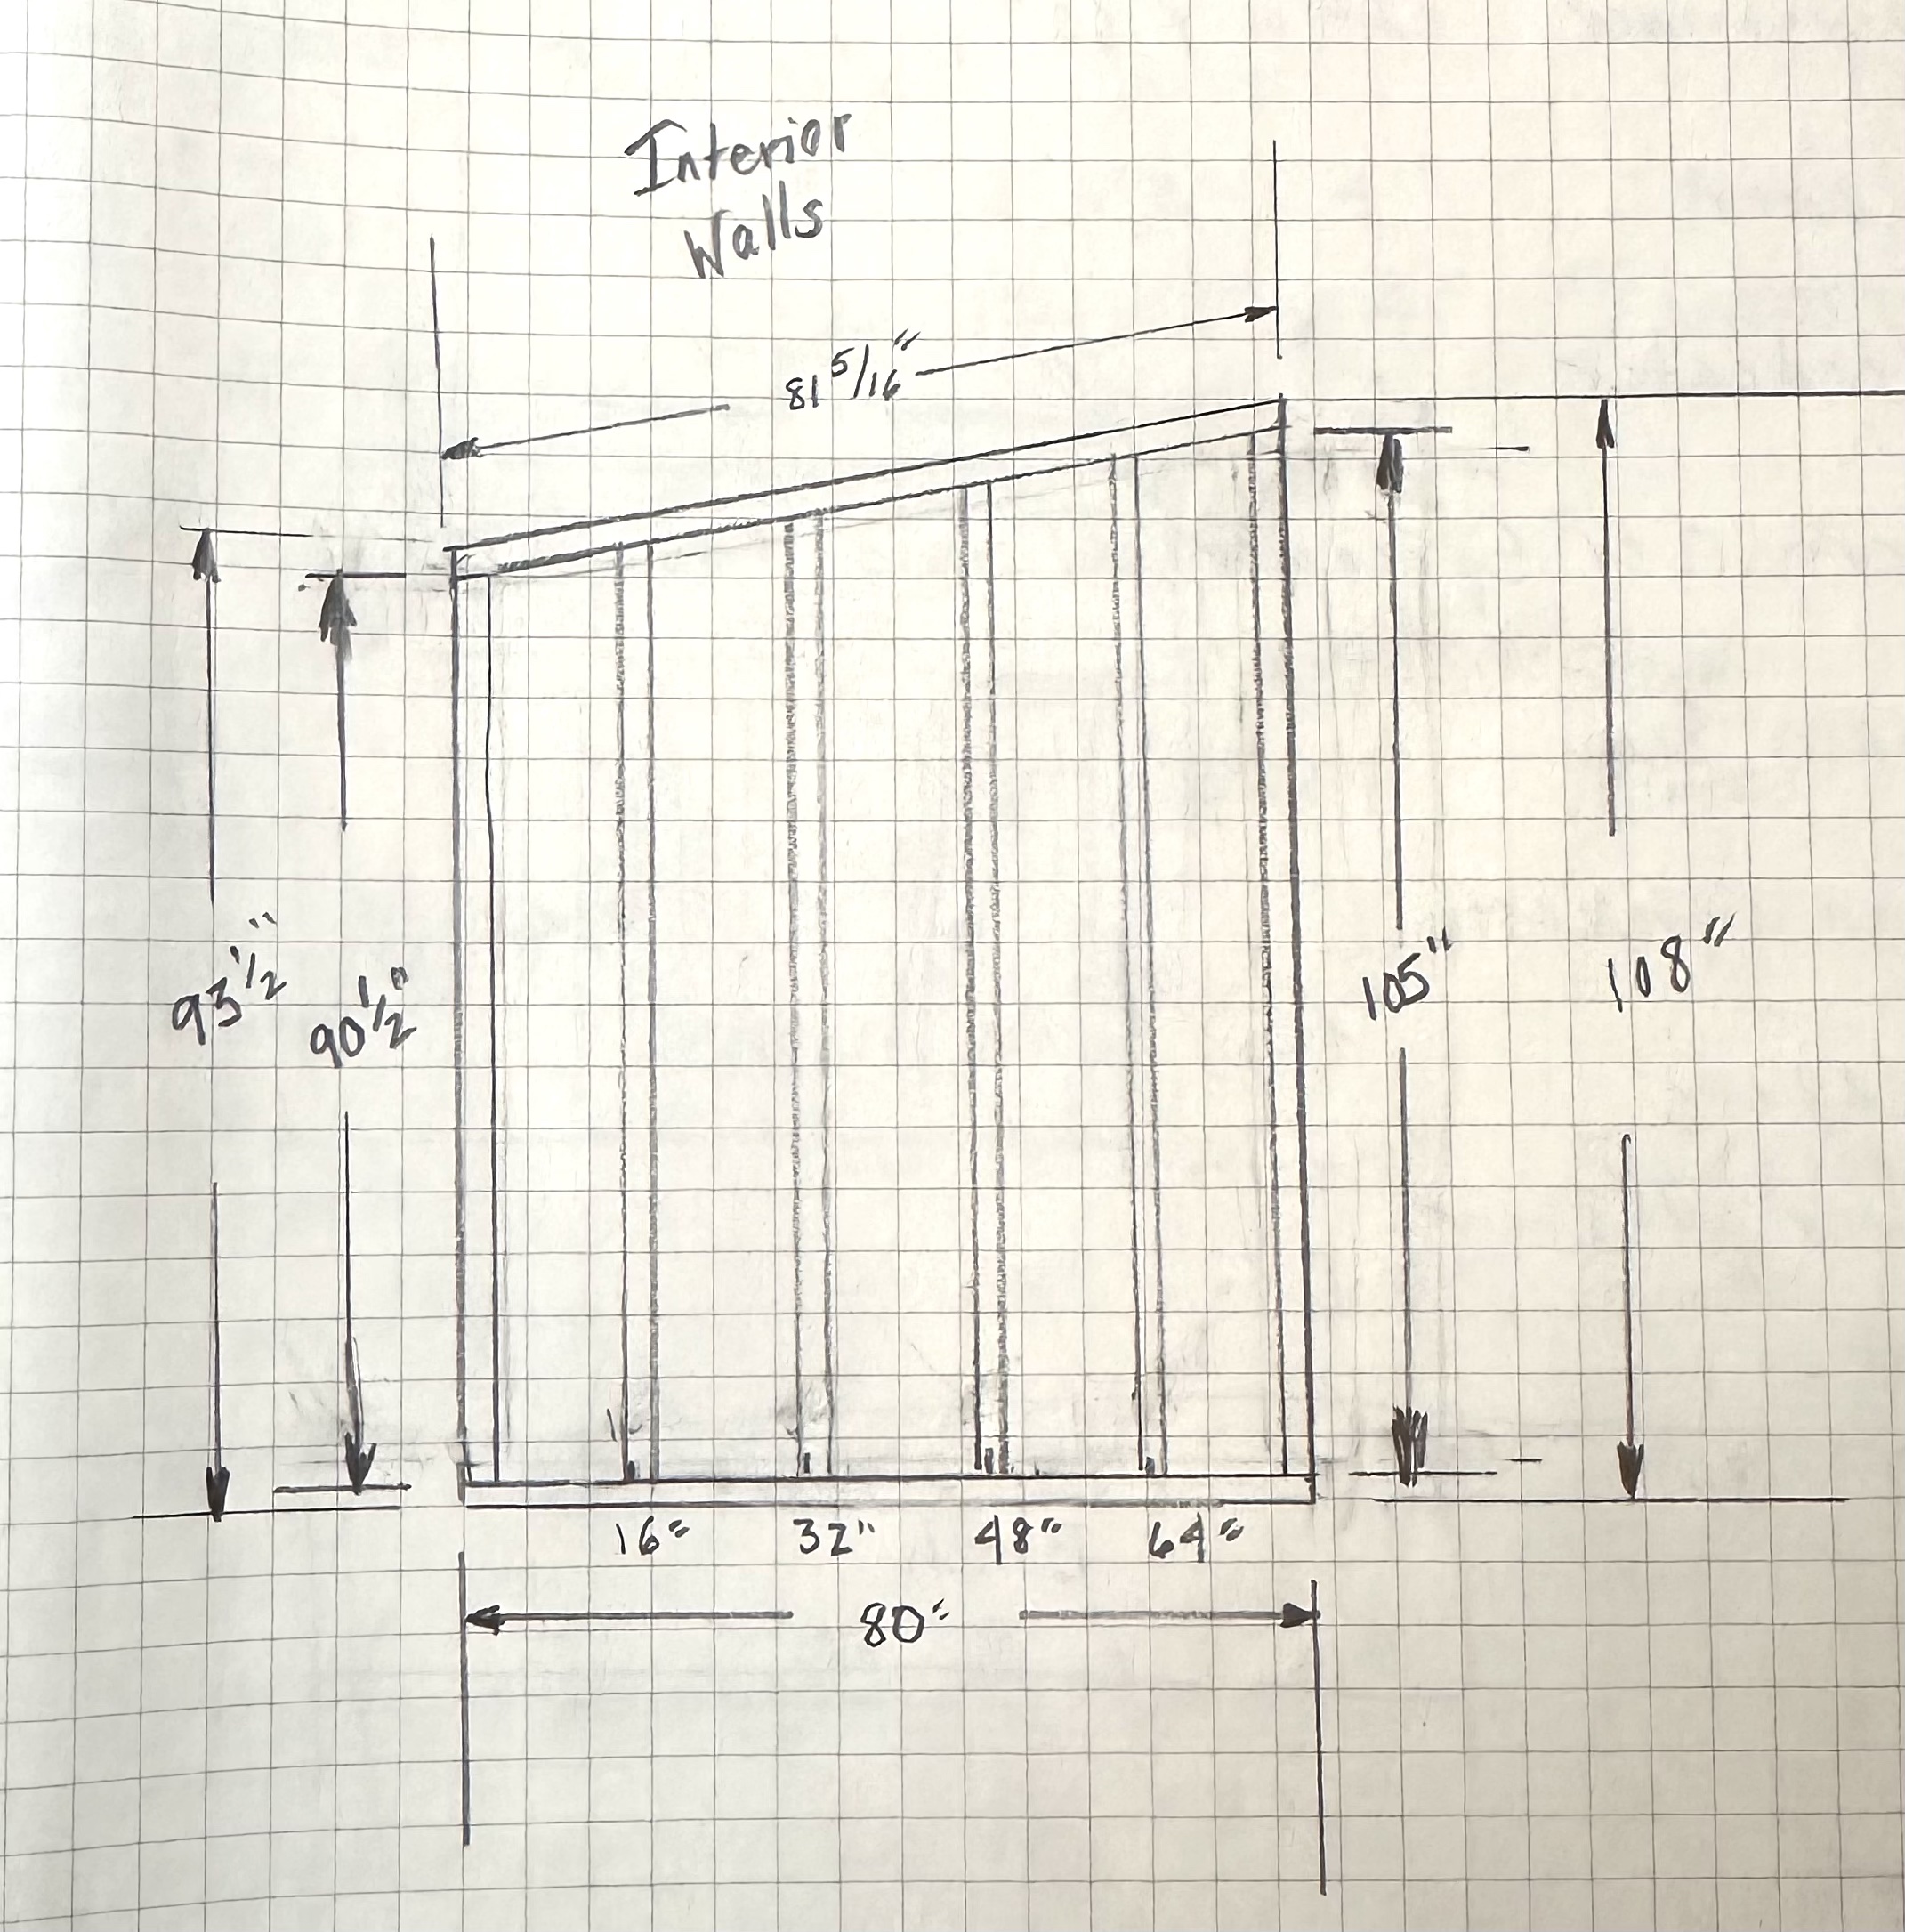
Step 4: The Interior and Left Side Walls
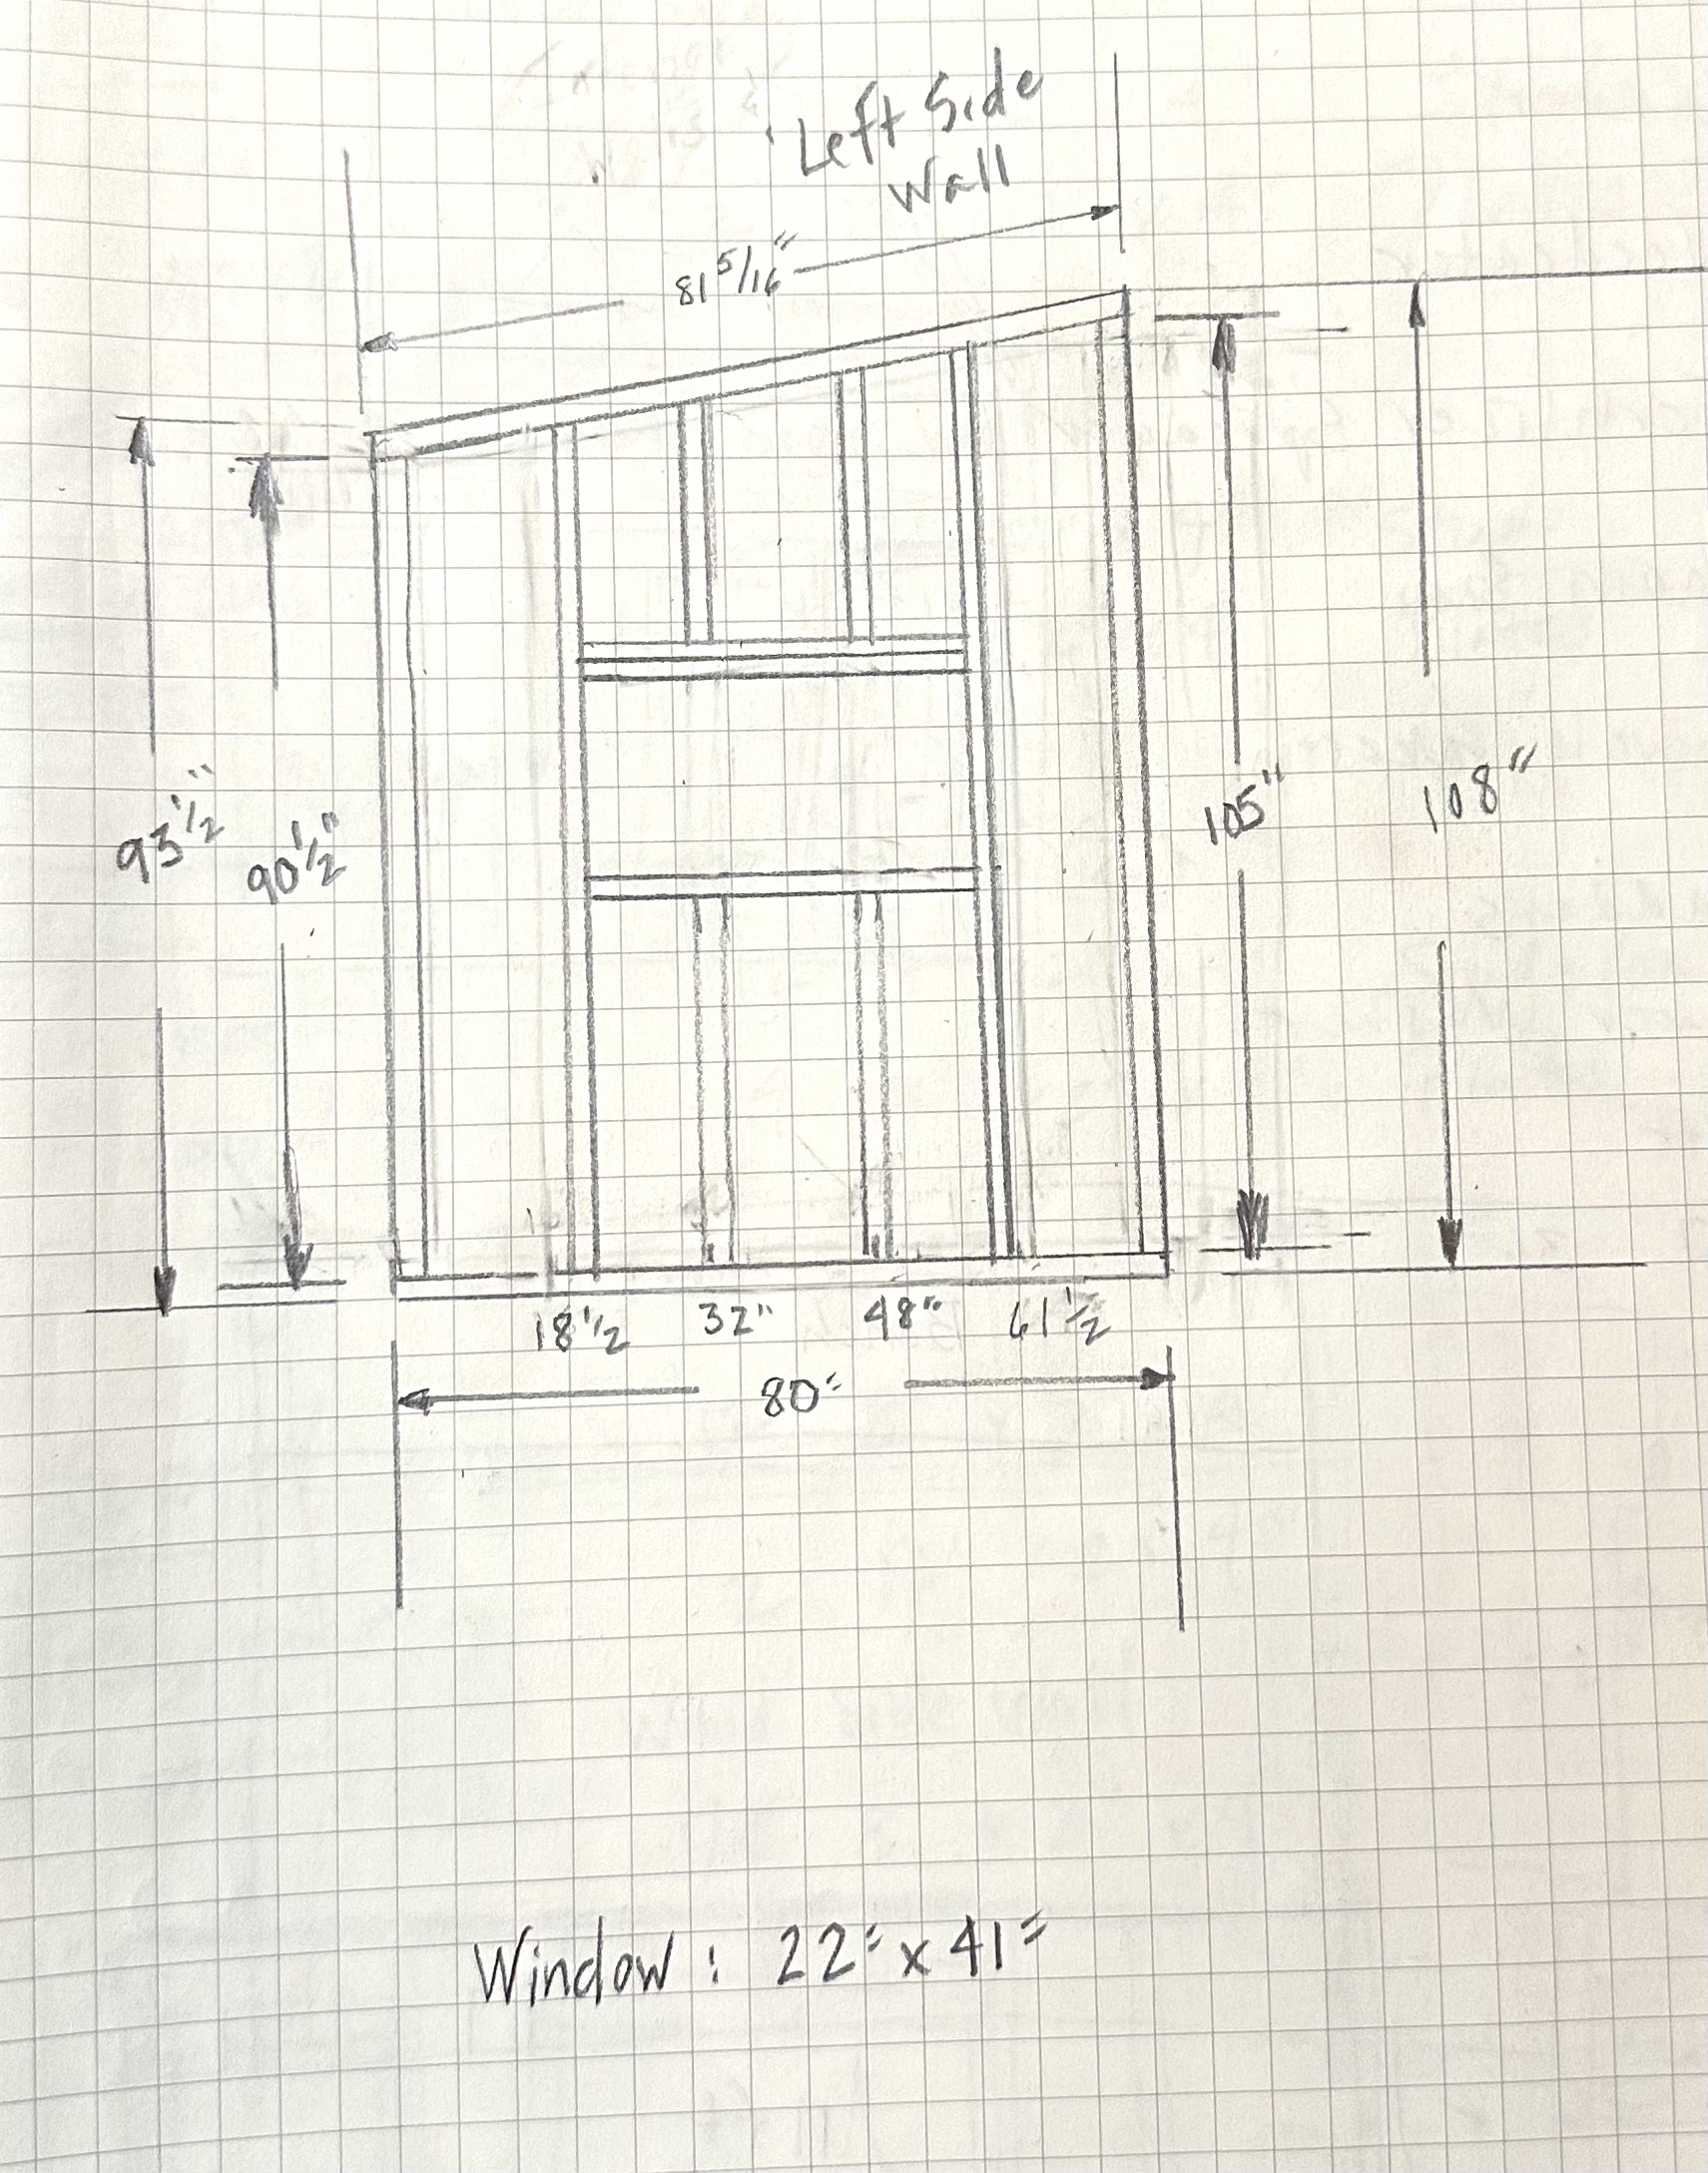
I planned to build these walls lying on the floor, as well. My original sketch did not include windows—I planned to frame all three walls the same way. But I drew a window in at the last minute at Katie’s request (and against Rich’s objections).
Soorry, Rich, but Katie needed a place to put that window box!
Materials to build all three walls
15 2 x 4 x 10’ boards
12 2 x 4 x 8’ boards
2 sheets reverse board and batten plywood siding (interior walls for the shop)
2 1 x 4 x 8’ boards (window facing
1 22” x 41” window
Interior Walls Plan
Left Side Wall Plan
DIY Shed Designing the Build
Step 5: The Roof System
The roof. The roof. Oh, the roof.
I am writing this post 3 months after we built it, and I can tell you that the roof was a huge amount of work, and that we learned a lot about building a roof. We accomplished it together over a long weekend (and big sister did NOT get on the roof!)
We watched lots of videos on Andrew Throne’s YouTube Channel to guide us. I really like his stuff and I encourage you to check out his channel. Oh, and we bought more tools to make the job easier. (And funner. I love field trips to Menards!)
I’ll show you how we built the roof when I post the videos we made each day during the build. (I’ll also talk about how we should have built it, knowing what we now know about building a roo!)


Materials
12 2 x 4 x 8’
3 sheets OSB sheathing
1 roll underlayment
3 bundles shingles
2 roof rakes
1 drip edge
1 ridge piece
Staples and staple gun
Roofing nails and nail gun
tubes of roofing cement
Plan
Watch Andrew Throne videos and figure it out as we go!
DIY Shed Designing the Build
Step 6: The Doors
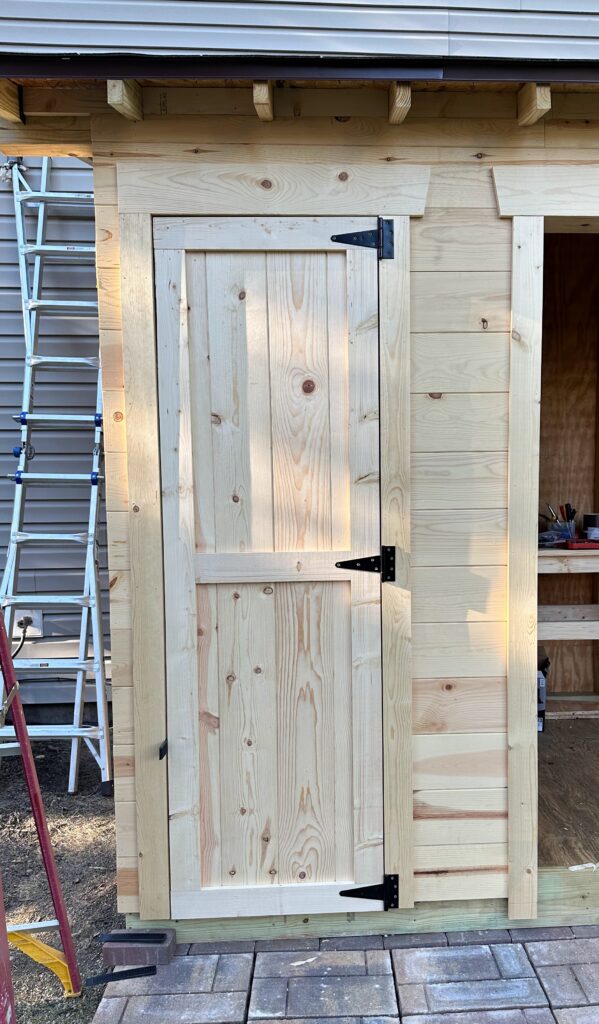
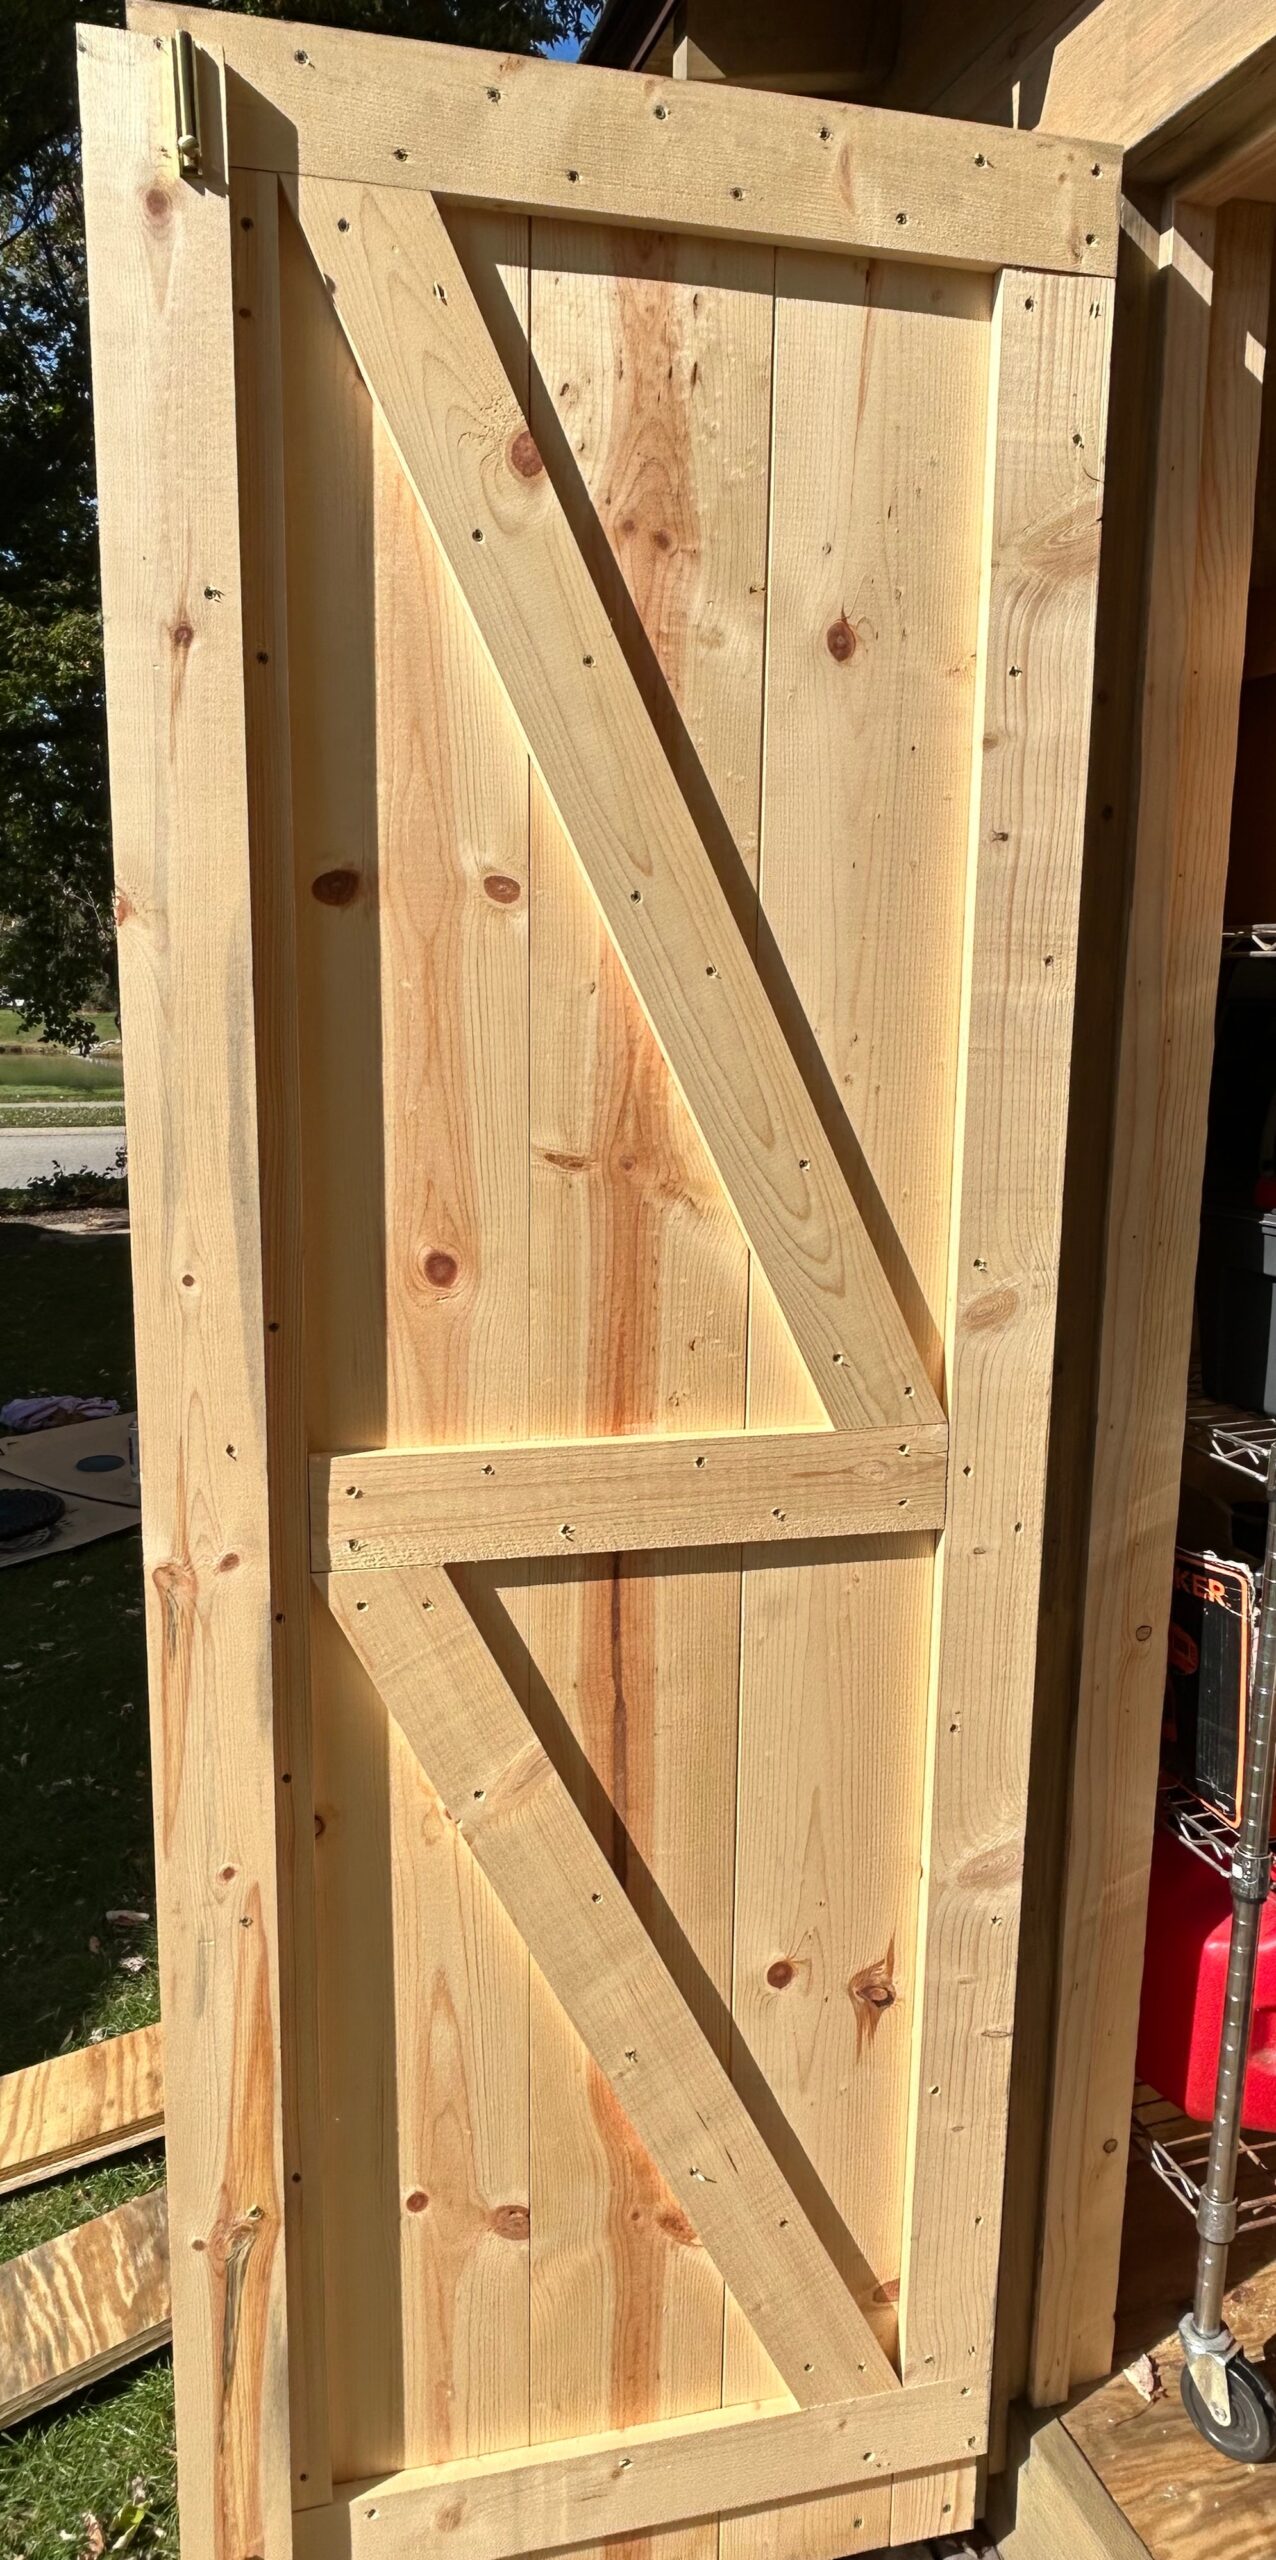
These we would build out of the same tongue and groove siding we planned to use to side the shed, as I did for my shed. Again, we would build them lying flat—this time on the garage floor.
We planned to build the doors so they would extend a few inches below the level of the floor, even with the bottom of the siding. The yard tools finished door opening was 80” x 26”, so that door would be built 25 ¾” wide and about 82 ½” tall. The shop door opening was 80” x 56”, so those doors would be built to be 27 ¾” wide and about 83 ½” tall.
Pieces of tongue and groove would be cut to length, the tongue and groove trimmed off the sides to the correct width, then locked in place, and glued and screwed together.
We would use 1 x 4 bracing to hold them together all the way around with diagonal bracing on the backside going from the hinge side up to the center or the top. Doors would be screwed together with Liquid Nails and two sizes of screws, fastening the bracing to the siding so the screws don’t show from the front side.
Each door would be hung with 3 surface-mounted barn door hinges and a gate latch to hold the doors closed.
Materials
12 1” x 8” x 8’ #2 and better pine tongue and groove siding
20 1” x 4” x 8’ pine boards
tubes Liquid Nails
Screws
Screws
12 Hinges
2 Latches
Siding & Trim
Siding will be 1” x 8” pine tongue and groove siding #2 or better.
Trim will be 1” x 4” pine; 8’ and 10’ lengths
Trim above the doors and windows will be 1″ x 6″ pine
What’s Next?
So, this was the plan I made in advance of the build.
We scheduled the project to begin when Michael and I took Trent back to Purdue in mid-August. After dropping him off at school, Rich, Katie, Mike and I went to Lowes to pick up lumber, supplies, and tools, and I got started on the foundation that weekend.
My next posts in this series will chronical the three weeks we spent constructing the shed, so check back soon!
I hope this has been helpful to all you would-be shed builders! #LosetheFear!
