My Garden Shed
Every project (I think) begins with a problem, and proceeds toward a solution that births a design. So began the design for my own beautiful little garden shed, which I built in 2019.
This shed design evolved…I didn’t see it coming.
This is the story of its evolution.
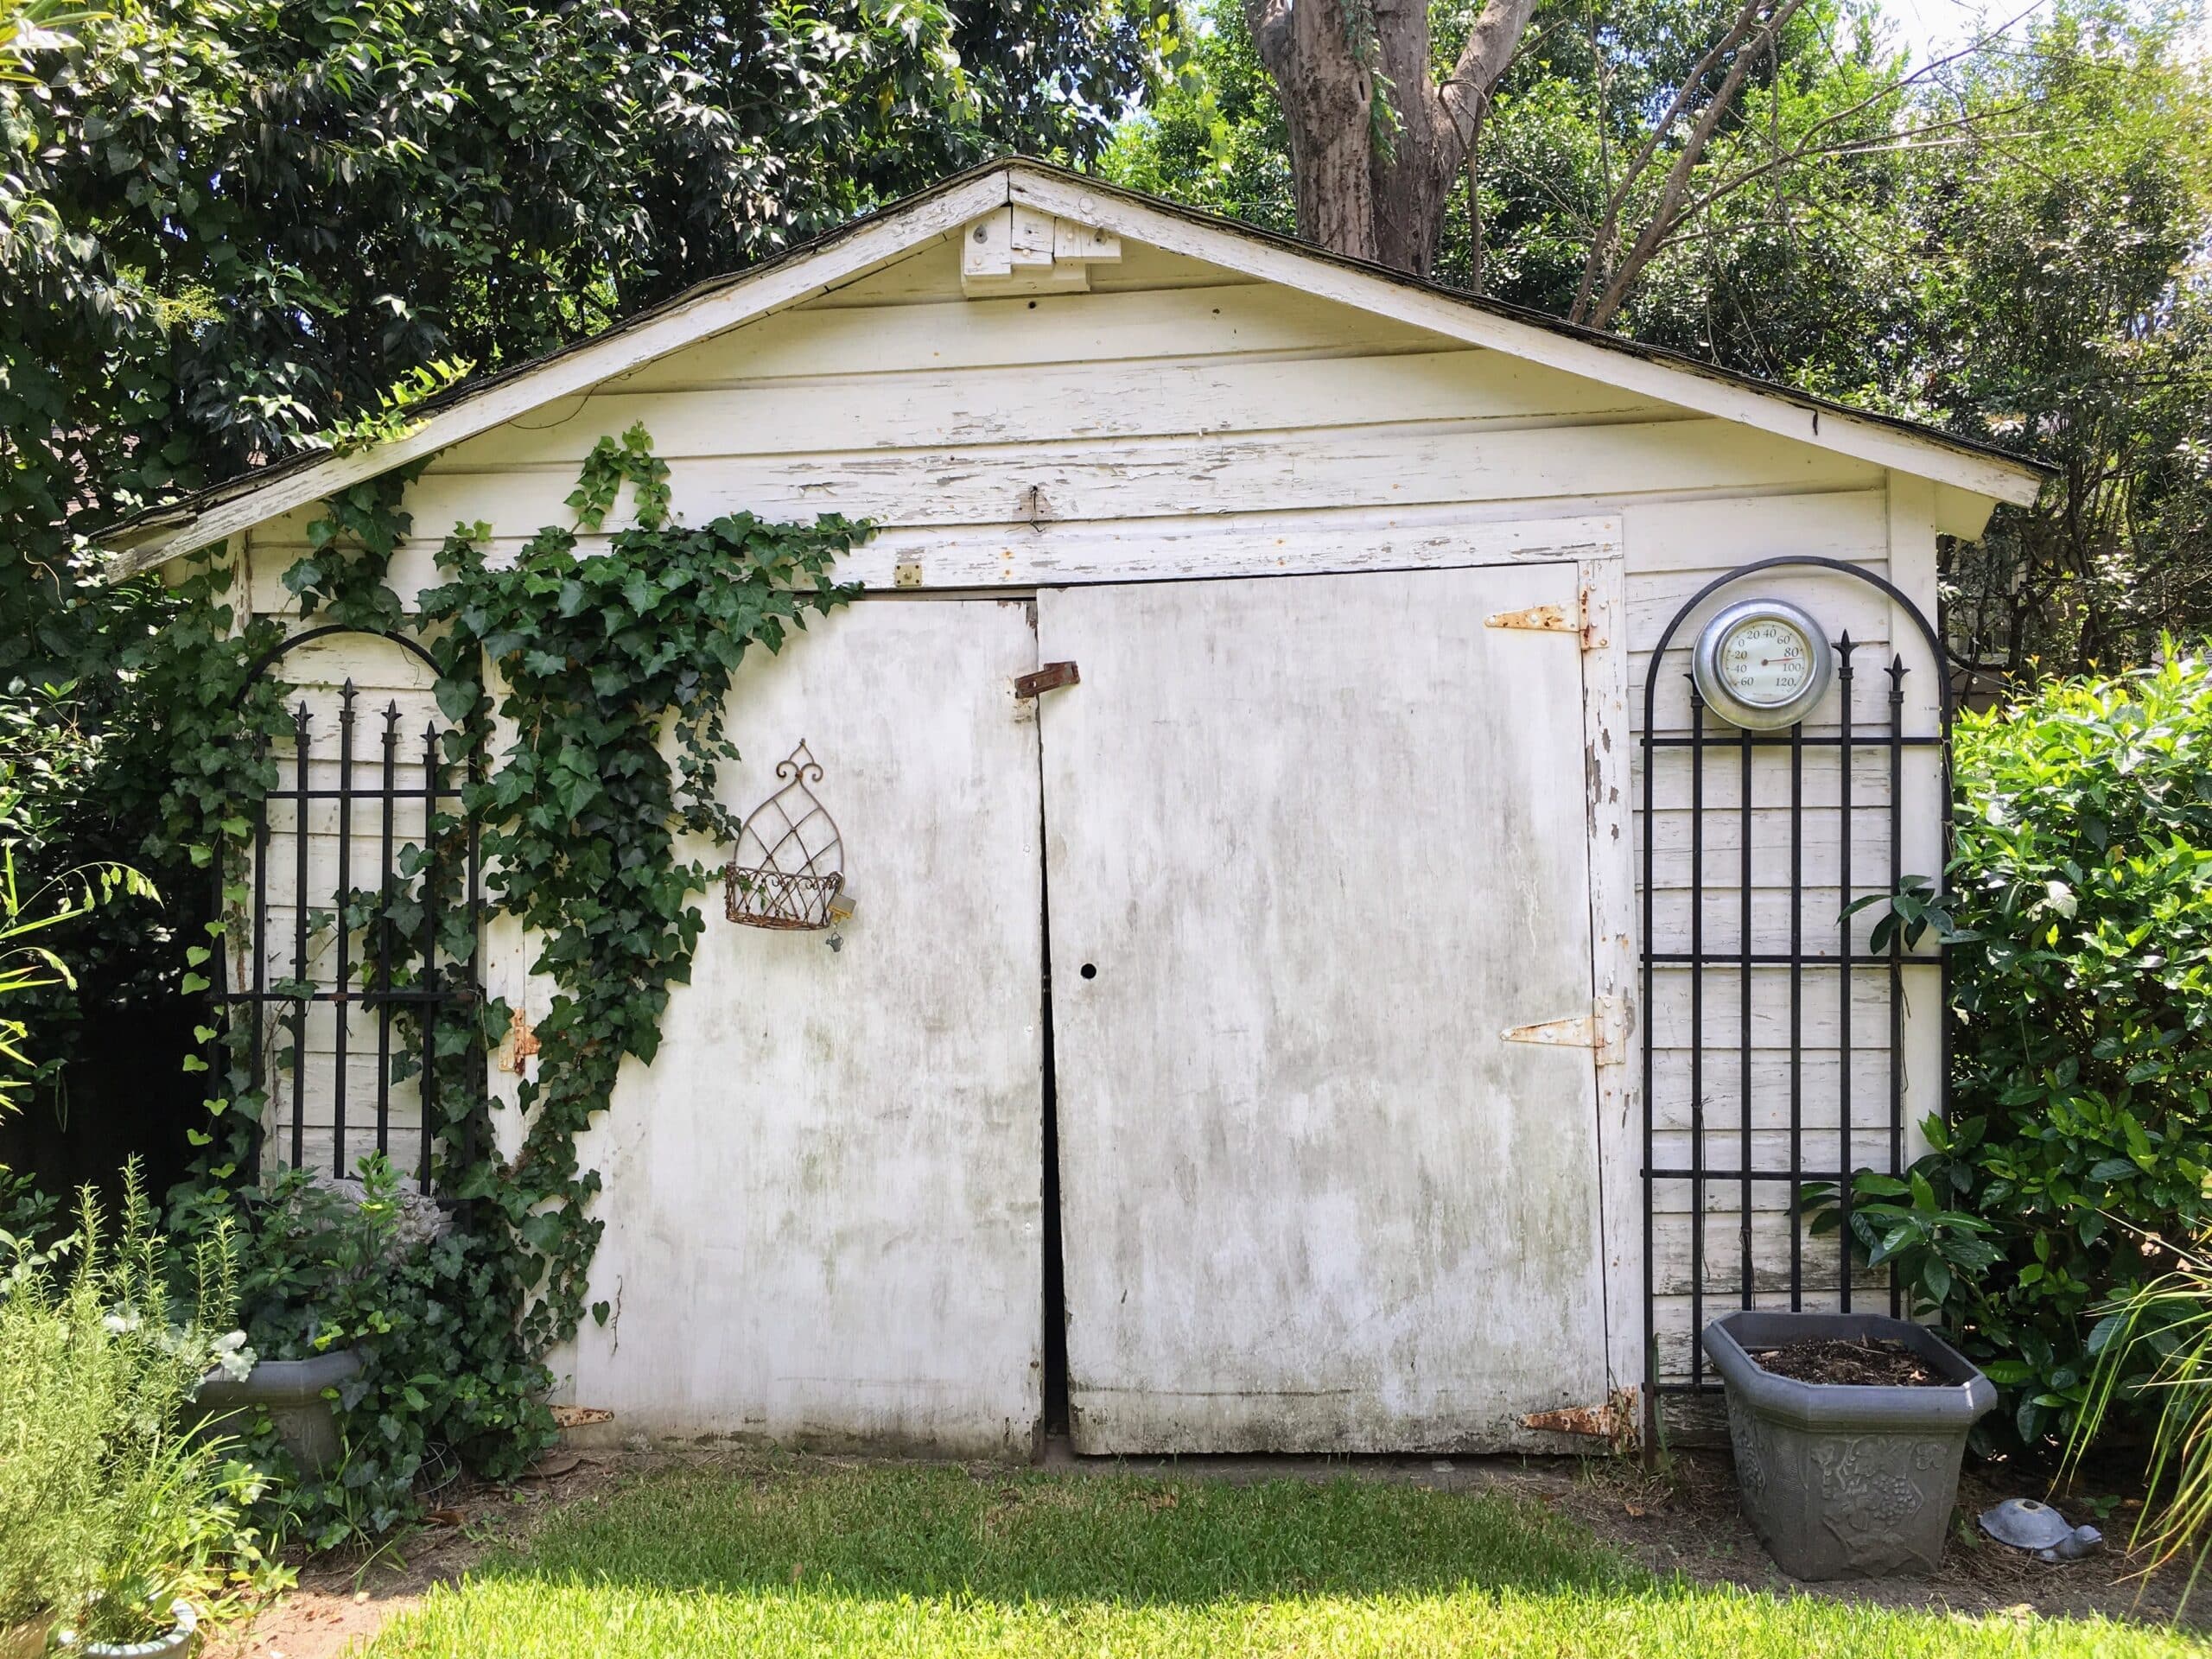
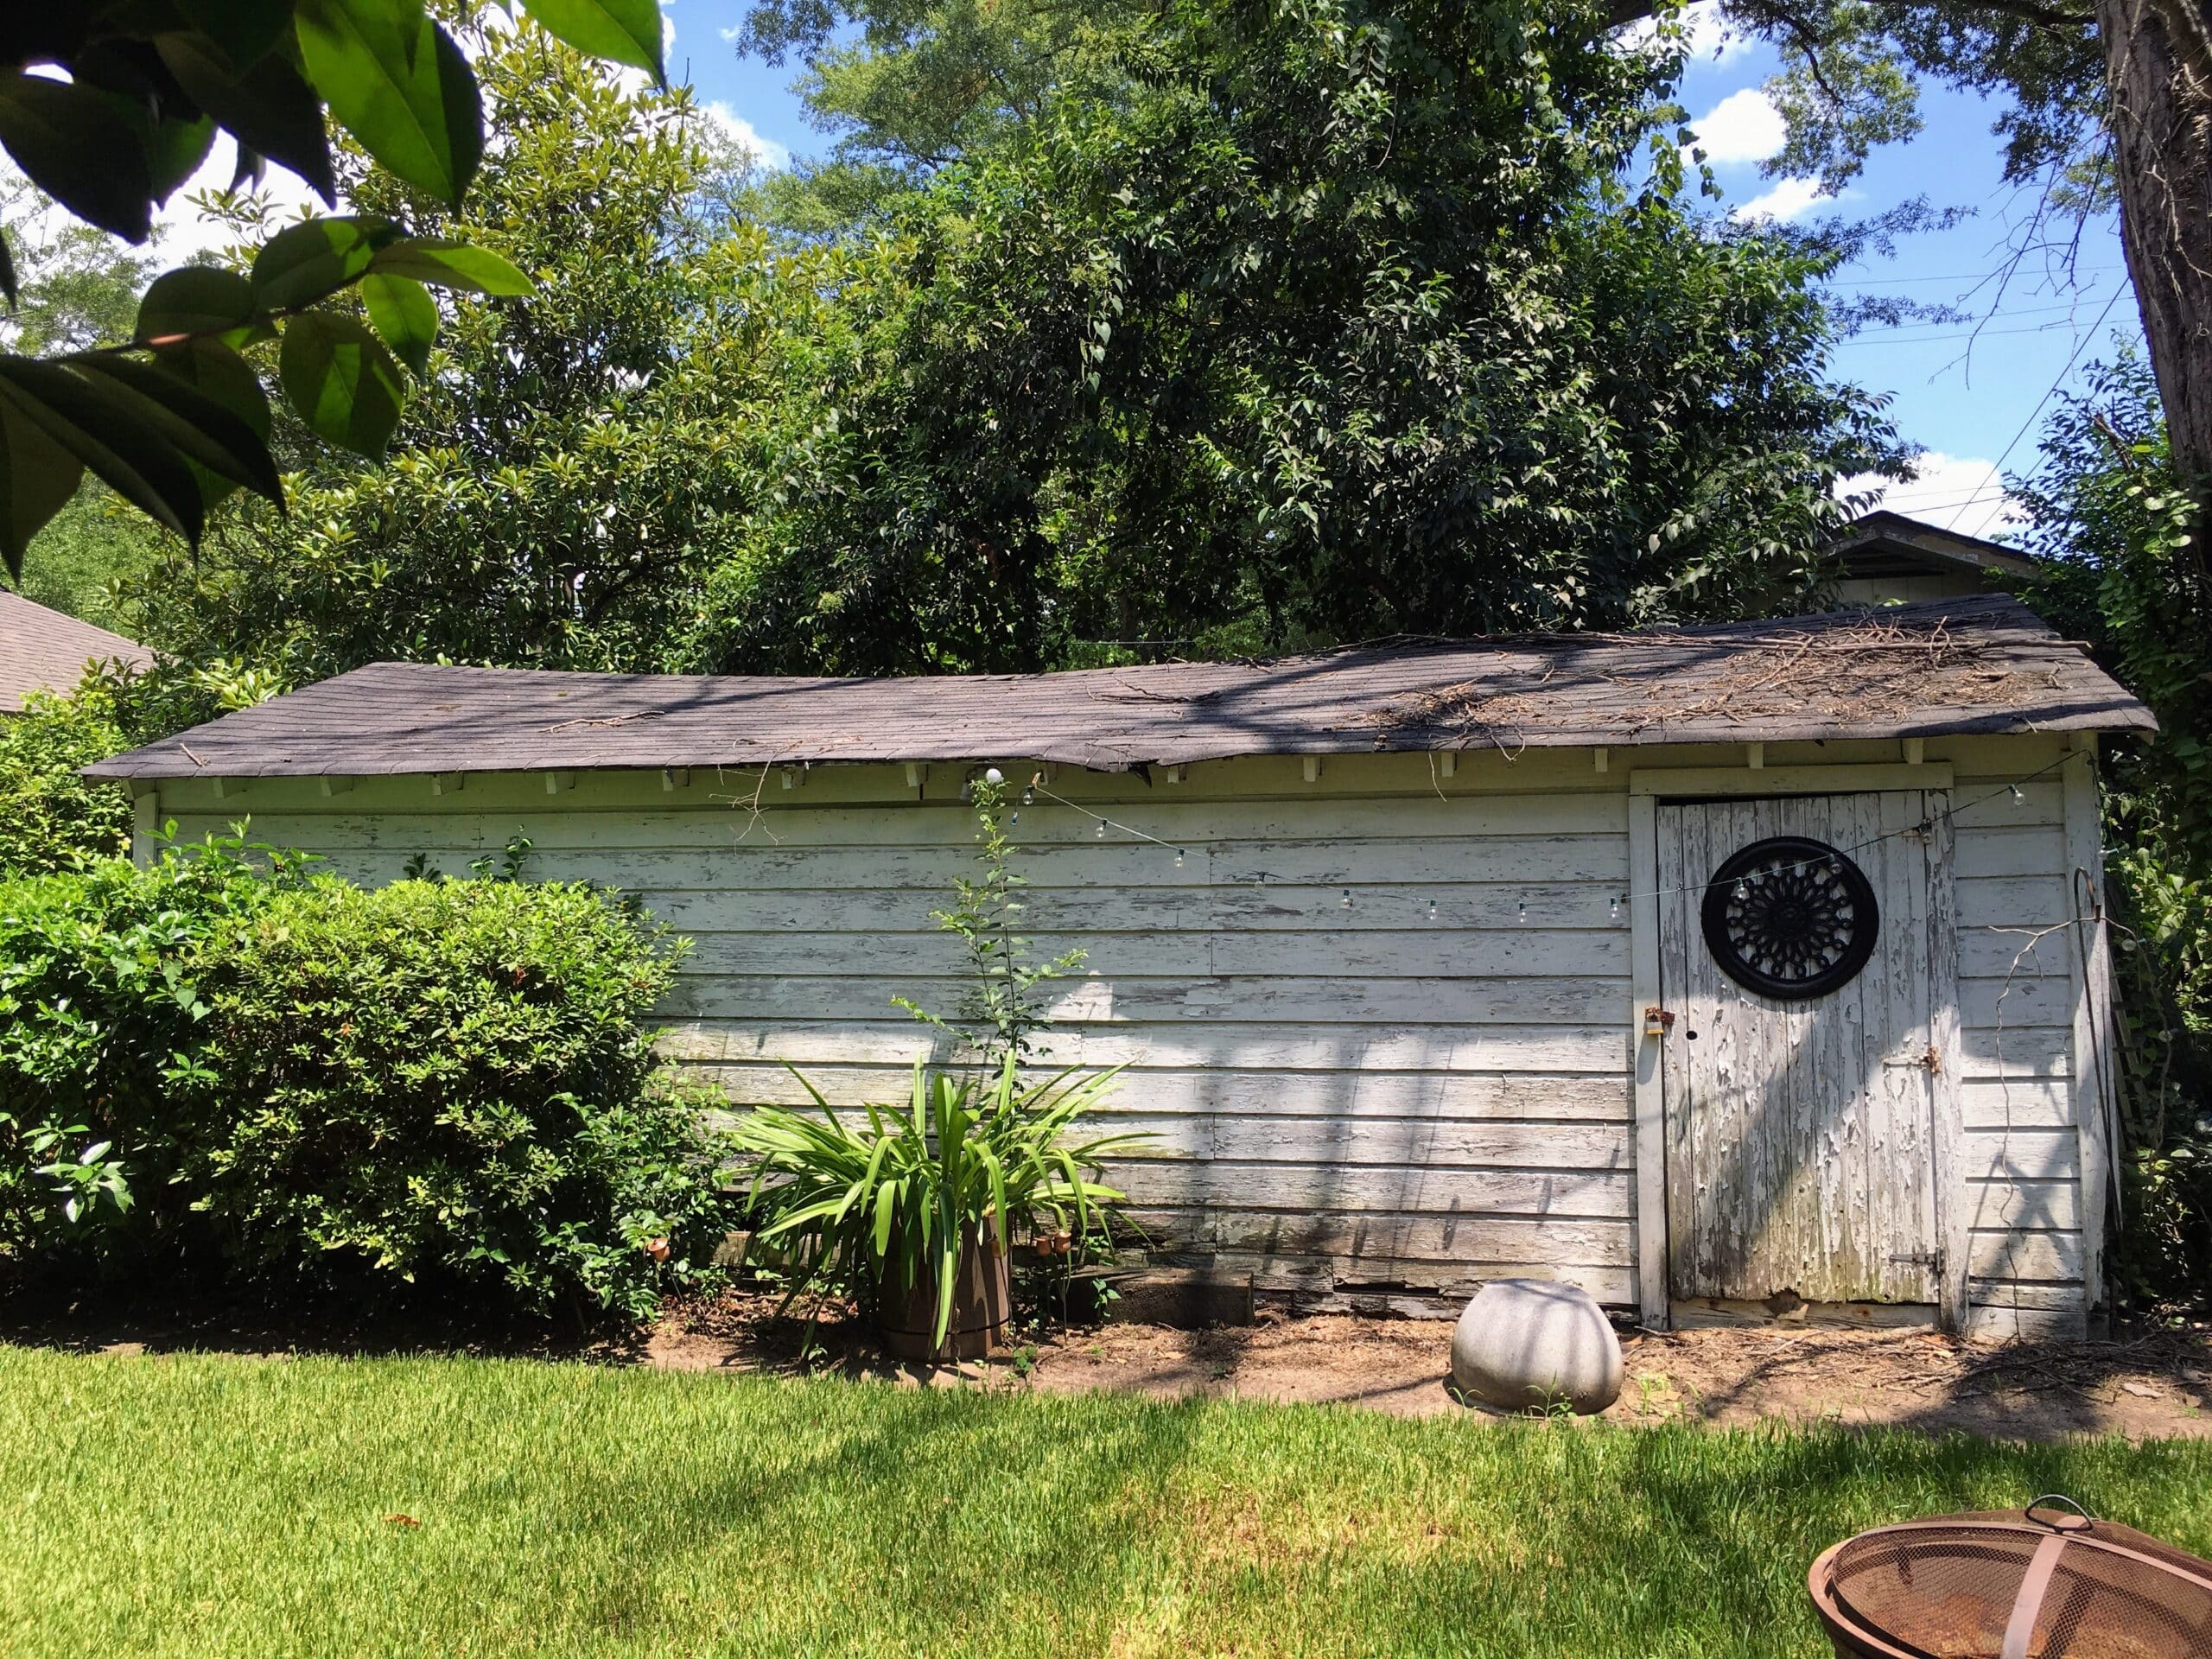
2016 Swayback roof on the garage
Chapter 1: A Little History
We had Some Problems!
In 2016, we were dealing with a several big problems.
First, we had a dilapidated 1940s garage with a roof that had caved in for the second time. (We were pretty sure the termites were holding hands to keep it standing.)
After the first cave-in, because we couldn’t afford to do anything much, our contractor and friend, Bruce, did a budget-friendly shore-up (and gave us a two-year warranty which we thought was pretty swell). The shore-up lasted exactly two years before the roof began caving in again. (Apparently some of the termites stopped holding hands.)
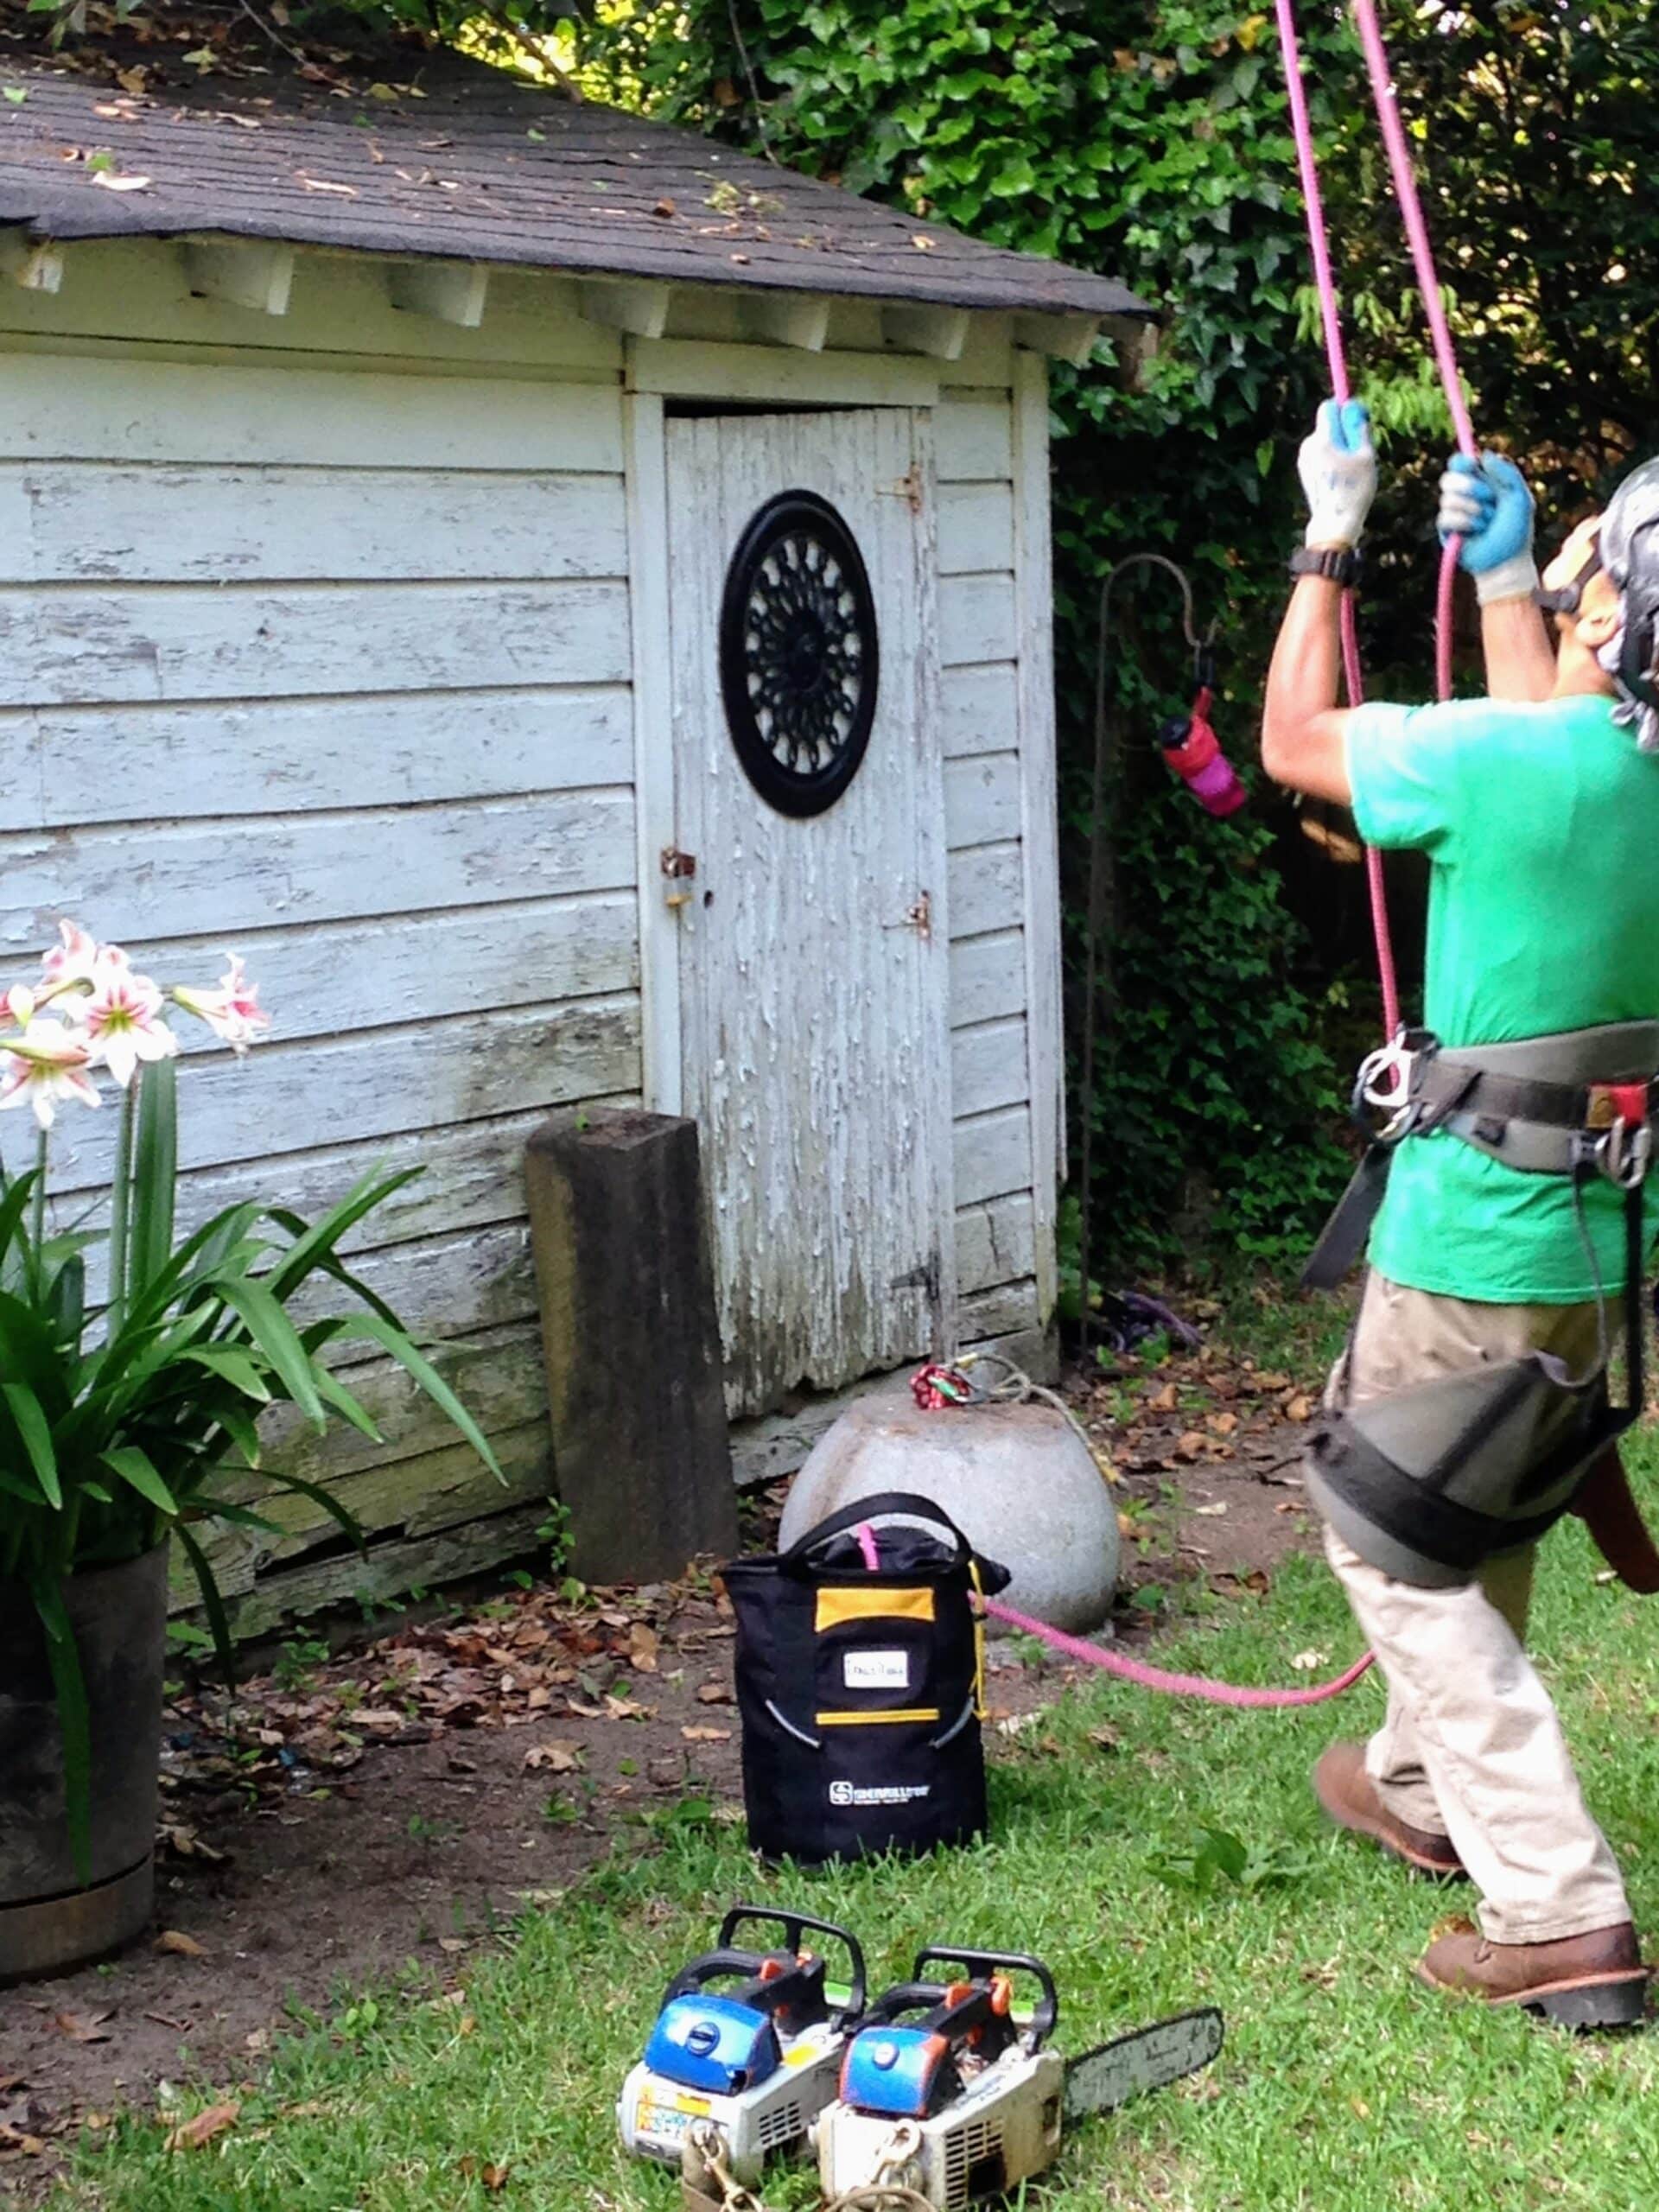
At the same time as the second cave-in, we had a 90-foot high, suddenly-dead, over-mature hackberry tree. By suddenly-dead, I still cannot believe how quickly it died.
We had had the tree climbed, trimmed, and treated in 2014, the same year Bruce shored up the garage. I guess the tree and the garage signed some sort of pact to go out at the same time, because within a month of the garage roof caving in for the second time, the tree shed its leaves and just…died. Like one week it seemed fine, and two weeks later it was bare and dead.
It was weird.
So. caved-in garage, a huge dead tree, a jungle of seriously overgrown camellias and redbuds, and numerous trash shrubs planted by the birds.
We had to do something!
2014 Climbing, trimming, and treating the Hackberry tree
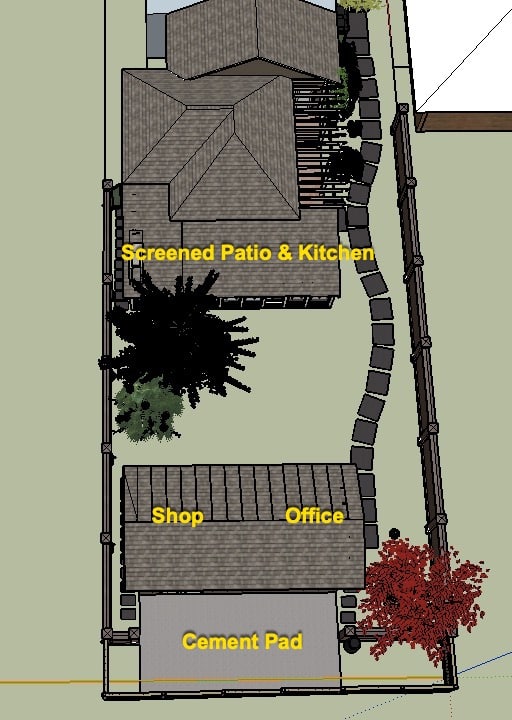
Design in Google Sketchup
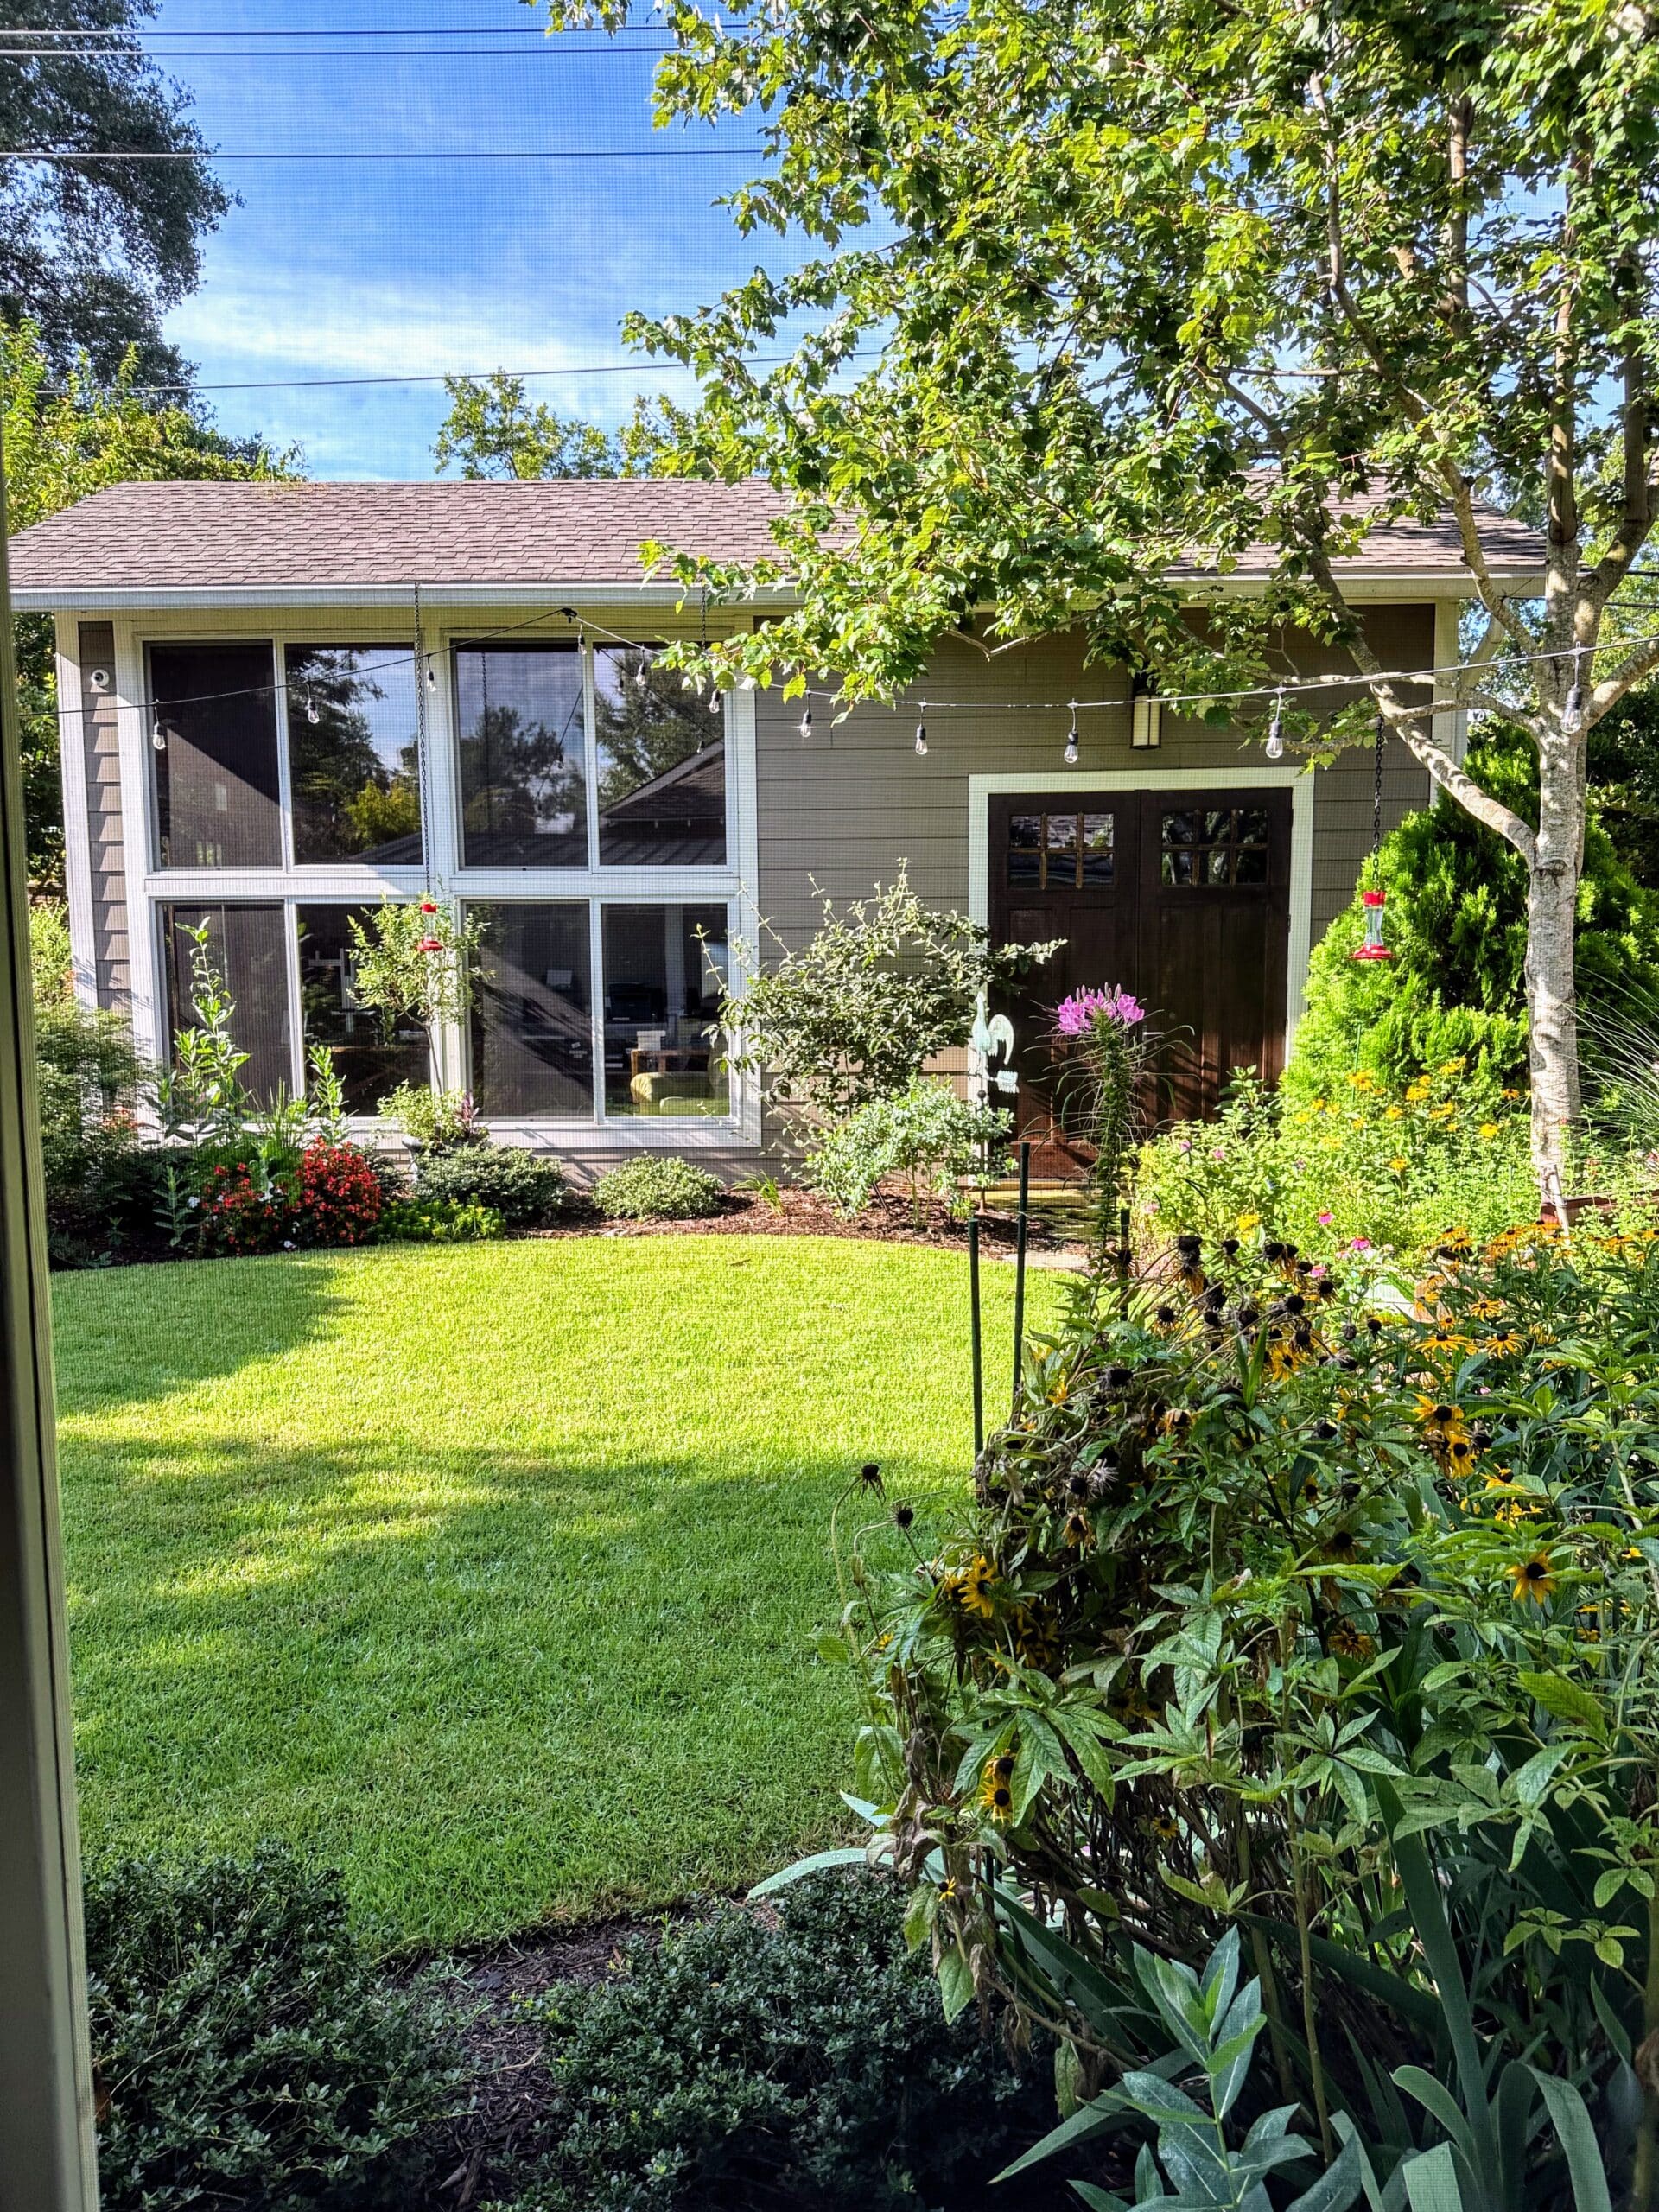
The Back Building: office on left and shop on right
Chapter 2: Envisioning Possibile Solutions
We were ready to dive in, because we had been talking about what we wanted for years. We wanted a backyard with a back building that would complete our home, and would address a number of needs we had identified.
- Since I was in business for myself, I needed dedicated office space.
- We had no storage for our tools, bikes, and seasonal stuff, so we needed a shed or shop for storage and to give us a space where we could work on projects.
- We wanted to be able to spend more time outside, but that was problematic for Michael who is a most exquisite mosquito magnet and cannot go outside without ALL the mosquitos attacking him. (I can be standing next to him and nope…they are all over him). So we needed a screened space.
- I wanted a garden, but since I was still working full time, I needed something that was manageable, i.e., a yard that could be kept looking good by a yard service so I could spend my time gardening on the weekends rather than cutting grass, raking leaves, and edging.
- I needed space to store my garden tools and pots and a bench for potting plants.
So we designed a building to hold an office for my business (which I would share with Michael) and a shop where we could do stuff. We designed a screened patio with an outdoor kitchen, and designed the backyard to have permanent plantings as well as places for me to garden.
All good.
Mike insisted that the shop had to be conditioned space. I argued. A lot. I thought that was over the top. But eventually, I relented, And I’m glad I did. It just made sense. We are in South Carolina, after all. So it’s great having conditioned space to work in.
Chapter 3: And Then…
And then.
(Here it comes.) The problem that needed a solution that birthed the design of my shed.
After a year and a half of construction, we were finally moving our tools out of storage and into our new shop, when Michael said something that kind of stopped my heart.
In his considered, logic-driven scientific (male) opinion, he didn’t think my dirty-grimy garden tools should be stored in our new, beautiful shop.
Wait. What. Really?
Really?
Well!
Eventually, after I got over feeling insulted (and maybe even crying a little), I thought about it, and had to admit he had a point. (That’s twice in this post, Michael!)
Shovels and rakes and implements of garden construction and destruction generally do not require conditioned space as power tools for a wood shop do. They need a place to stay dry and out of the elements, but not necessarily conditioned space. Right?
So, OK, thought me. I’ll design a dedicated garden shed…something that is just for me.
And I did. And I’m glad I did.
My garden shed has attracted a lot of attention from other gardeners who have seen it, and by the way, it is NOT a “she” shed. That is just dumb. It’s a non-gendered Garden Shed.
So let’s take a look at designing and building it.
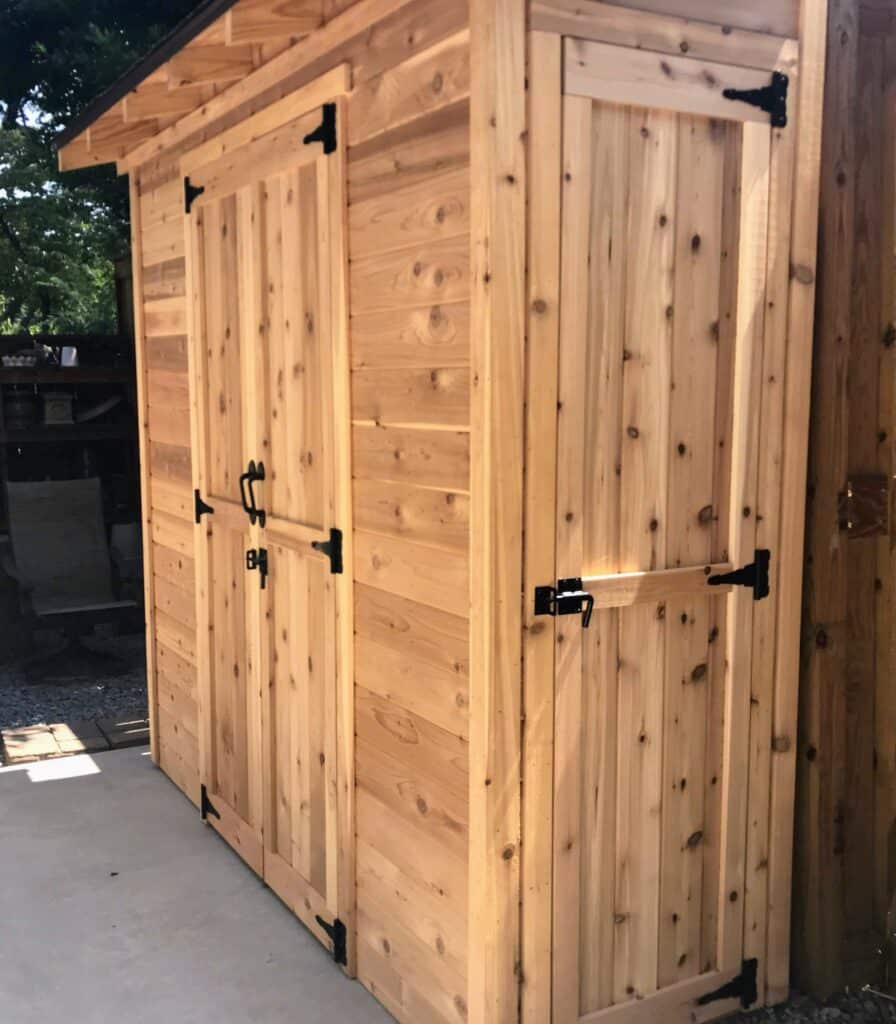
My Shed: Front View
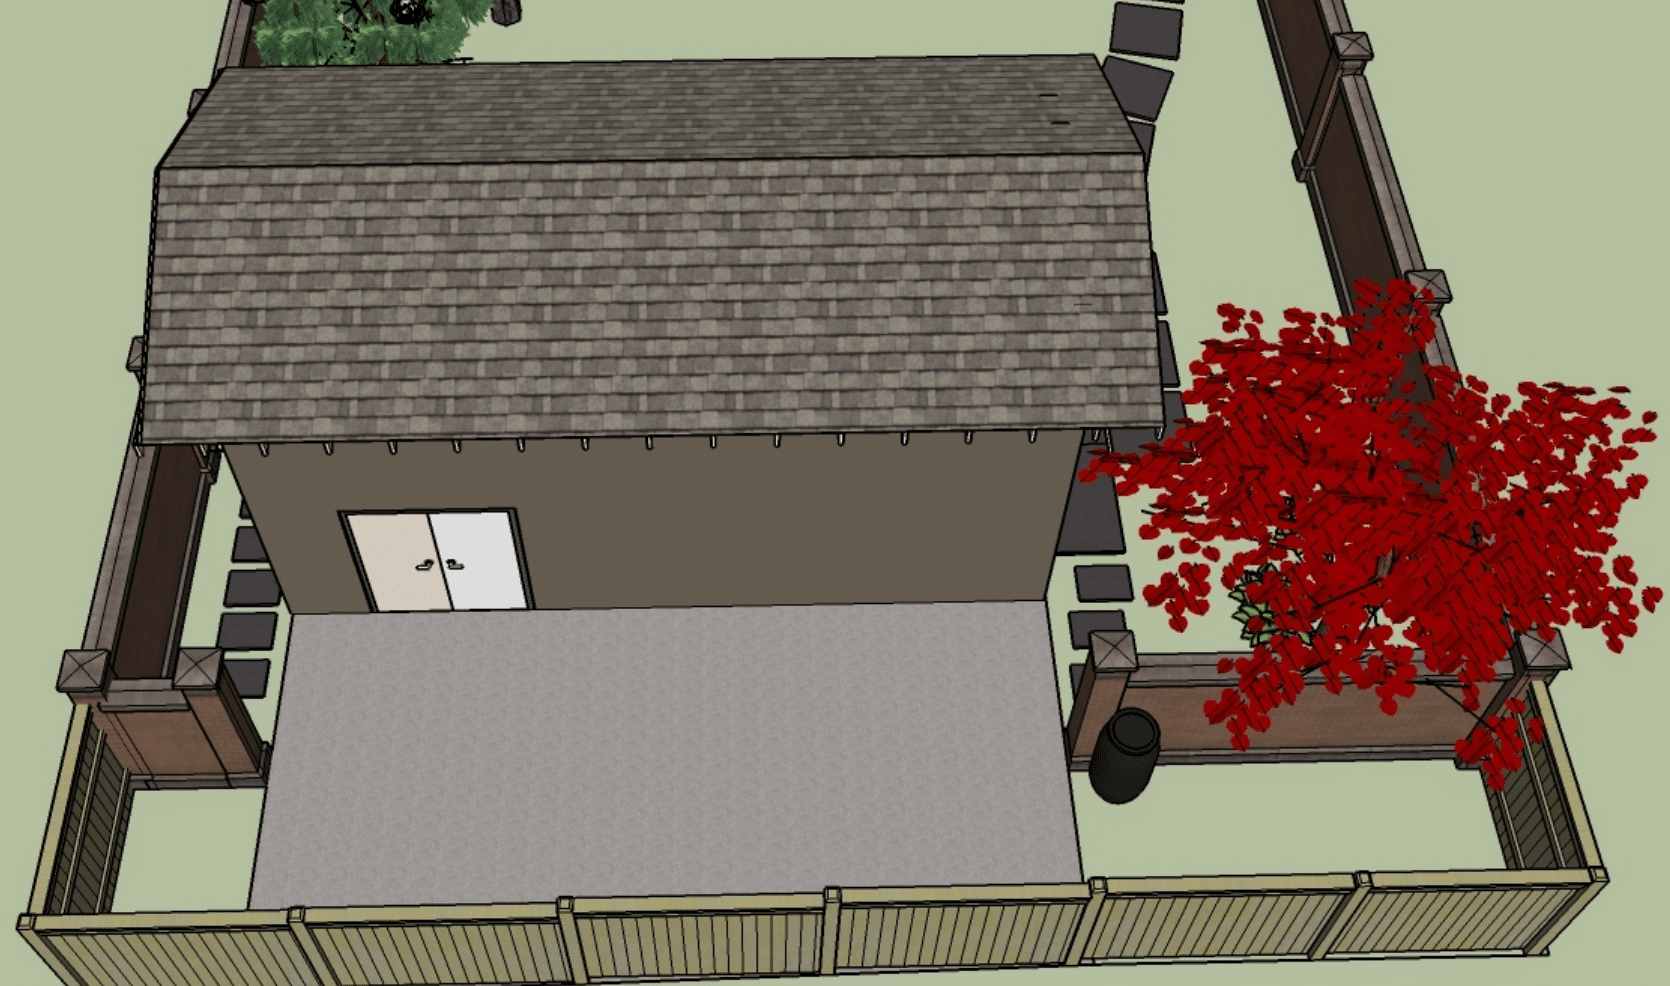
This view in Google Sketchup shows the site where I would put my shed.
Chapter 4: The Design and Designing the Build
To design my shed, I had several things to consider.
Site Considerations.
Size. Behind the back building is a cement slab surrounded on three sides by a gravel apron. Anything I would build would have to be sized so it didn’t impede the flow of traffic.
Sun. The back of the shop faces south, so in the summer, that space really warms up.I decided to situate my shed against the back fence and put a shed roof on it so that when I stood at my potting bench, the structure would shade me from the sun.
Function. I didn’t have the space for (nor did I need) a building I could step into, so I designed the shed as a potting bench with closets on either end for larger tools. The footprint is 92″ wide by 32″ deep.
Ergonomics. Since the potting bench would function like a kitchen counter, I designed it with a kick-space so I could stand at the bench and have room for my toes beneath.
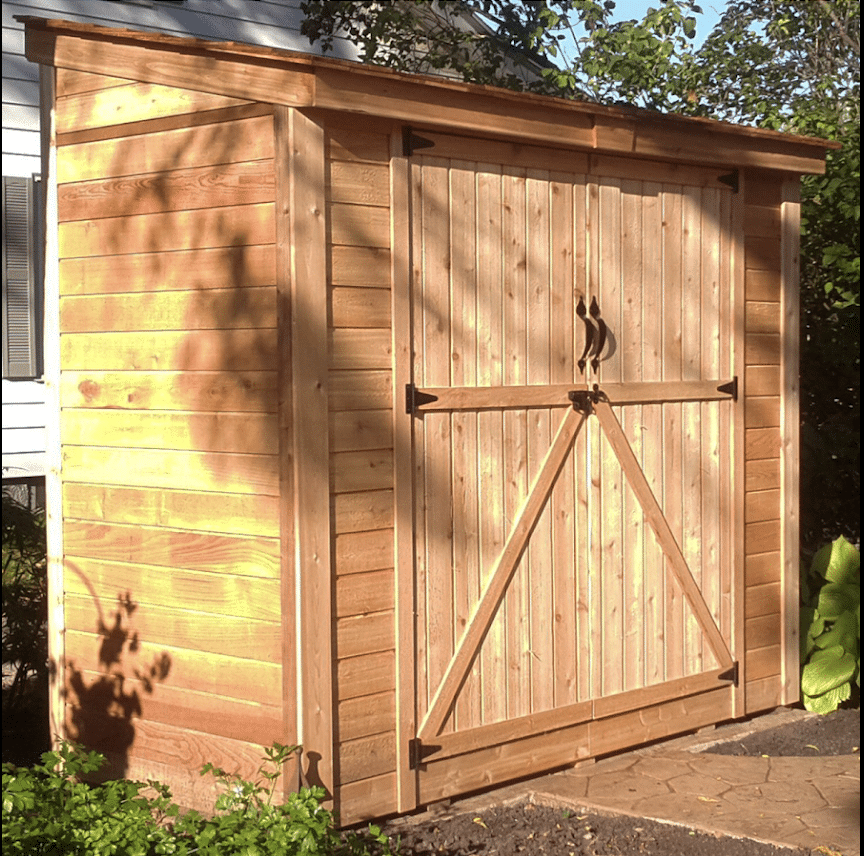
The shed idea I found on the web that inspired my design
Look and Feel–Materials
Like everyone else (I think) who designs things, I already had something in mind that I had seen and admired.
For example, when I designed our back building, I worked from two thoughts: 1) keeping a Craftsman feel to the office/shop building so it would blend with the house, and 2) a photograph I had seen of a carriage house someone had built. Those carriage doors on the building? Straight from that picture.
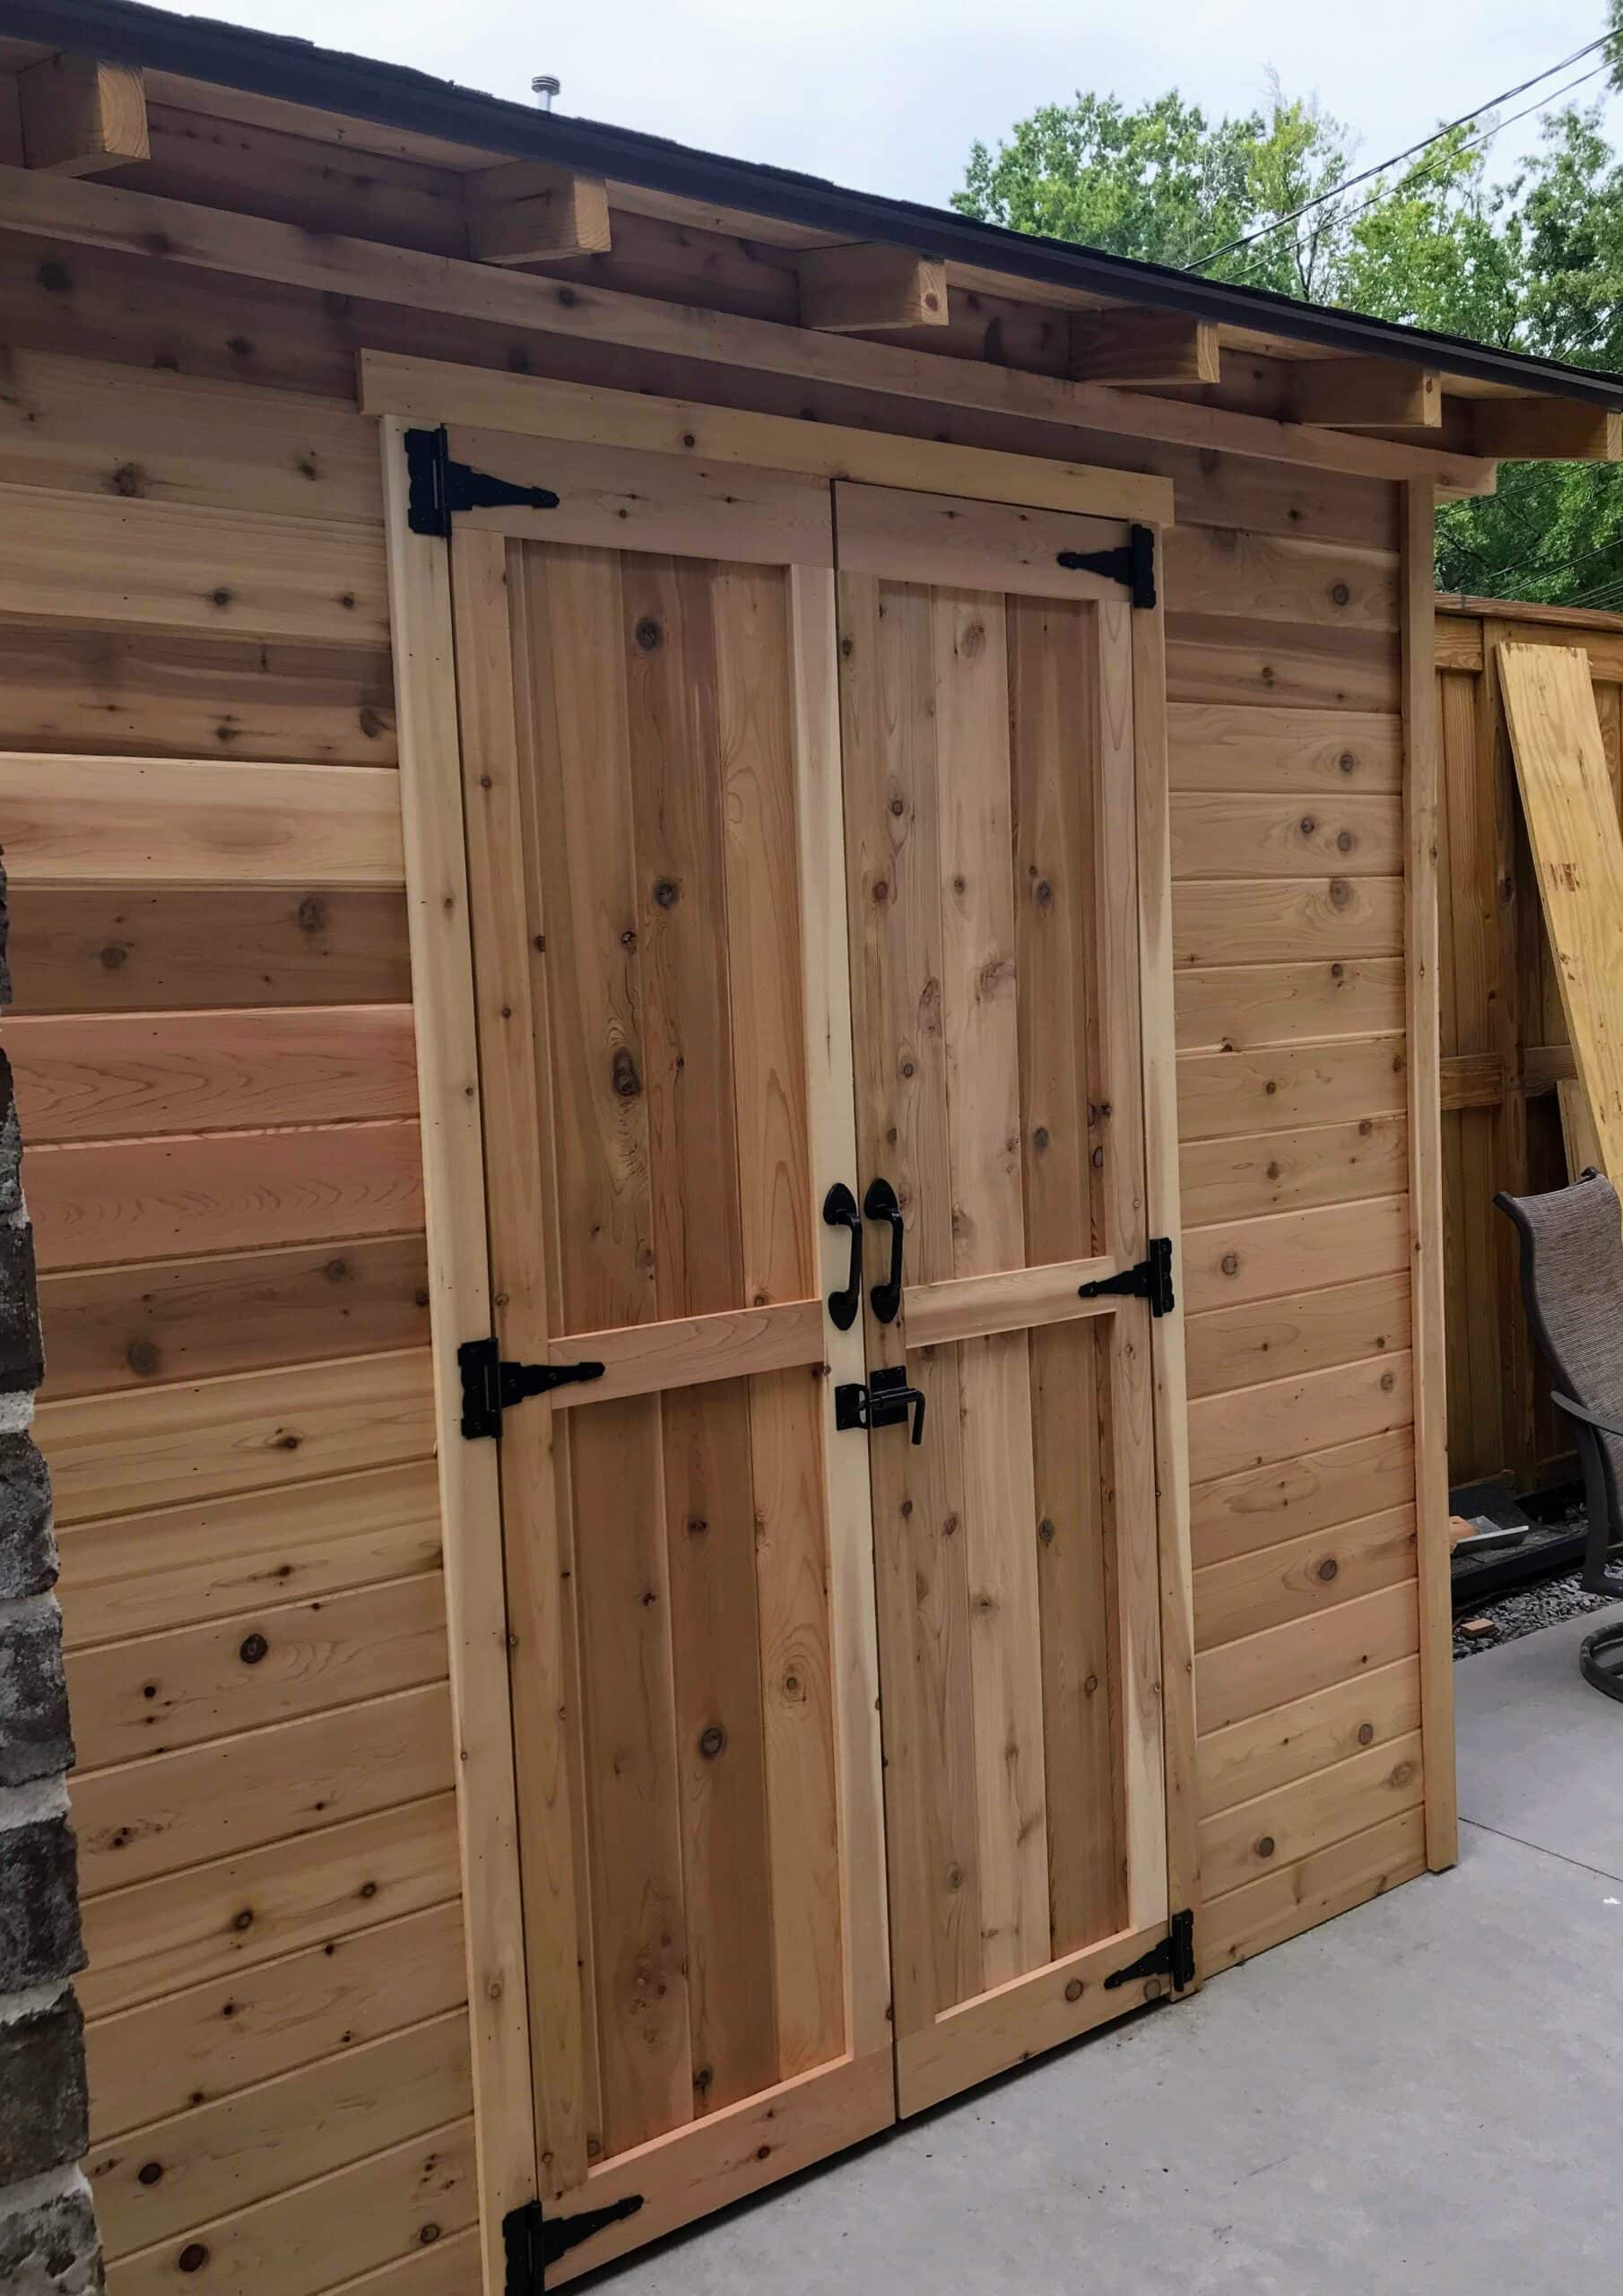
So it was for my shed. I looked all over the web for pictures of sheds I liked, and kept coming back over and over to a really organic design clad in tongue and groove siding with doors hand-made out of the same stuff (see the photo at left).
That was the look I wanted.
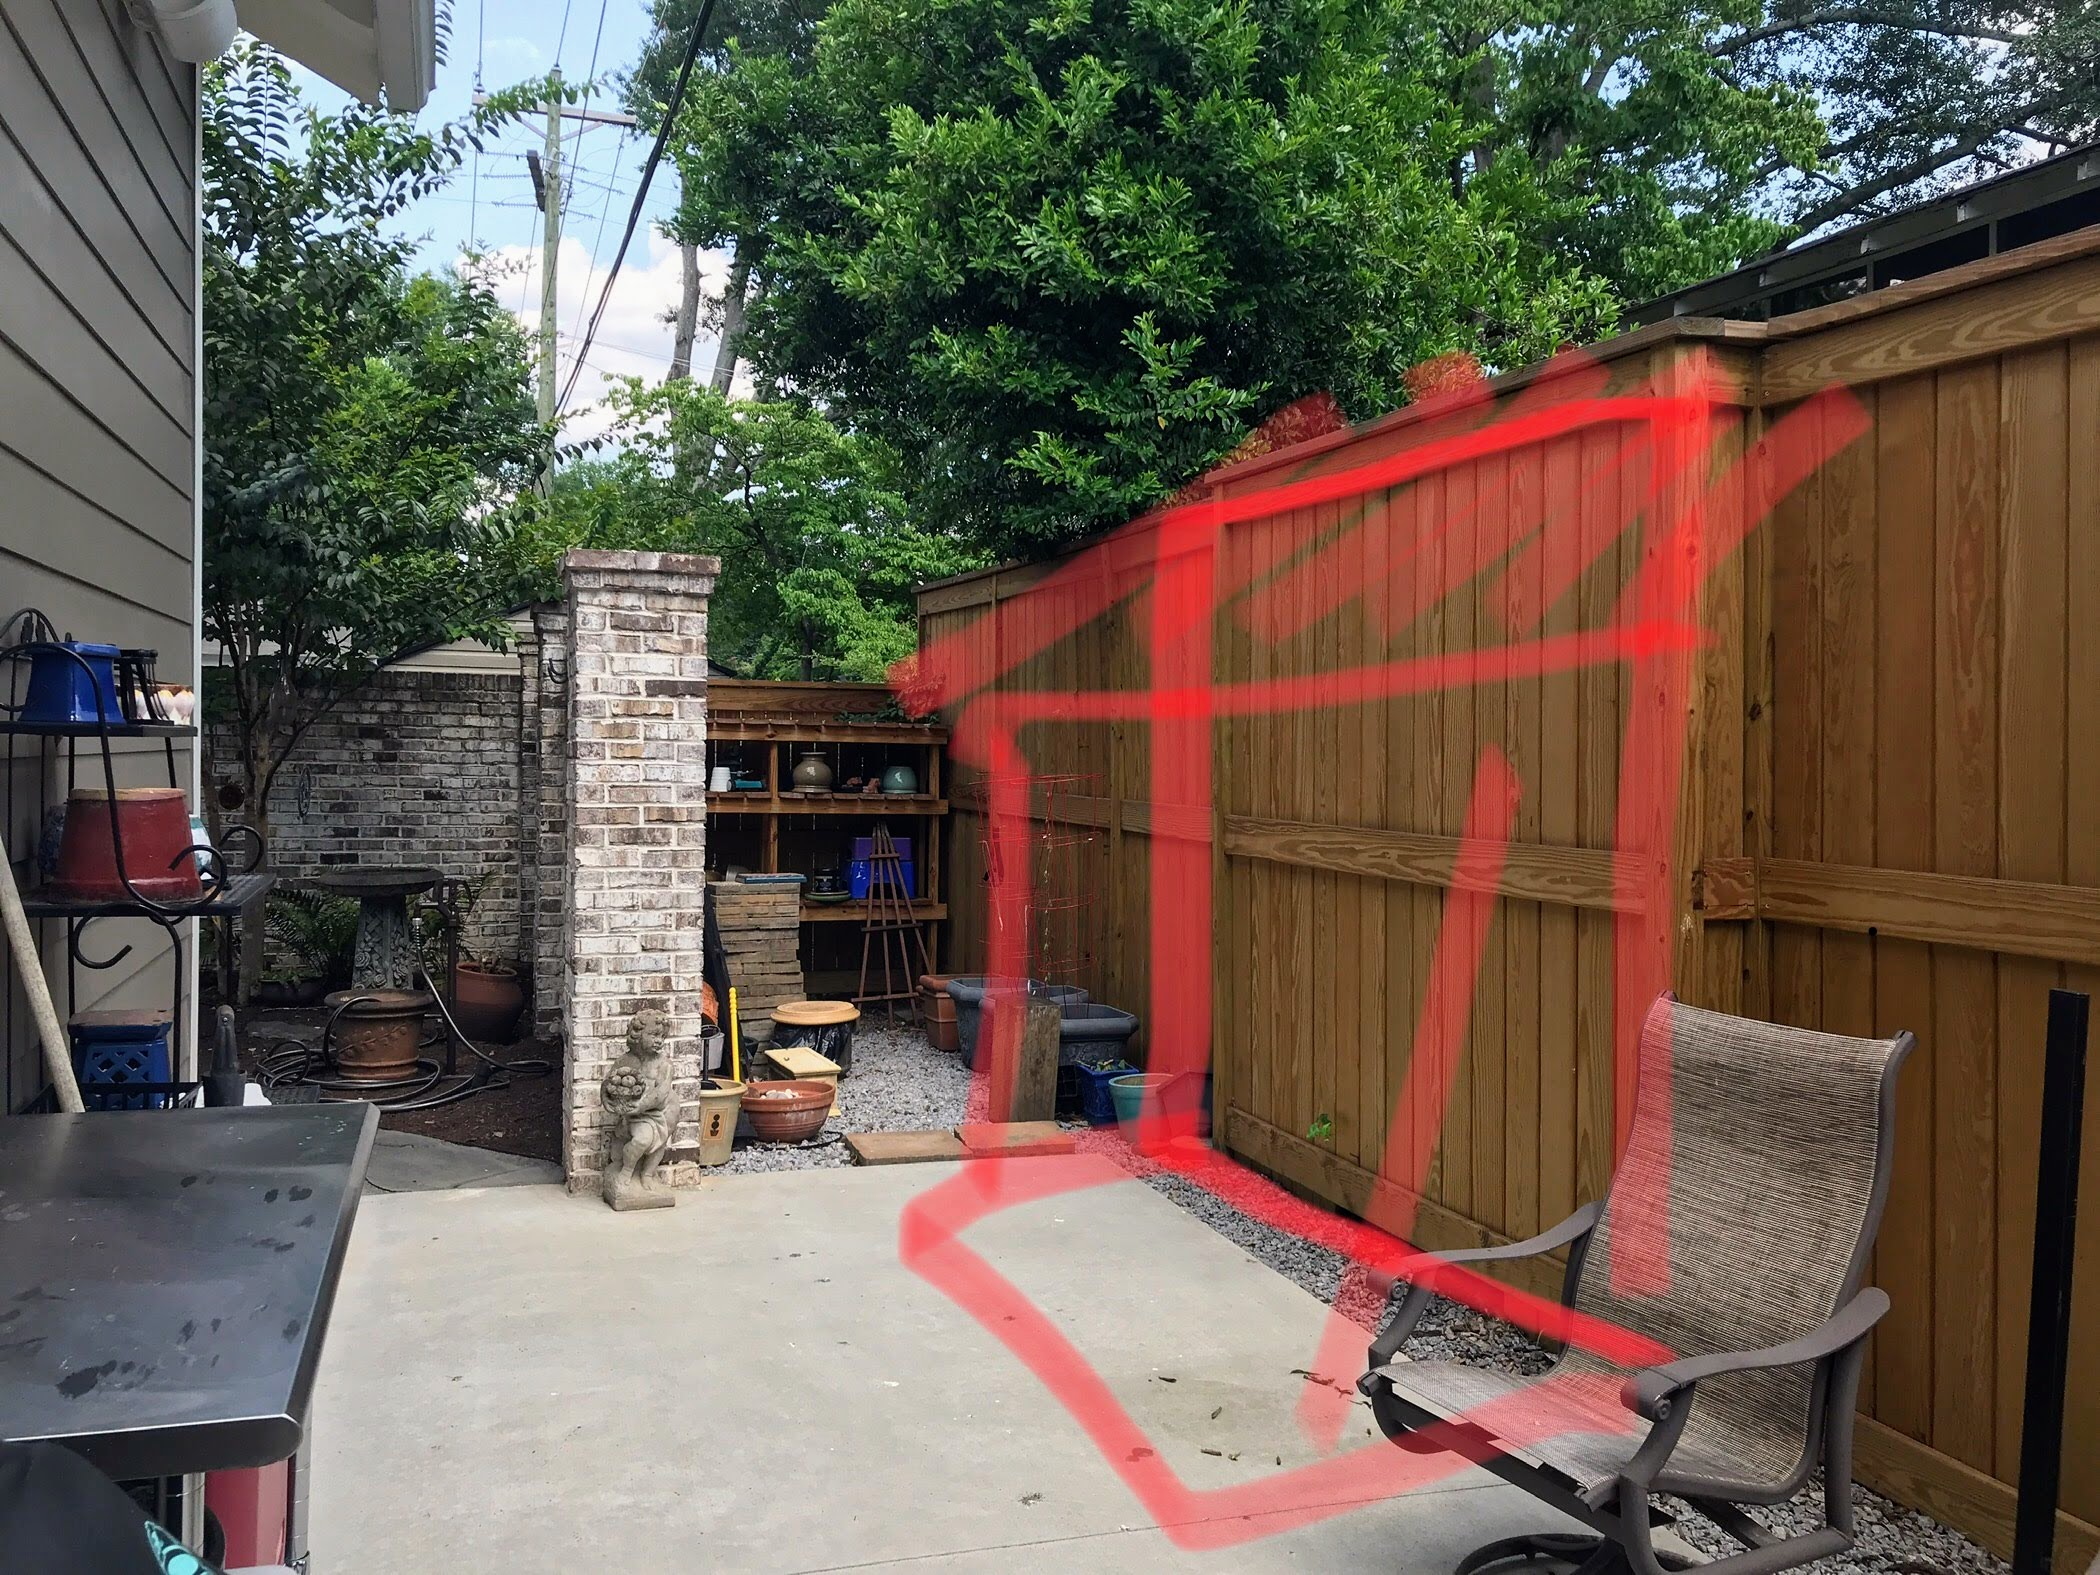
Situating the shed
Working with Space
After I determined the function and the look I was after, I sketched it out in my daily journal (a Moleskin notebook with graph paper) then laid out the footprint on the slab with boards so we could be sure it was correctly sized and situated.
A word about that. Maybe I am spatially challenged. but I can’t “see” 8′ unless you show me 8′. To see the outline of a garden, I lay out a hose and play with it until I get it the way I want. Then I paint the ground.
To situate the office/shop building, we laid out corner posts with string and moved them around until we got the building where we wanted it (given setback requirements).
To situate the shed and make sure I had the size right, I laid out boards to outline the whole thing with boards to divide the compartments. The picture at the left shows how I do this in 3 dimensions, drawing on a photo so I can visualize the use of space.
Don’t skip this step, people. Even if someone else is going to do your build, make sure you are happy with the size and space before the project starts.
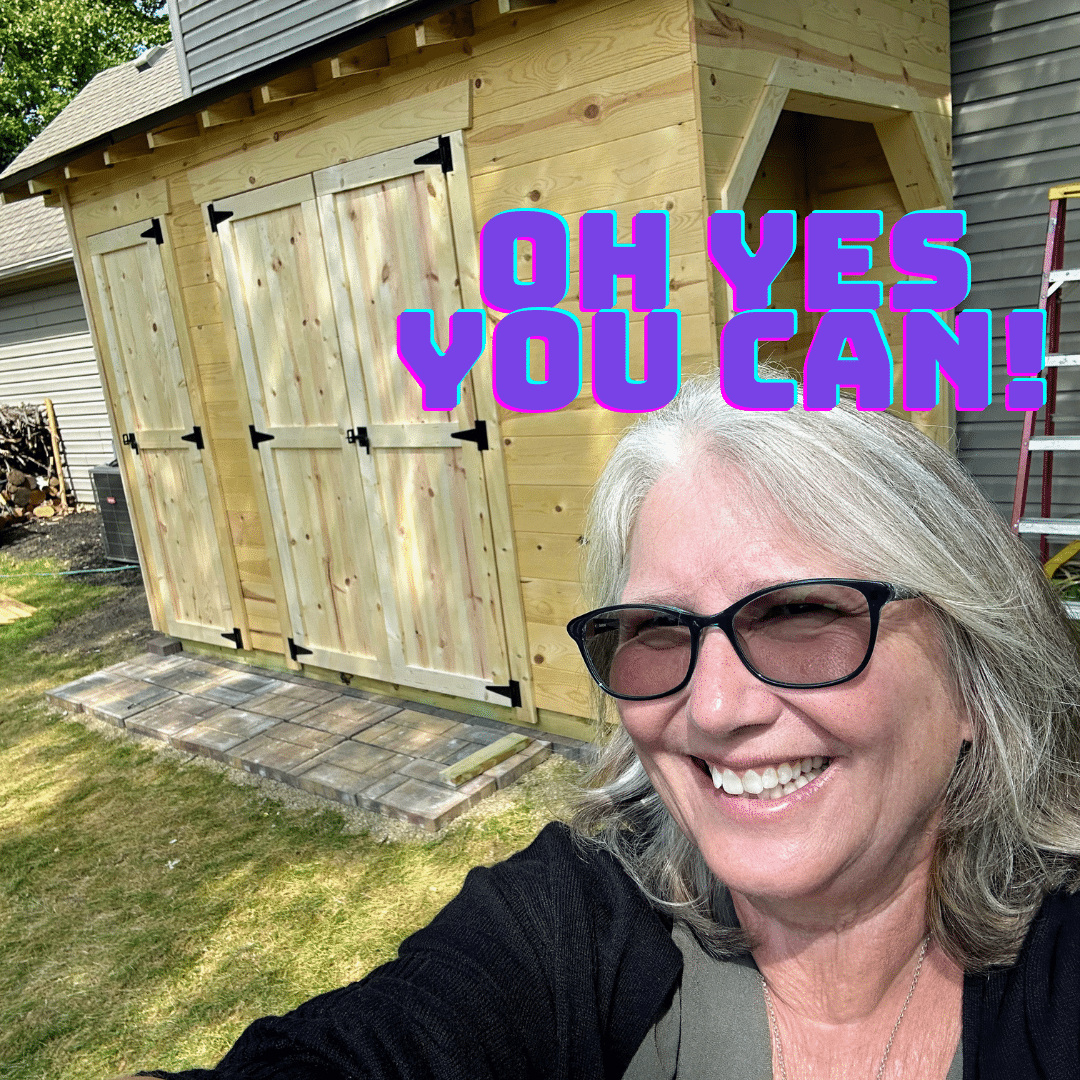
Oh Yes You Can!
So often, people look at a finished product (like my shed) and think or actually say, “I could never do that.”
Yes, you can. The whole reason I have decided to journal is to help people lose the fear about trying things. Like building sheds. And fountains. And planters. And stuff.
I am hopeful that by journaling about my own processes, you may find inspiration and the courage to tackle a project you have always dreamed about…because you can do this!
Designing the Build
It is one thing to come up with a concept; it is another to plan how to build it. I designed the back patio and the office shop building, but I didn’t build them. Bruce and his crew did the building, with much conferring about how to actually build what I had designed on paper.
This project was different. I would be the builder, so I had to work out the build.
I won’t go into a lot of detail here except to share a few basic things about building that you may already know:
- Walls are framed with 2″ x 4″ lumber spaced 16″ on center.
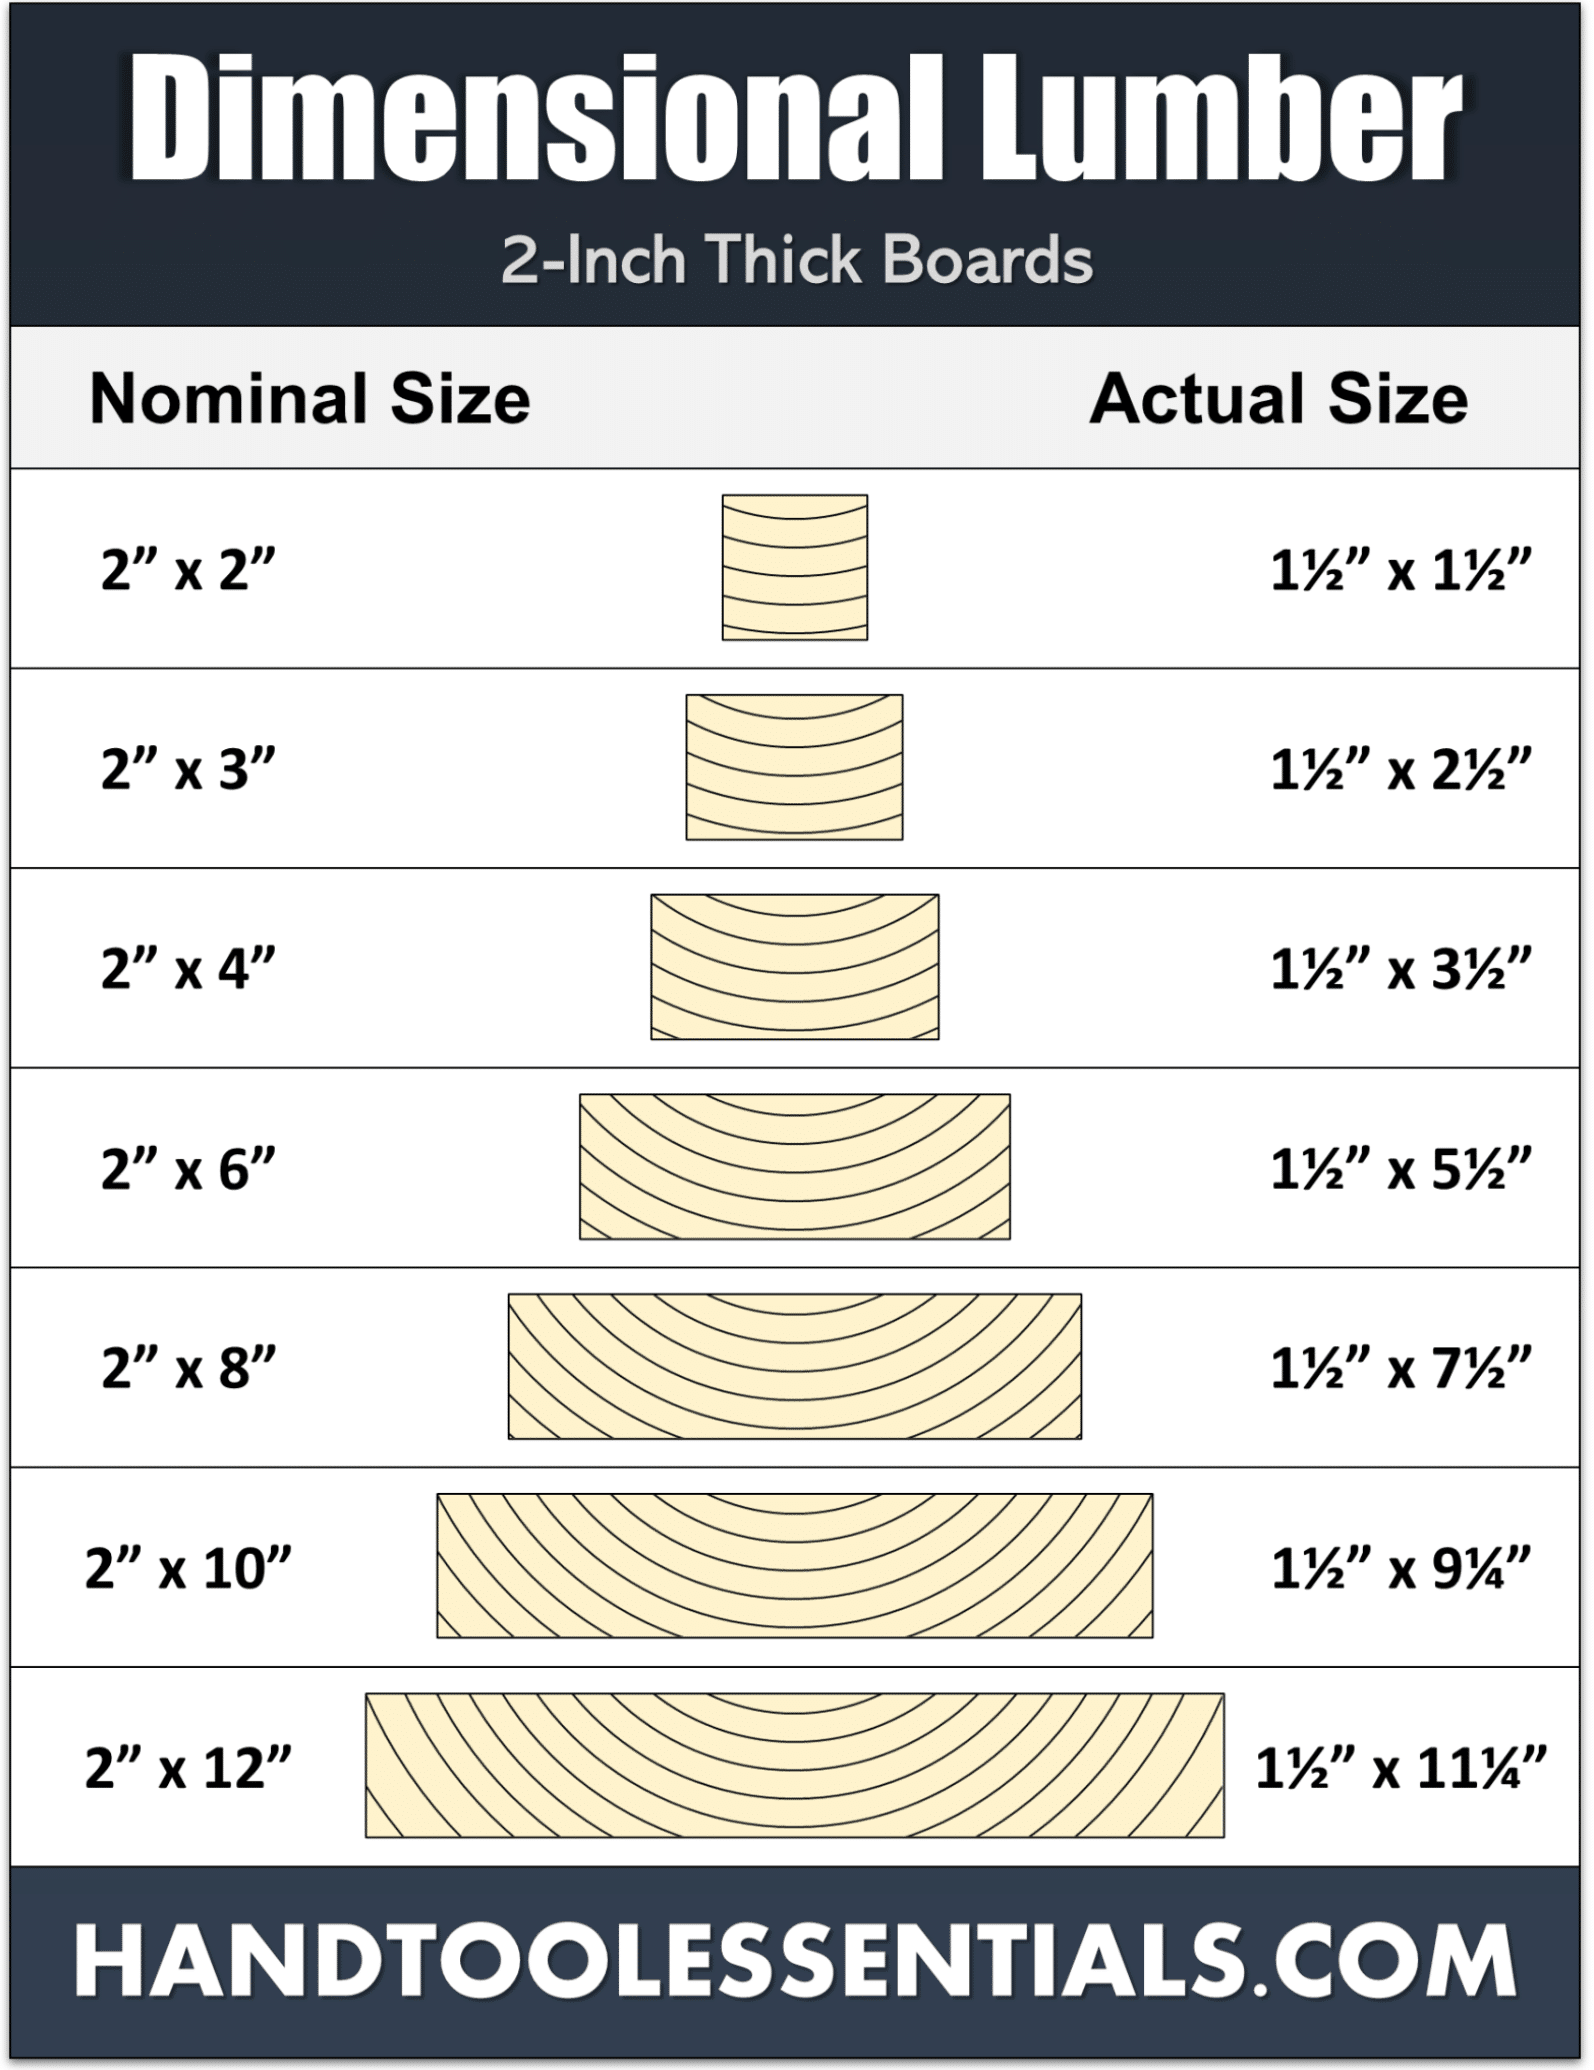
- 2 x 4s aren’t actually 2″ x 4″. They are 1.5″ x 3.5″. 1 x 4s are actually 3/4″ x 3.5″.
- Doors and windows have to be framed with headers at the top to distribute the weight of the load above (i.e., the roof).
- Roofs are not hard to build, but are a pain in the ass. And I refuse to get on them.
- There are things you can do by yourself and things you will need another person to help with. (Like the roof if you’re me.) Realize your limitations and plan accordingly!
The Foundation
I designed the foundation like a cabinet base. It would be built right on the cement slab and gravel apron using pressure-treated 2 x 4s.
Notice the kick-space in the front, similar to what you have in your kitchen. That’s space for your toes!
The floor would be pressure-treated 3/4″ plywood.
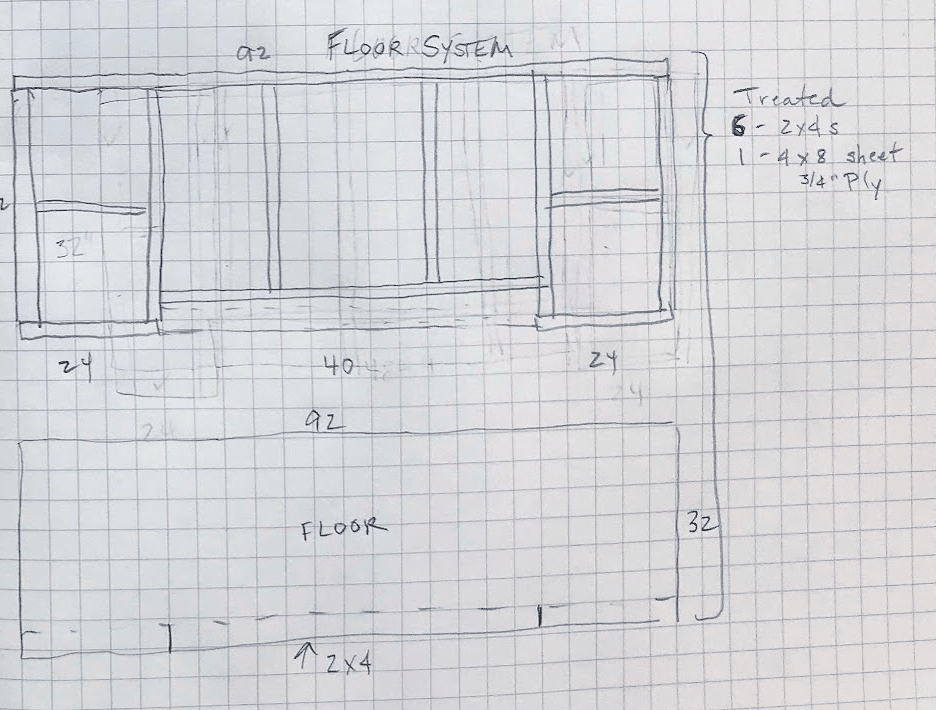
Floor system framing
The Back Wall
The back wall would be framed in pressure-treated 2 x 4s spaced 16″ on center. Since it would be just six inches from the fence and would never be seen, I would side it with cheaper reverse board and batten plywood siding. I planned to build it and side it lying flat on the concrete slab, then have Michael help me lift it into place.
It would have to be stained and sealed before the wall was raised and put in place, because there would be no way to do it once it was up.
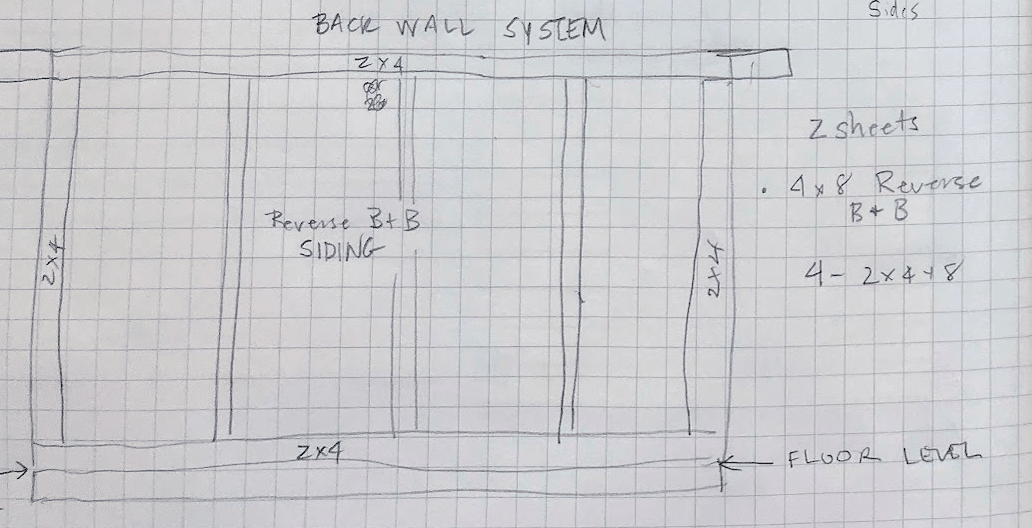
Back wall plan
The Front Wall
The front and back walls would be load-bearing–that is, they would support the weight of the roof system. The interior walls and the ends would not be load-bearing.
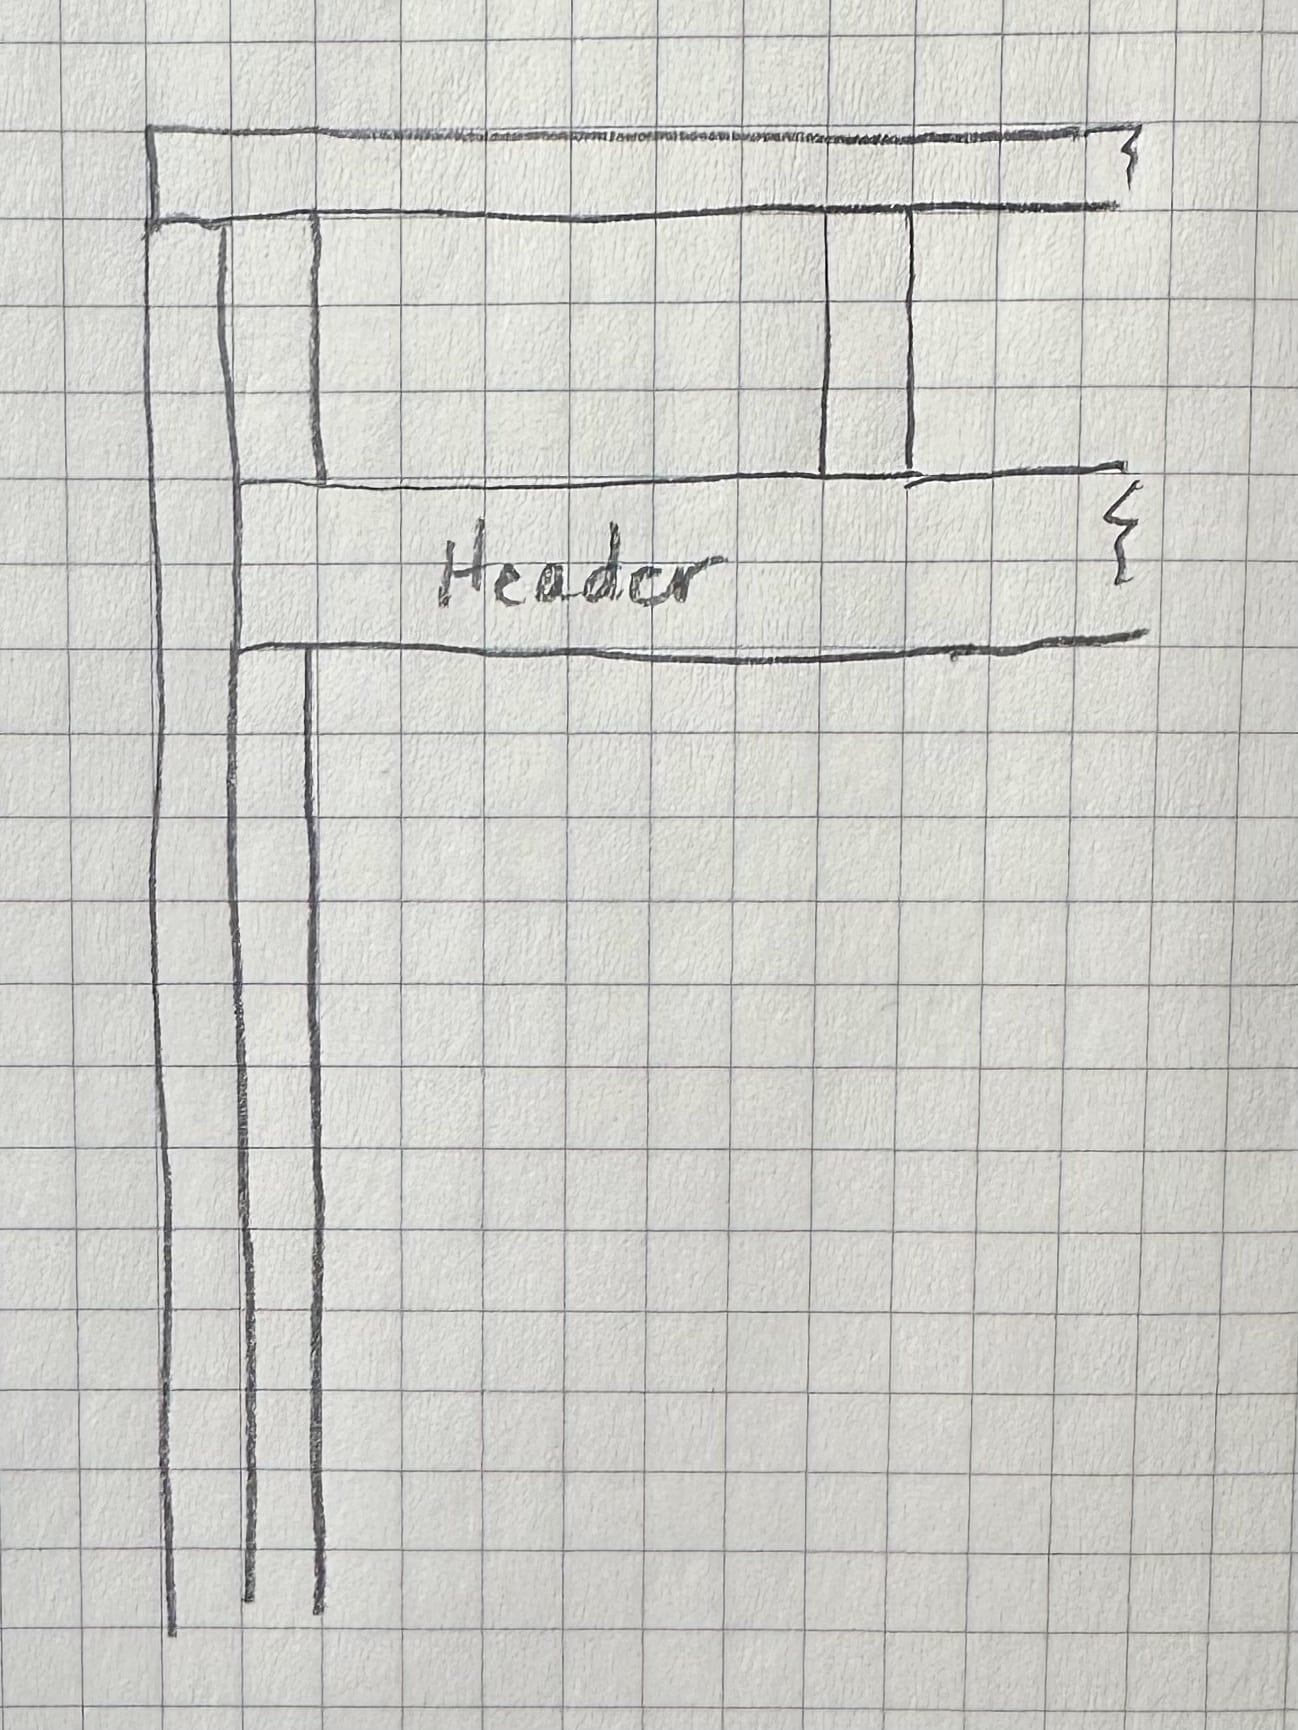
The front wall has a large opening for a set of double doors into the potting station, so a header would be needed to distribute the weight of the roof. Building a door opening is kind of like putting together a puzzle. You have doubled upright pieces that support a double header, all nailed or screwed together so the pieces interlock. My original drawing doesn’t show that.
The drawing below shows a closeup of how that header should have been drawn (and how it was actually pieced together).
The side wall plan is shown top right.
The Roof System
My plans didn’t include a roof system! I knew I would build a shed roof, and it would slope toward the front of the shed, and I accounted for that with the height of the front and back walls. But since I didn’t know how to build a roof (then) I didn’t know how to draw it!
I DO know how to build roofs now. On-the-job training!
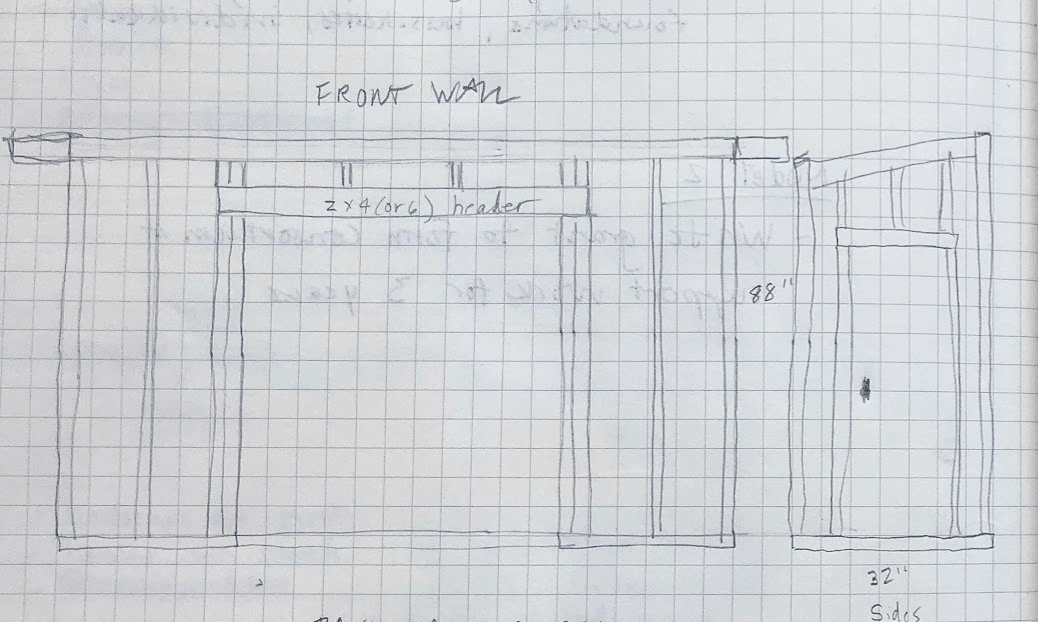
Front wall and end wall plan. Note that my drawing doesn’t show how those pieces interlock. I have redrawn that below.
Chapter 5: Building It
But First, A Word about Tools
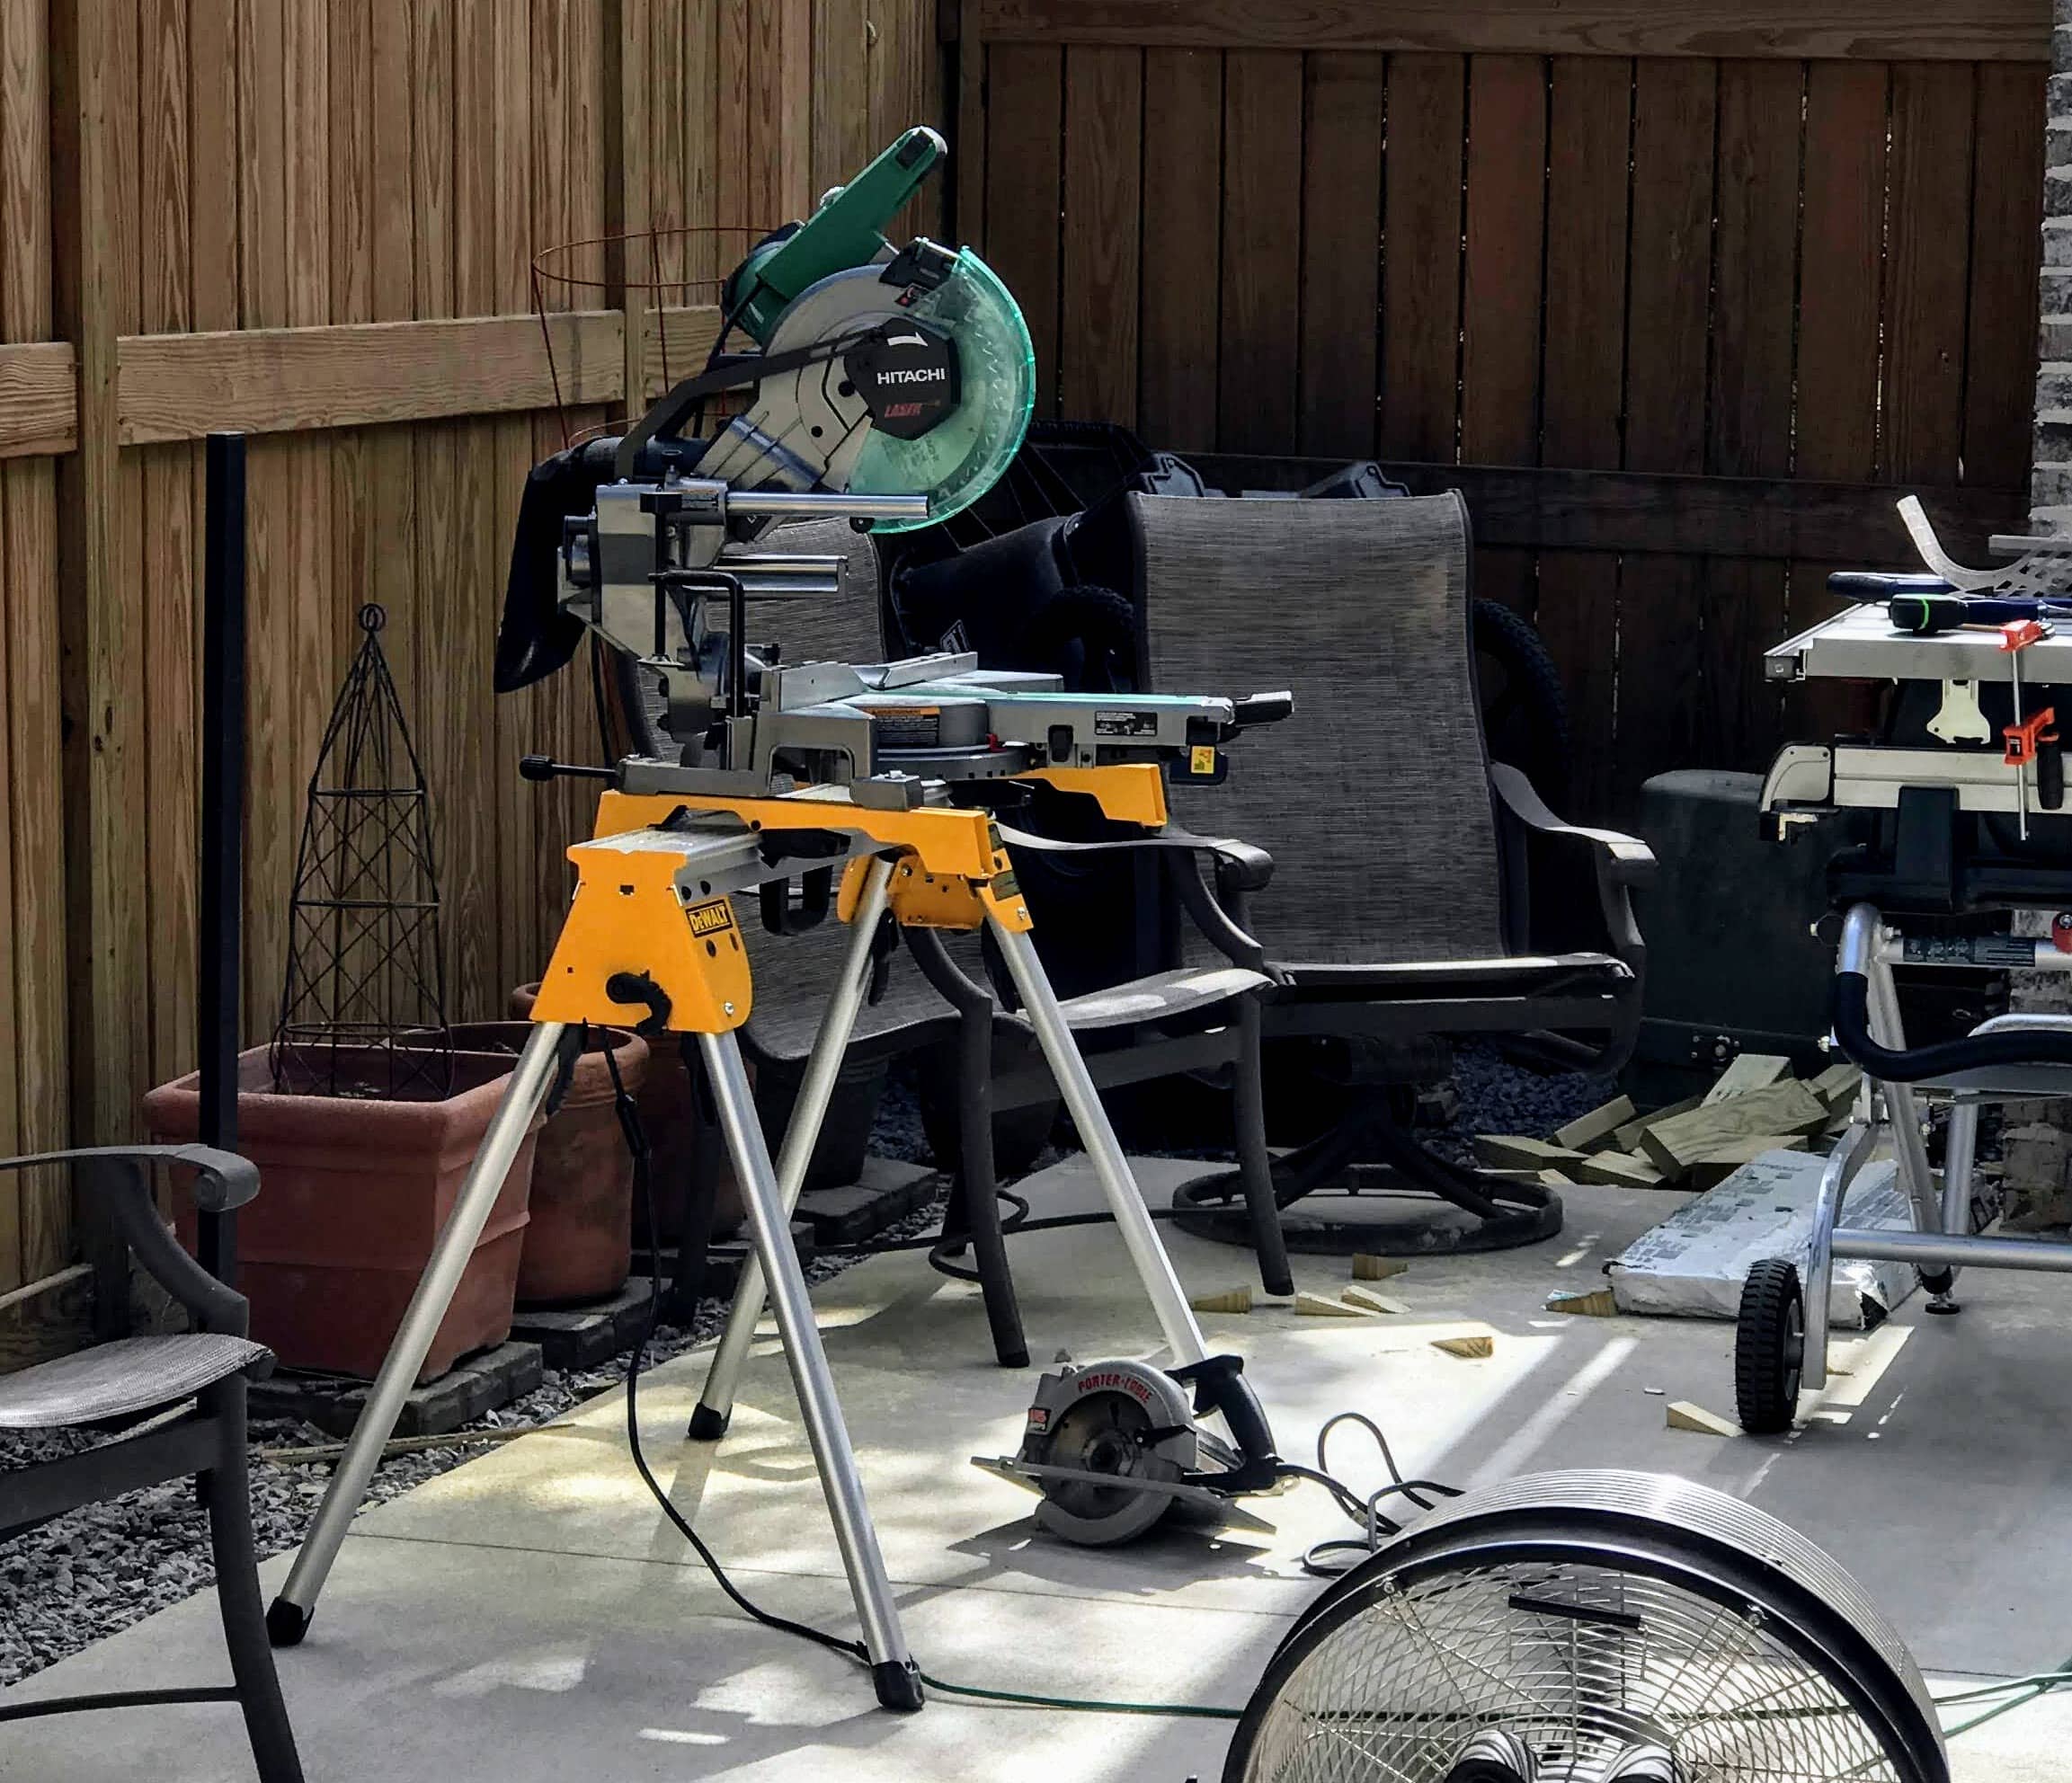
One of the very best things about building a new project is when you realize, “Hey, I need a new tool for that,” and you get a cool new power tool. So it was with this project. I had a circular saw and a table saw, but needed a miter saw like the big girls have. So I got this one. It is one of my very favorite tools now!
We also bought a nail gun for putting up the siding. Another cool tool. People, take every opportunity to purchase the right tools for the job!
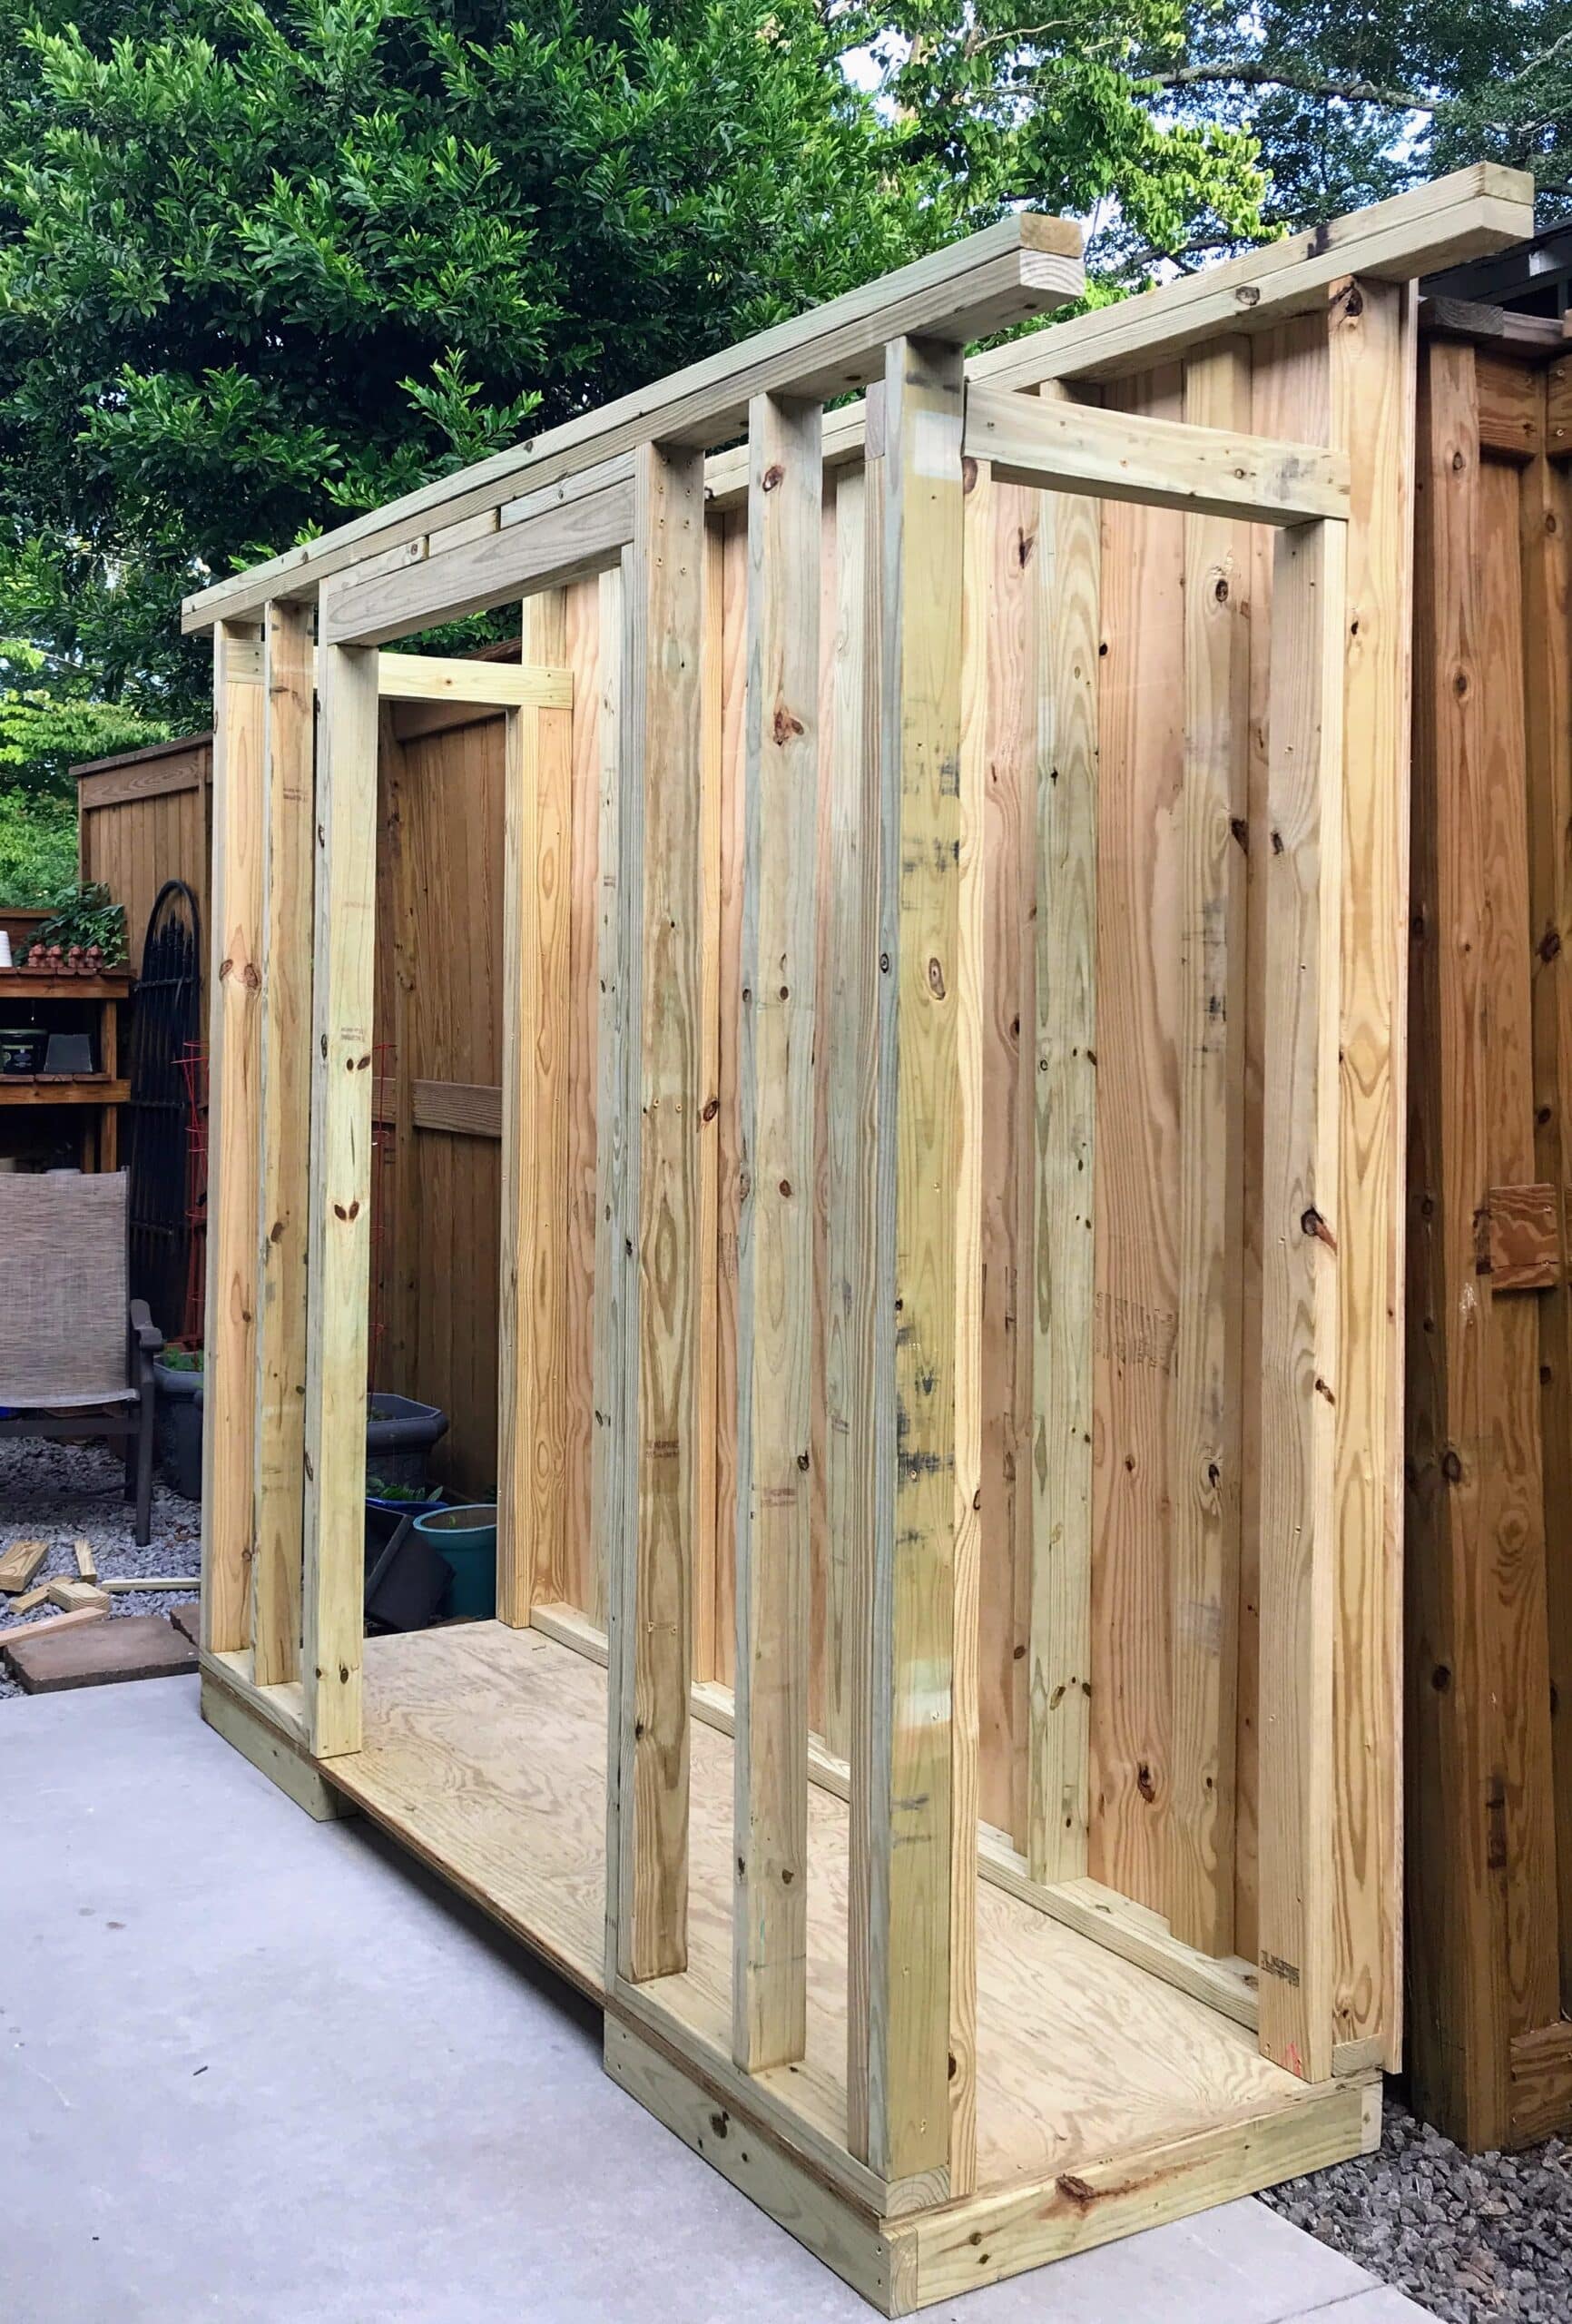
Foundation and walls framed
Foundation & Framing
I followed my plan to build the foundation and exterior walls. I built the back wall, sided it and stained and sealed it, then Michael helped me lift it into place.
Next, I built the front wall, and Michael helped me lift it into place. Then I built the ends.
After that, we were ready to tackle the roof. We learned everything we needed to know from YouTube videos. We watched several videos, then found one we liked, watched it again, and then literally began watching sections of it and going and doing what they showed us.
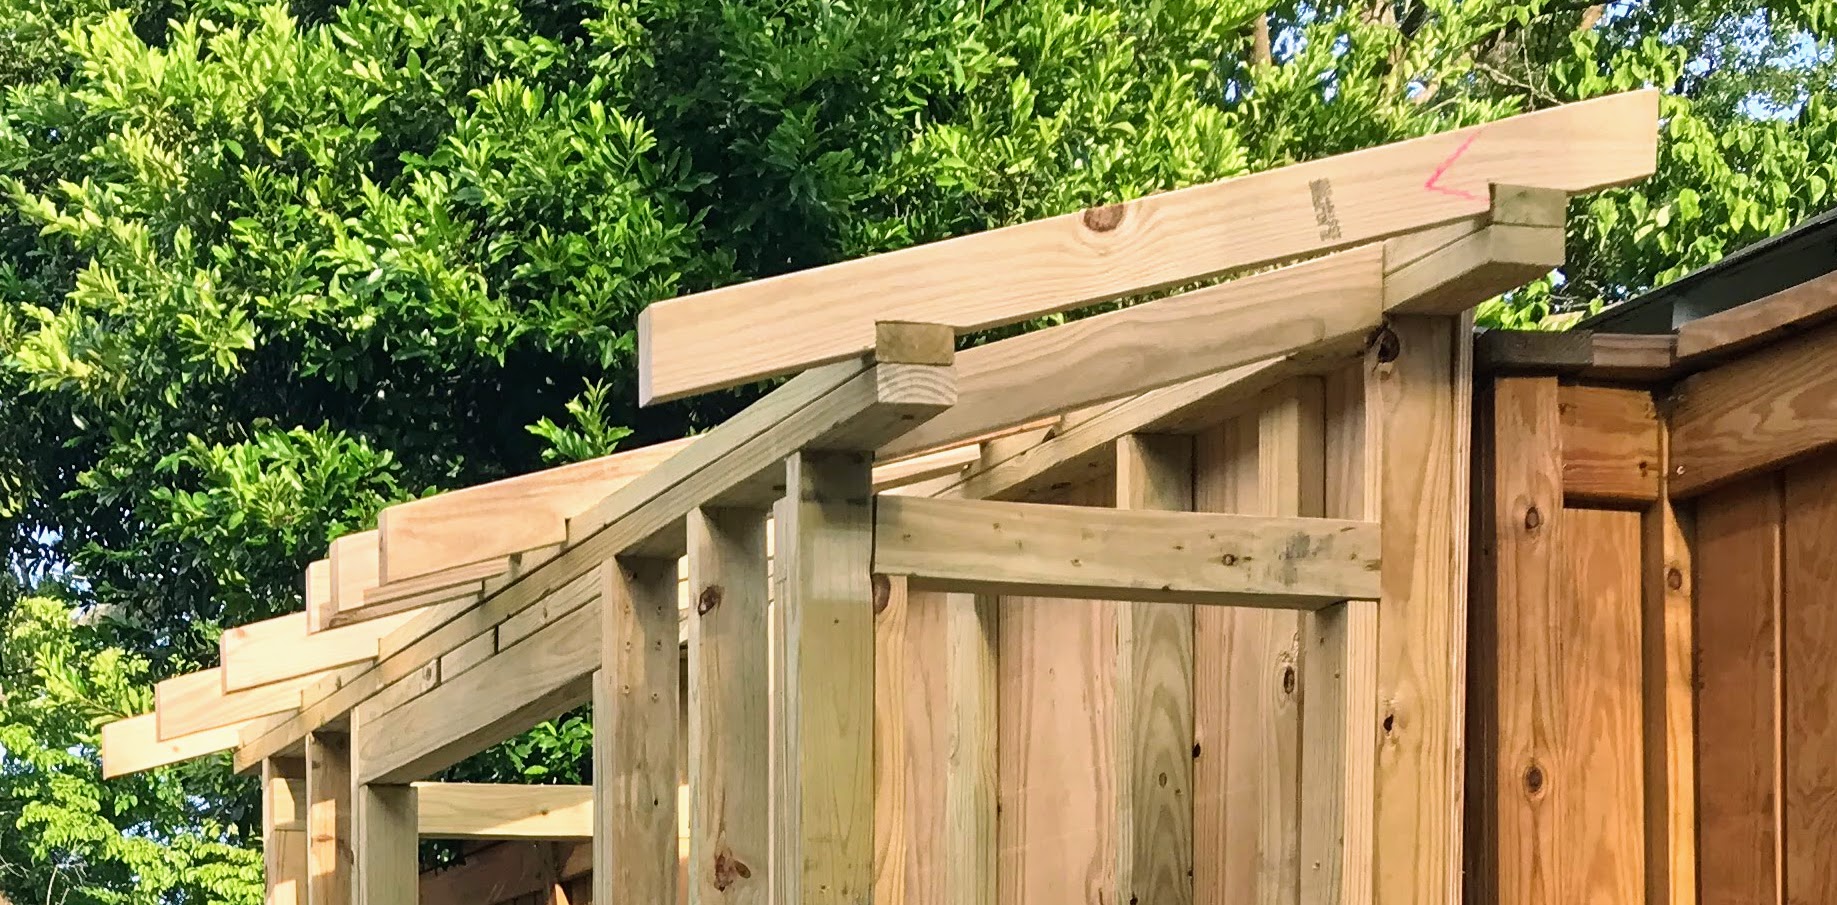
Roof rafters with bird’s mouth notches.
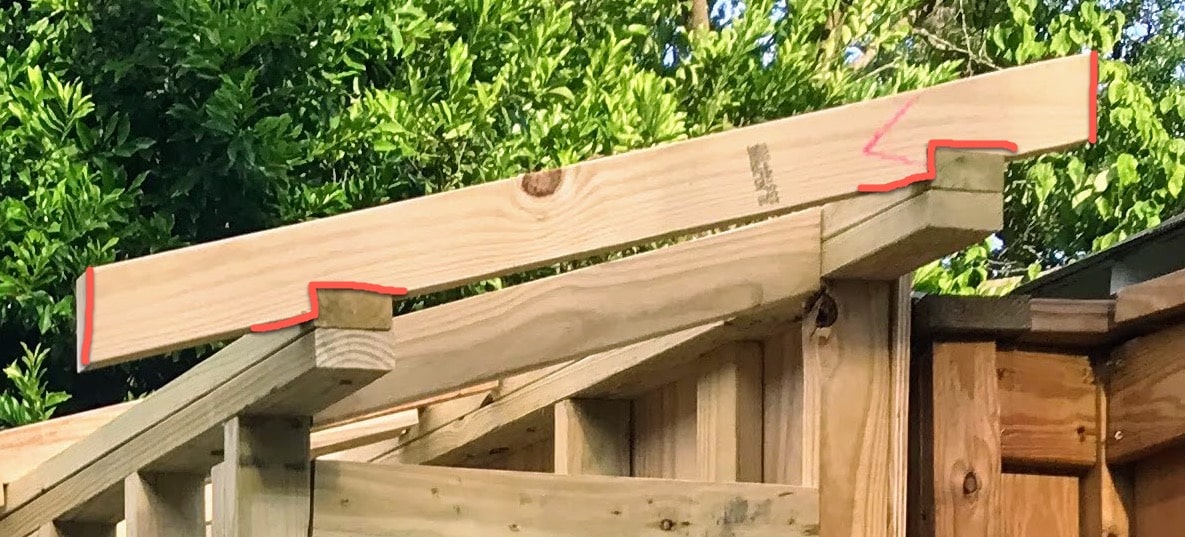
Below is a picture with the angles and bird’s mouth notches highlighted.
The Roof
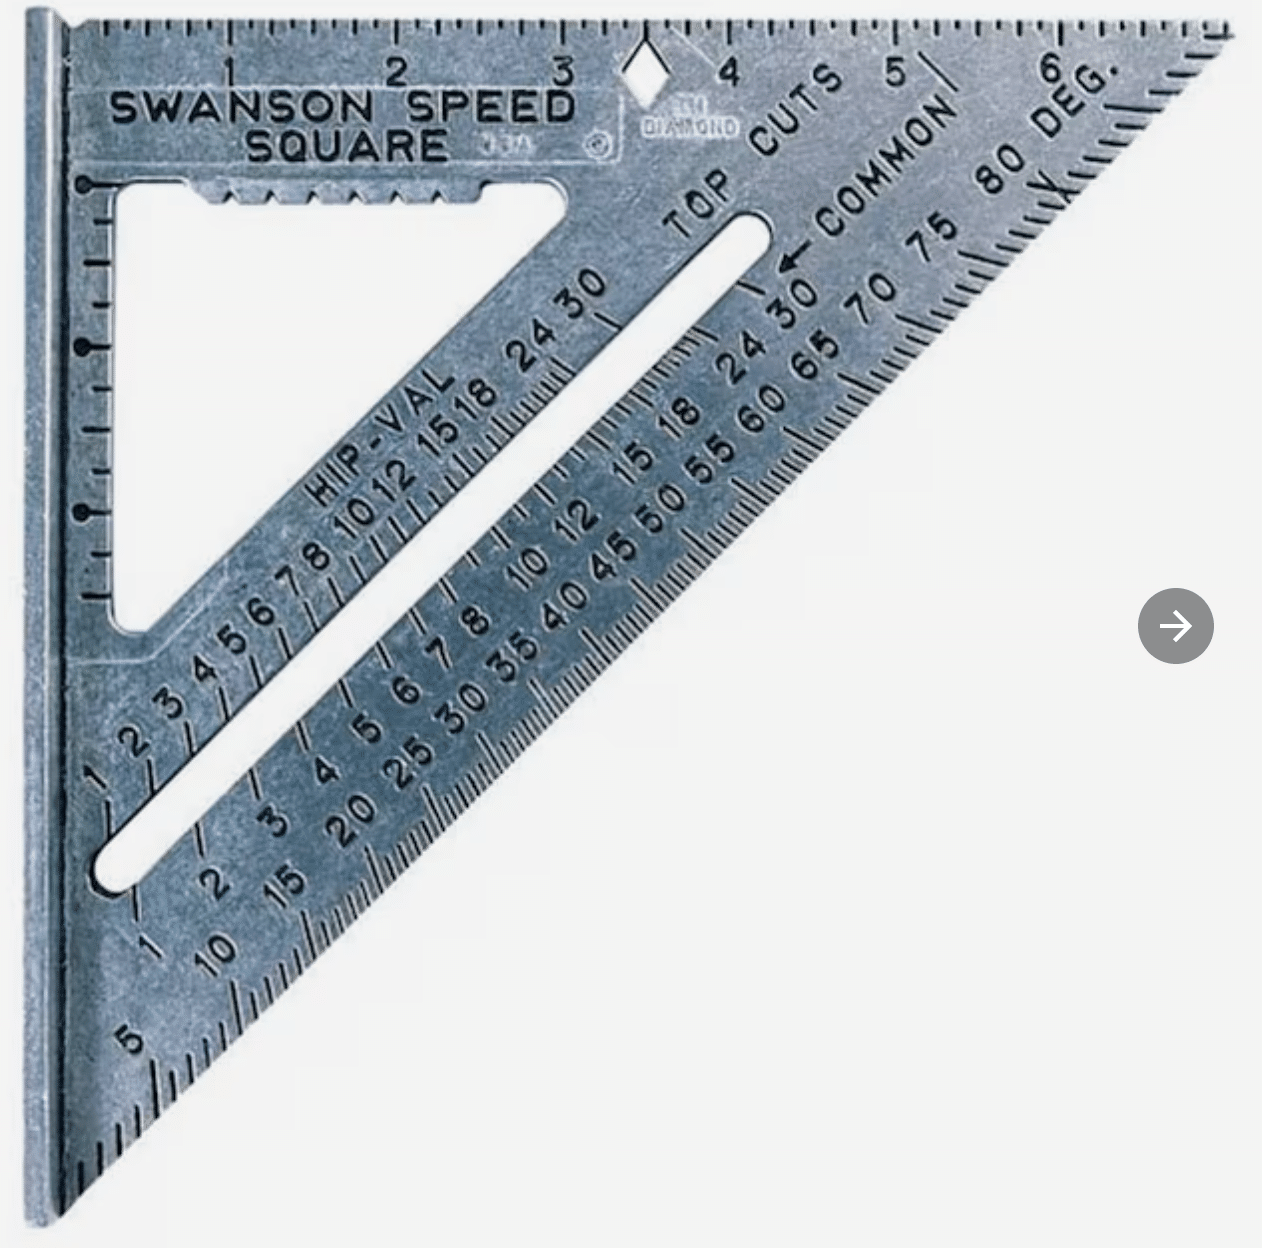
Building the roof involved learning how to figure out the angles and learning how to use a speed square to cut bird’s mouth notches in the rafters. These notches allow the rafters to sit flat on the top plates even though the rafters are angled.
The ends of each rafter were cut at an angle that matched the angle of the roof (calculated with slope or with an online roof slope calculator). The same angle was used to mark the birdsmouth notches.
Learning how to use a speed square is a snap. There are hundreds of videos on YouTube to show you how, but my favorite go-to guy for all things sheds is Andrew Throne The second segment of the video in the link shows how to use a speed square, pictured at left.
Roof installed
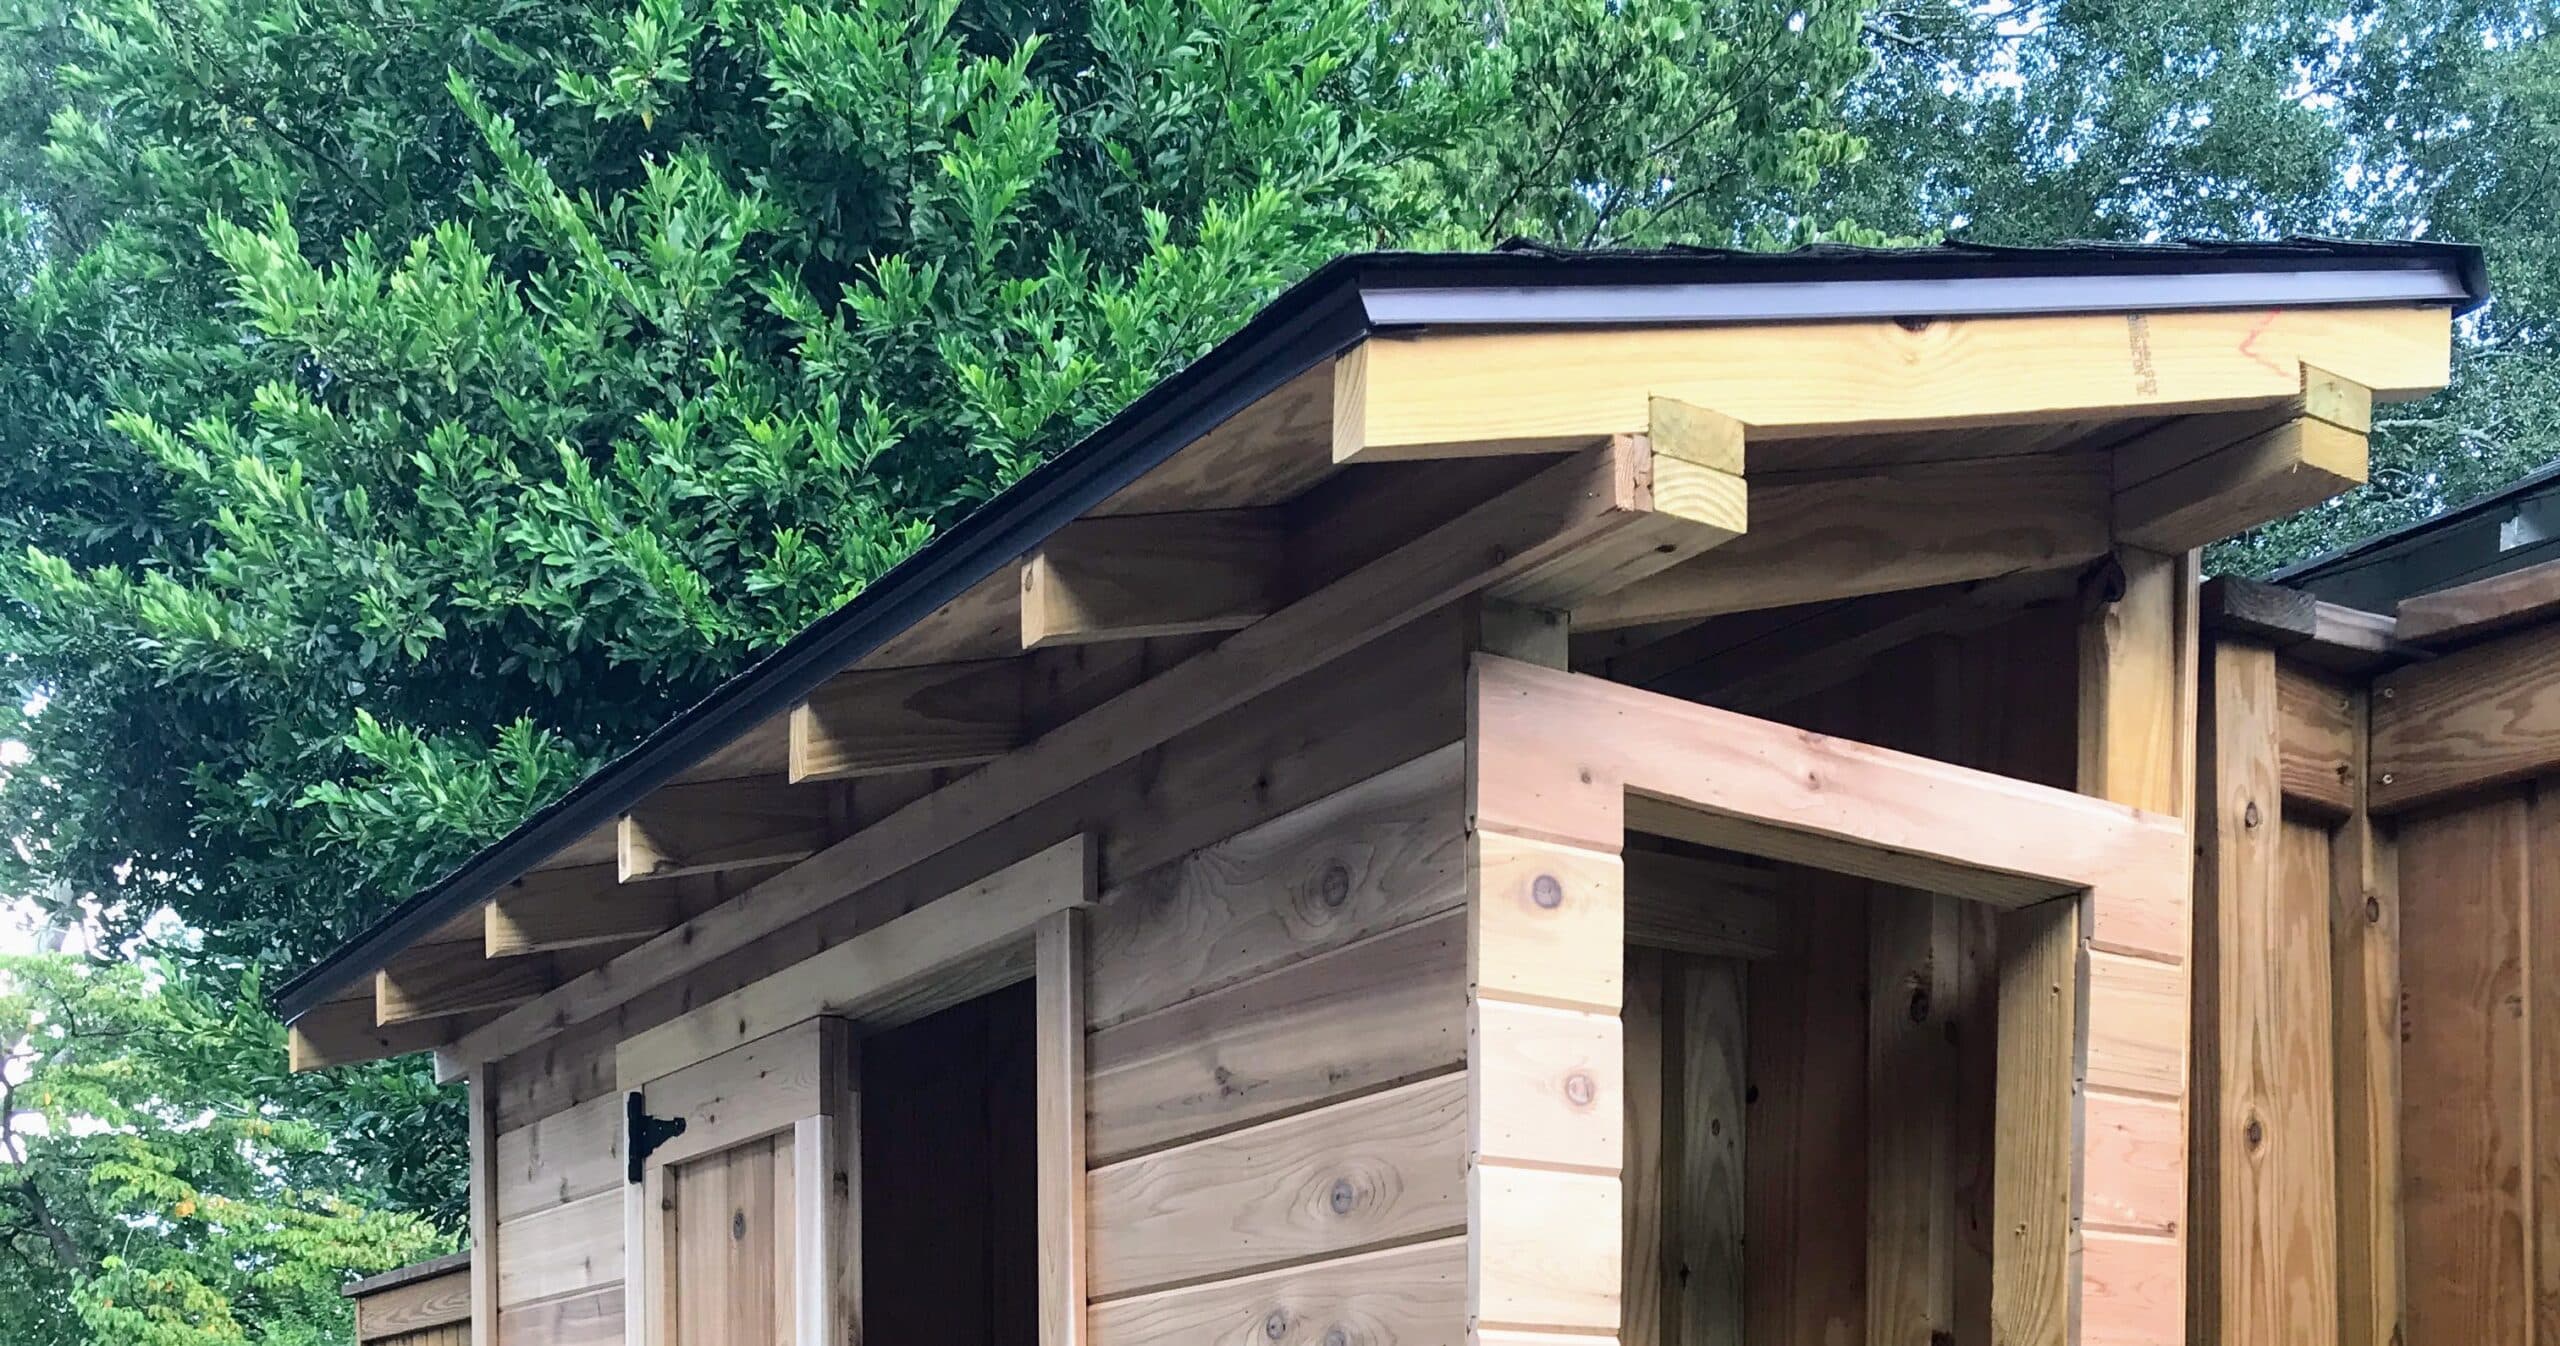
Michael did the heavy lifting on the roof. After installing the rafters, we installed blocking between the rafters to fill the space between them.
We decked it with OSB, then rolled out the underlayment, installed the drip edge along the sides and front, then roofed with asphalt shingles.
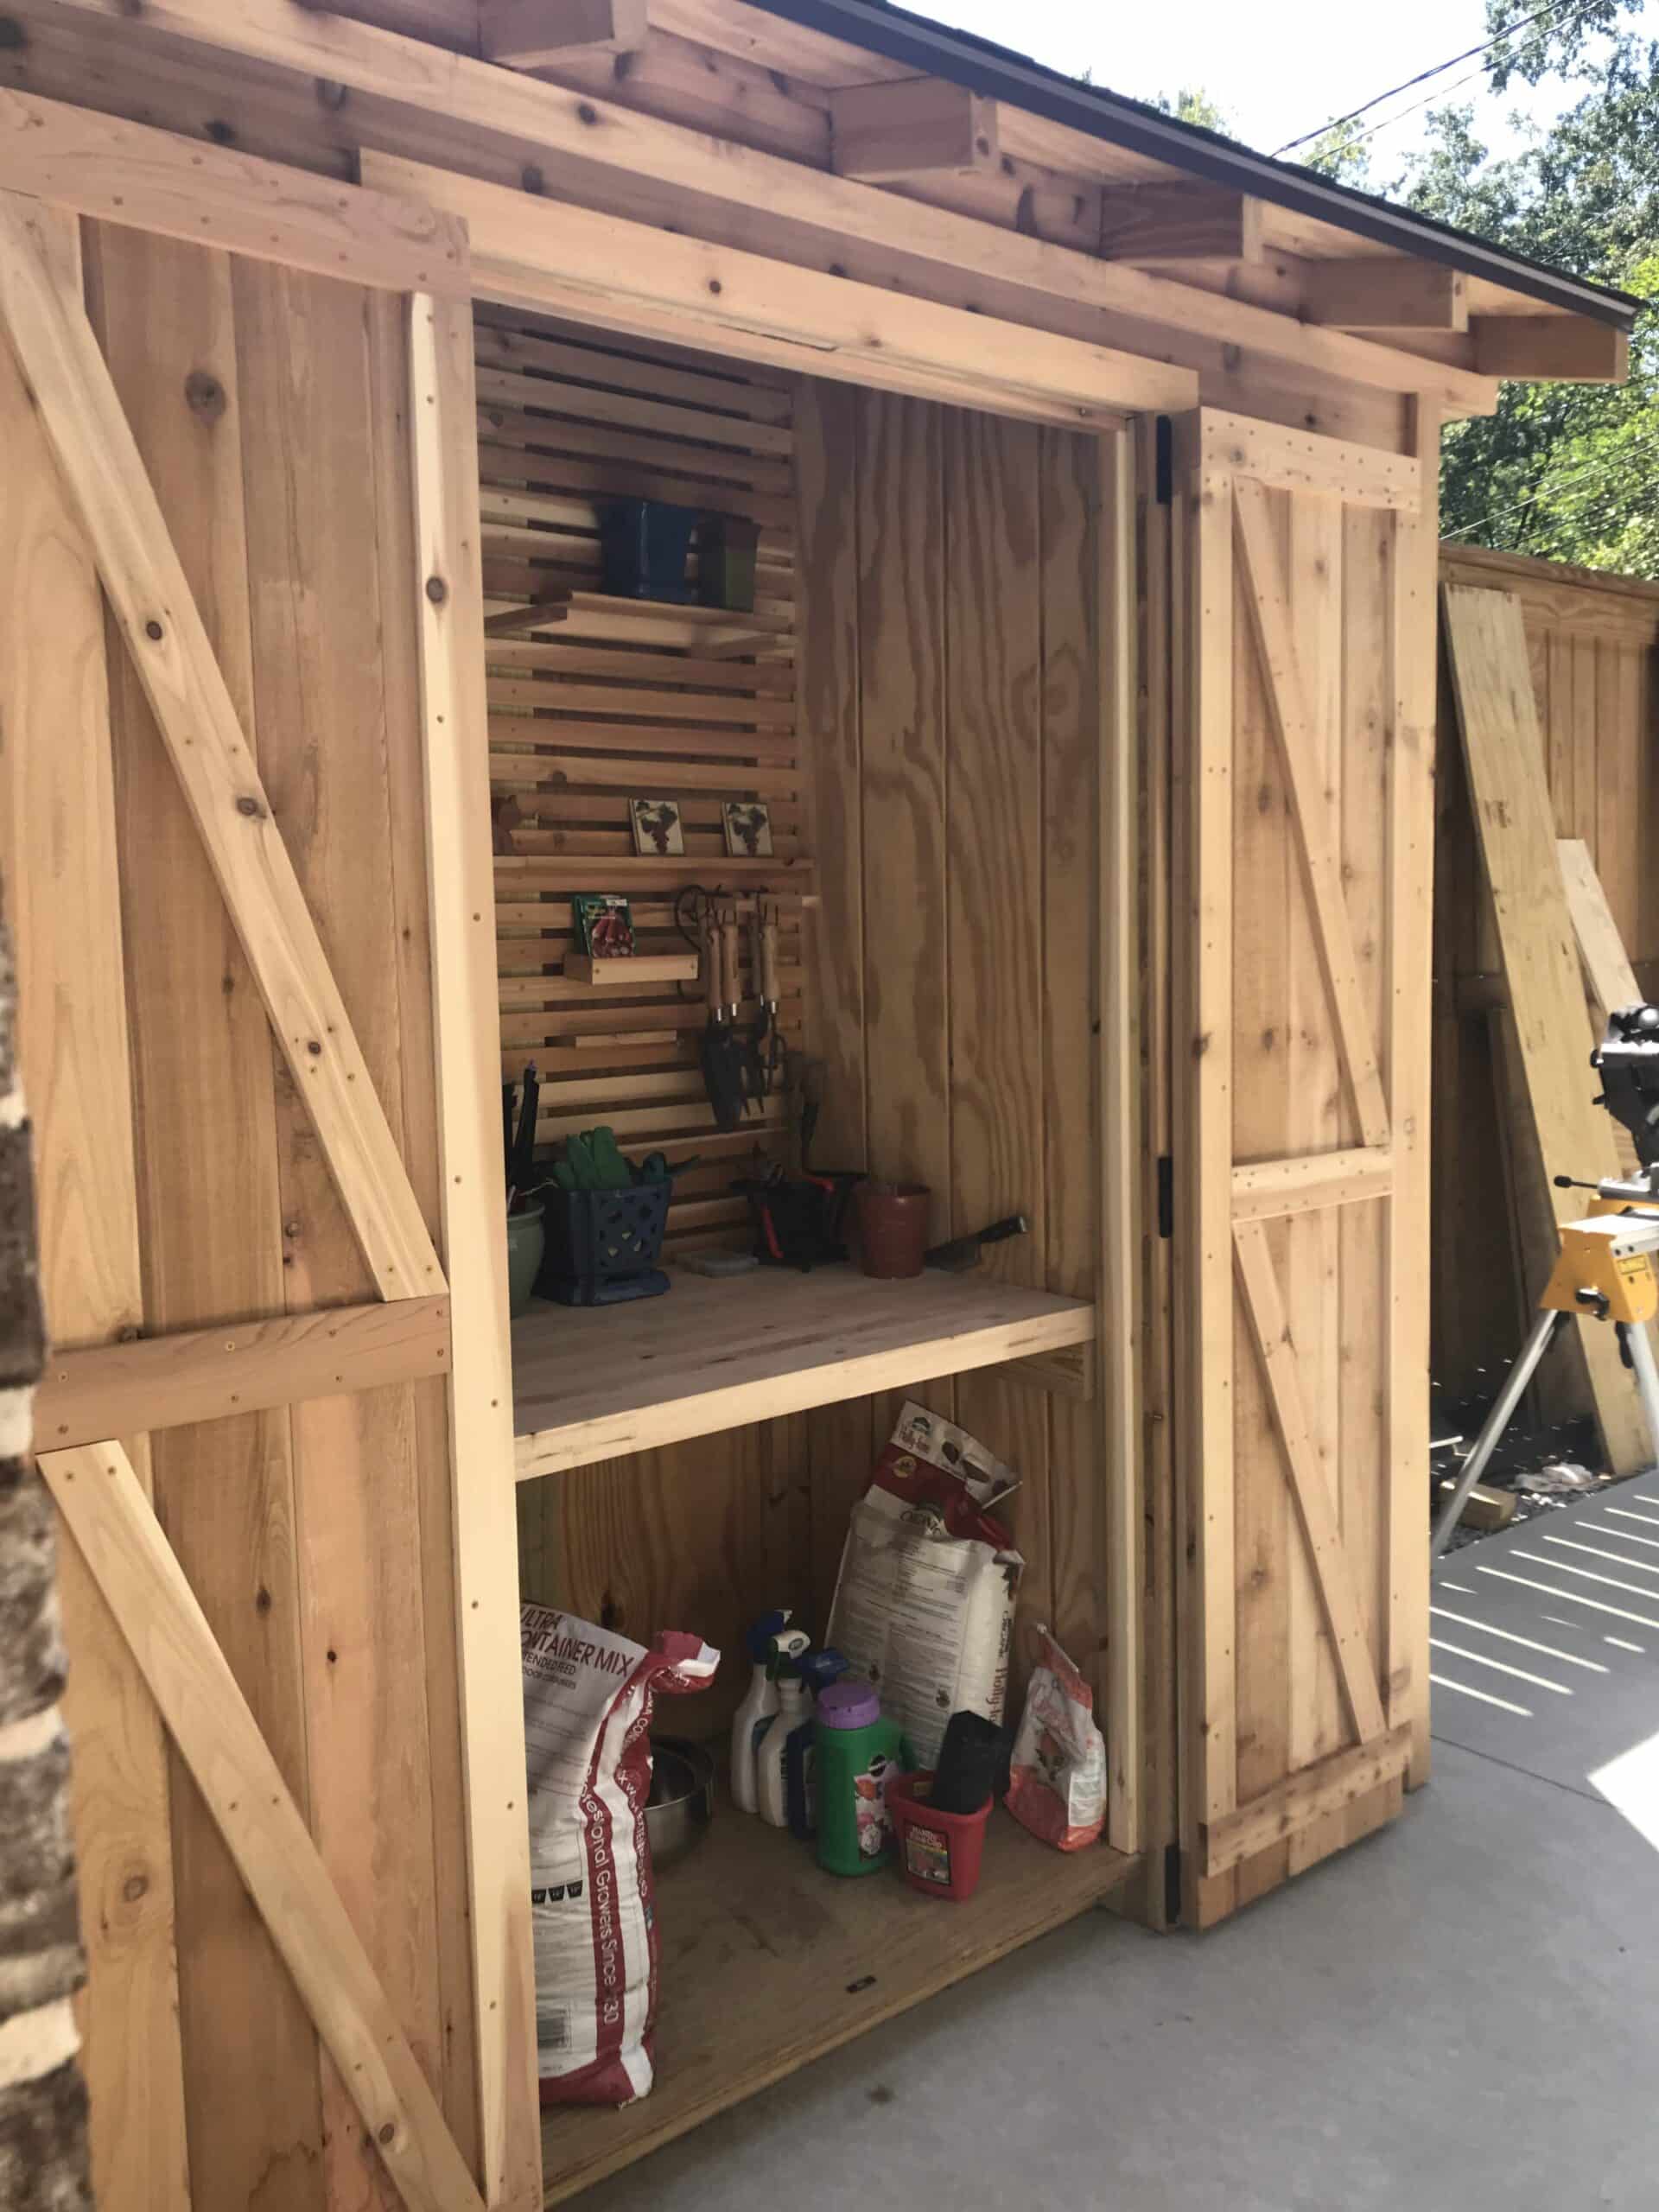
Door detail. Note that the right side door has the diagonal braces installed incorrectly.
Siding & Doors
Installing the siding was so easy and fun. Starting at the bottom of each wall, I used a nail gun to attach each piece with the tongue facing up. Each subsequent piece snapped over the tongue and was nailed to the studs.
I wish I had more pictures…I had no idea that some day I would write a journal entry about building my shed. I don’t have pictures of building the doors, which I did in the shop in the air conditioning. (A blessing in the SC summer!) I cut the pieces to length, ripped the pieces that would form the edges of each door, then snapped them in place on the floor.
Then I used 1 x 3s to frame each door panel on the front and back, and to put a diagonal brace on the back side of each door. I attached everything with glue and screws that were sized to not go all the way through the wood.
Note: diagonal braces are supposed to installed from the hinge side up. You’ll notice in some of these pictures that I installed at least one of them backward!
Slat wall and potting bench
The Potting Station
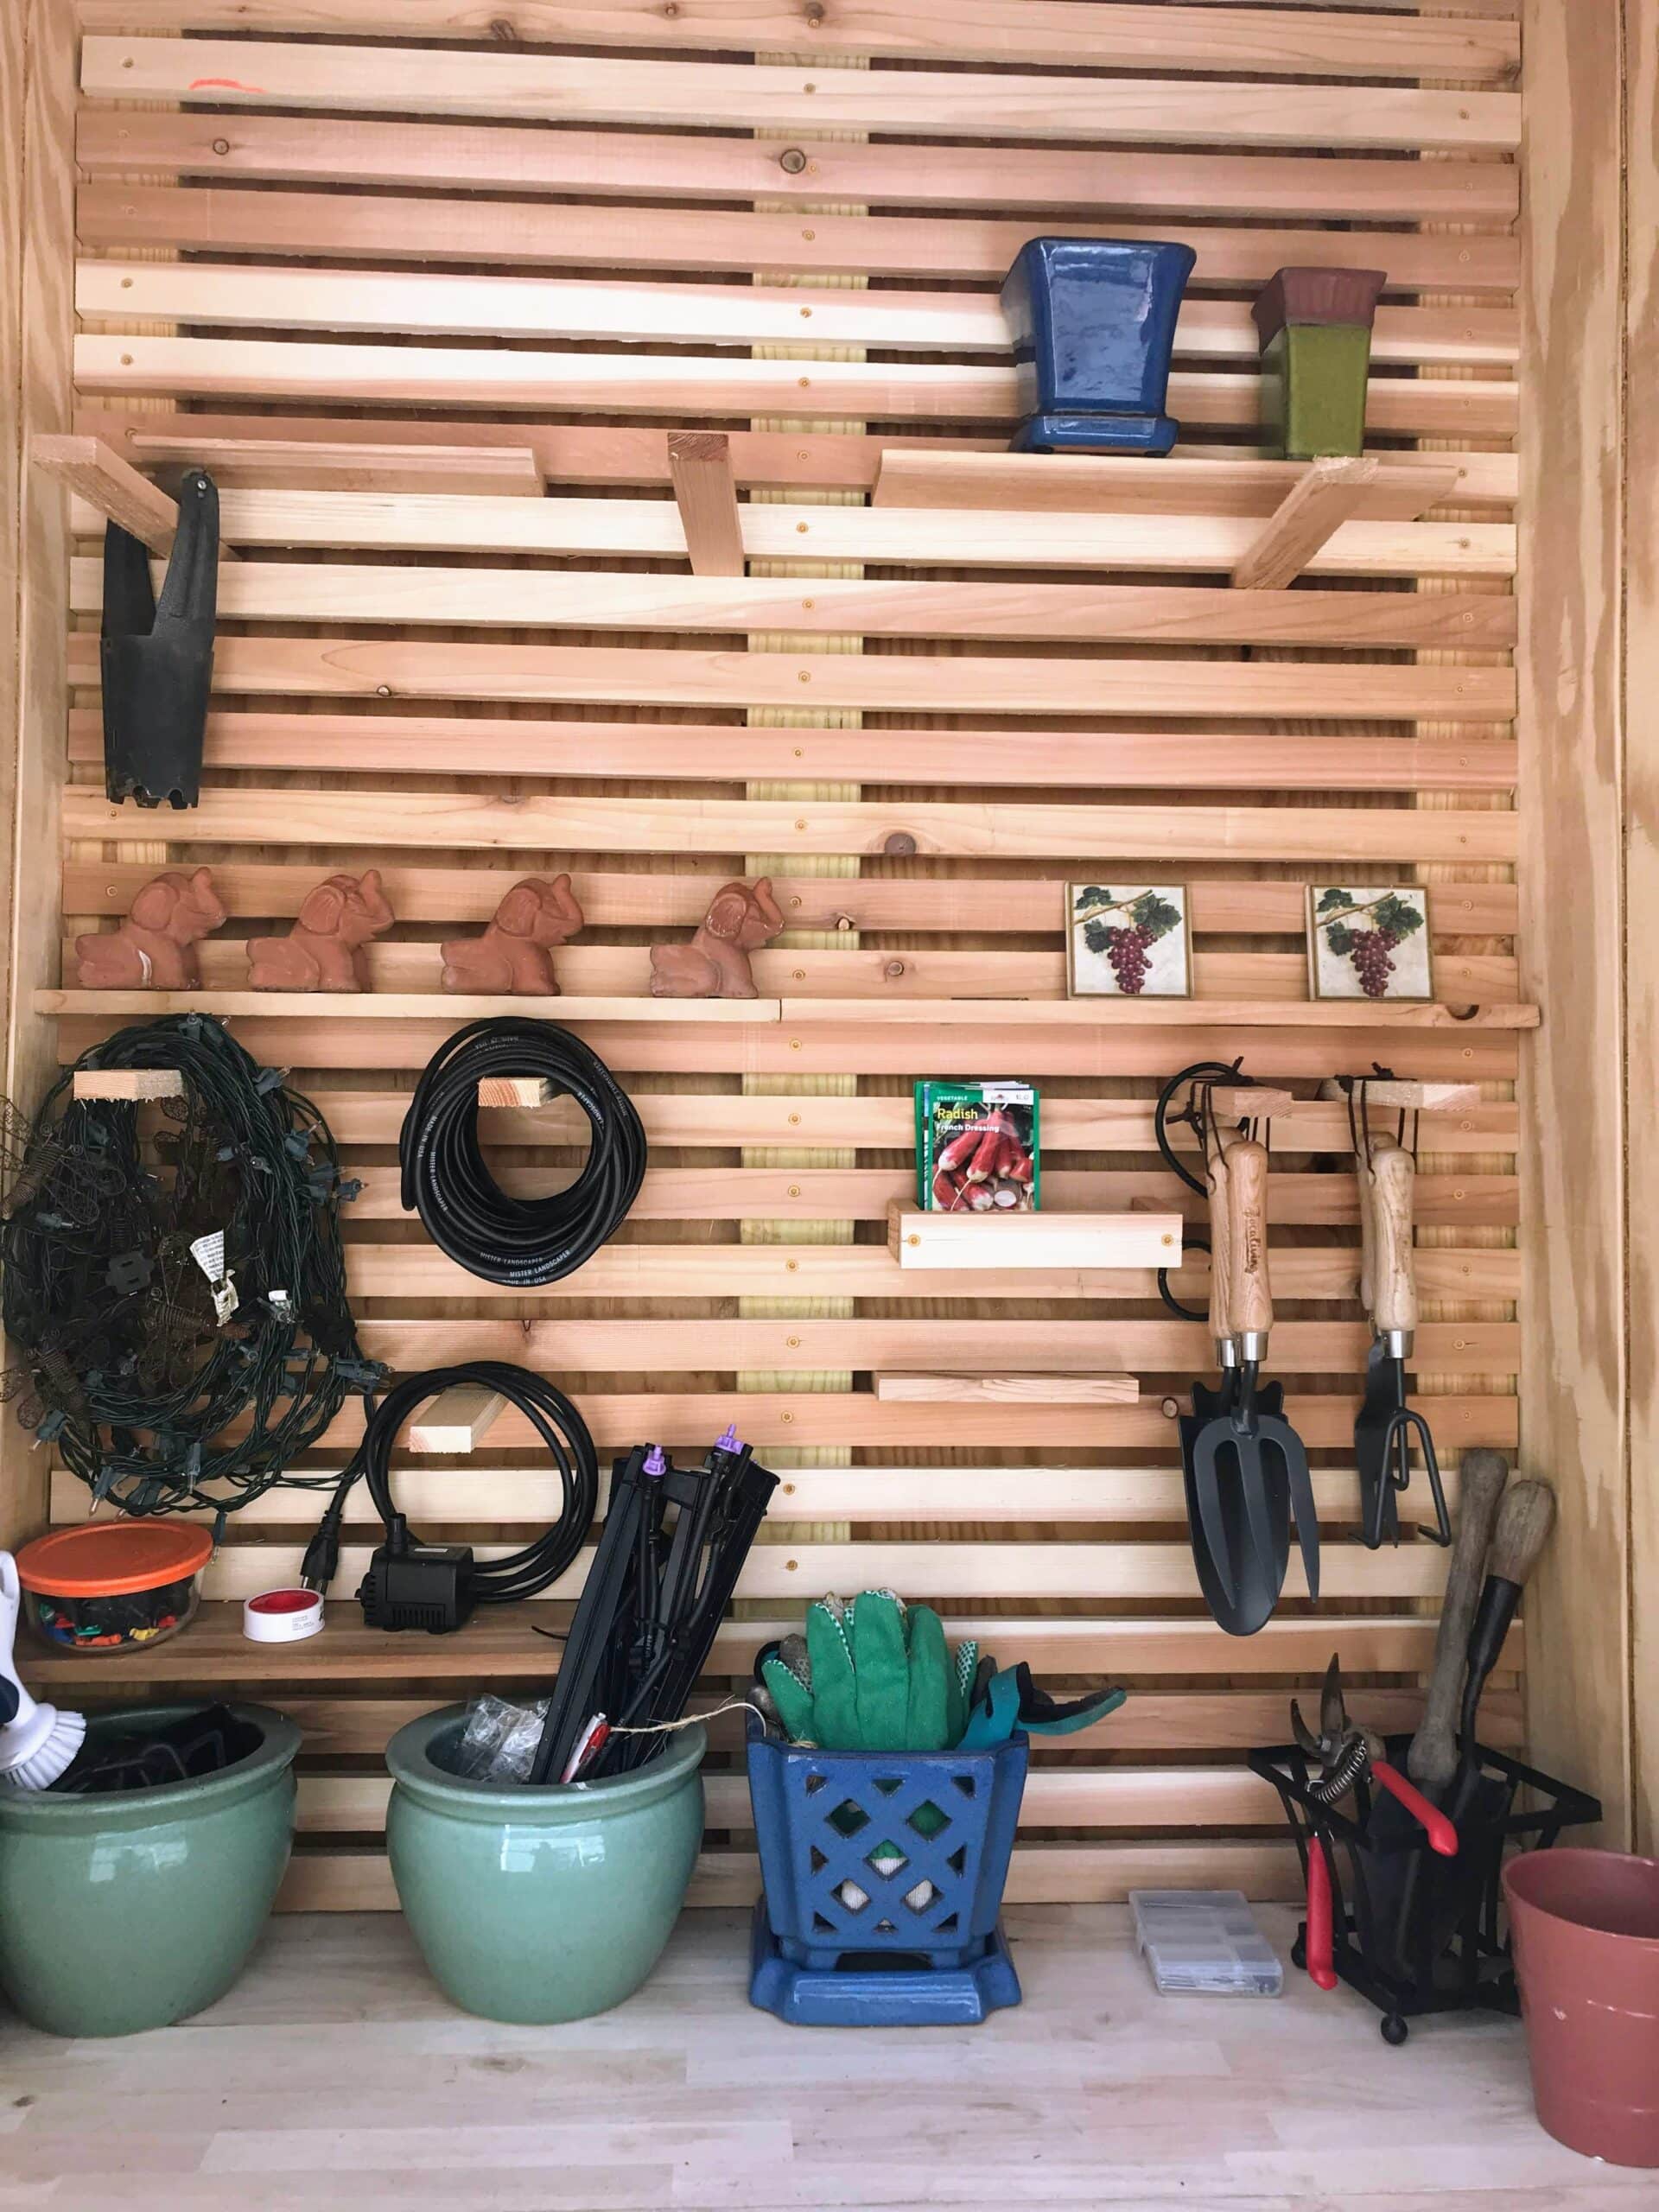
The potting bench is made with a piece of butcher block counter top that I found in the neighborhood after someone renovated their kitchen. It was one of those things I had to have even though at the time, I had no idea what I would use it for.
To install it, I screwed a 2 x 4 support around the sides and back of the potting space, cut the counter to size with a circular saw, and just plopped it in place.
The slat wall system on the back wall of the station is made with 1 x 2 cedar slats, installed 3/4″ apart. I am able to take pieces of 1 x 3 and put them between the slats for hanging hand tools and tubing and such. Notice that the hand tools and the tubing are hanging from pieces of wood that are just pushed into the spaces between the slats. Similarly, the shelf in the middle is made of a couple of pieces of wood just pushed into place between the slats.
So that’s it, folks! The shed that I designed to solve a problem I didn’t know I had!
In the coming weeks, I’ll be journaling about the process of designing and building my brother and sister-in-law’s shed, which is a much larger version of my garden shed. Like all building projects, It started with a problem that needed a solution that birthed a design.
So stay tuned!
You are definitely the wind beneath my wings! Your talents are endless. It is beautiful. ❤️
Thanks, Pam! It makes me happy every time I round the corner and see it!